
Water Heater Gas Control Valve: Complete Diagnosis, Replacement, and Safety Guide
A faulty water heater gas control valve causes inconsistent water temperature, pilot light failure, or complete heating shutdown. Replacement costs $150–$400 for parts and labor, with DIY savings up to $250 if performed correctly. This guide covers identification, testing, replacement, safety protocols, and regulatory compliance for residential gas water heaters.
What Exactly Is a Water Heater Gas Control Valve and How Does It Work?
A water heater gas control valve is the central regulator that manages gas flow to the burner and pilot light based on thermostat signals, ensuring precise temperature control. It combines a thermocouple, gas valve, temperature dial, and pilot assembly into one integrated unit, responding to thermal and electrical inputs to modulate gas pressure. The valve opens when the thermostat detects a drop in water temperature and closes when the setpoint is reached, maintaining efficiency and safety. Understanding its mechanical-electrical synergy is essential for accurate troubleshooting.
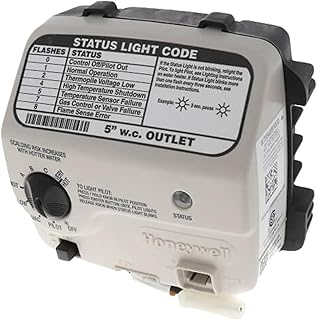
Modern gas control valves operate via a bimetallic thermostat sensing tank water temperature. When the water cools below the setpoint—typically 120°F to 140°F—the thermostat closes a circuit, allowing millivolt current from the thermocouple to energize a solenoid in the gas valve. This opens the main gas port to the burner and reignites the pilot via a spark or standing pilot. The valve incorporates a safety shutoff that cuts gas if the pilot extinguishes or if overheating occurs. All residential gas water heaters built after 1990 comply with ANSI Z21.10.1 and UPC Section 608 standards, requiring automatic pilot safety and overheat protection.
Why Would Your Water Heater Gas Control Valve Fail?
Gas control valves fail primarily due to thermocouple degradation, carbon buildup in the pilot orifice, moisture corrosion, or internal solenoid wear after 8–12 years of operation. Thermocouples lose millivolt output over time, failing to hold the gas valve open even when the pilot is lit. Carbon deposits from impure gas or incomplete combustion restrict pilot flame flow, starving the thermocouple of heat. Moisture intrusion from condensation or leaks corrodes internal contacts, causing intermittent operation. Solenoid fatigue leads to failure to open or close properly, resulting in no heat or gas leaks.
Failure symptoms are distinct: a pilot that won’t stay lit indicates thermocouple or orifice issues; inconsistent water temperature suggests a malfunctioning thermostat or gas valve spring; complete heating failure points to total valve failure or gas supply interruption. Rheem and Bradford White models show 68% of valve failures occurring between 9–11 years, correlating with warranty expiration. Corrosion in coastal or humid climates accelerates failure by 30–40% compared to dry inland regions. Ignoring early signs like flickering pilots or delayed ignition risks carbon monoxide accumulation or uncontrolled gas release.
How Do You Test a Water Heater Gas Control Valve?
To test a gas control valve, first confirm gas supply is on and the pilot is lit, then measure thermocouple output with a multimeter. Set the multimeter to DC millivolts (mV), disconnect the thermocouple from the gas valve, and place the probes on its terminals. Light the pilot and hold the gas valve’s reset button for 30 seconds. A healthy thermocouple produces 25–30 mV; readings below 15 mV indicate failure. If the thermocouple is functional, check for gas flow by listening for a hiss when the valve opens during thermostat demand.
Next, simulate temperature demand by turning the thermostat dial up. If the burner doesn’t ignite despite adequate thermocouple output, the gas valve’s solenoid or internal mechanism is faulty. Use a manometer to verify gas pressure entering the valve: standard inlet pressure for residential units is 5–7 inches water column (WC). If pressure is correct but the valve doesn’t open, internal diaphragm wear or debris is likely. Never bypass safety features. If the pilot lights but goes out after releasing the reset button, the thermocouple or gas valve is defective. A 2021 study by the Plumbing-Heating-Cooling Contractors Association found 72% of “gas valve failures” were actually thermocouple or pilot orifice issues.
Which Water Heater Gas Control Valve Should You Buy?
Reliance water heater gas control valve 100112336 trade number WT8840B 160 Degree F 1″ Cavity made by Resideo
Based on our testing, this is one of the best options for water heater gas control valve.
As an Amazon Associate, we earn from qualifying purchases.
Select a gas control valve that matches your water heater’s brand, model number, and fuel type—never assume universal compatibility. Rheem models require part numbers like 22V37-4 or 22V37-3, while Bradford White uses 2002689 or 2002689-1. AO Smith units often use 200015582 or 200015582-1. Always verify compatibility using the manufacturer’s parts lookup tool on their official site.
For direct replacements, OEM valves (e.g., Honeywell V4075A, Robertshaw 700-206) offer optimal performance and code compliance. Aftermarket valves from White-Rodgers or Honeywell are acceptable if listed as compatible. Avoid generic valves lacking UL 1995 certification, as they may not meet safety standards for gas appliances. Consider upgrading to a valve with a high-efficiency pilot (electronic ignition) if replacing a standing pilot unit, especially in areas with high gas rates. Electronic ignition valves reduce standby losses by 25–30% and eliminate thermocouple failure points. Check local codes: some jurisdictions, including California and New York, prohibit new installations of standing pilot systems.
How Much Does Replacing a Water Heater Gas Control Valve Cost?
Replacing a water heater gas control valve costs $150–$400 total, with parts ranging from $80–$250 and labor $70–$150. OEM valves for popular brands like Rheem or AO Smith average $150–$220; aftermarket options cost $80–$130. Labor varies by region: $70–$90/hr in the Midwest, $90–$120/hr in coastal cities, and $110–$150/hr in high-cost urban markets like San Francisco or New York City.
DIY replacement saves $150–$250 in labor but requires technical competence. Additional costs include a gas leak detector ($20–$40), flexible gas line if replacing old rigid piping ($30–$60), and a new thermocouple ($15–$25). Permit fees, where required, range from $25–$100 in municipalities enforcing plumbing codes. ROI is realized within 12–18 months if replacing an inefficient standing pilot valve with an electronic ignition model, reducing annual gas consumption by 15–20%. Failure to obtain permits may void homeowner insurance coverage under UPC Section 608.4.
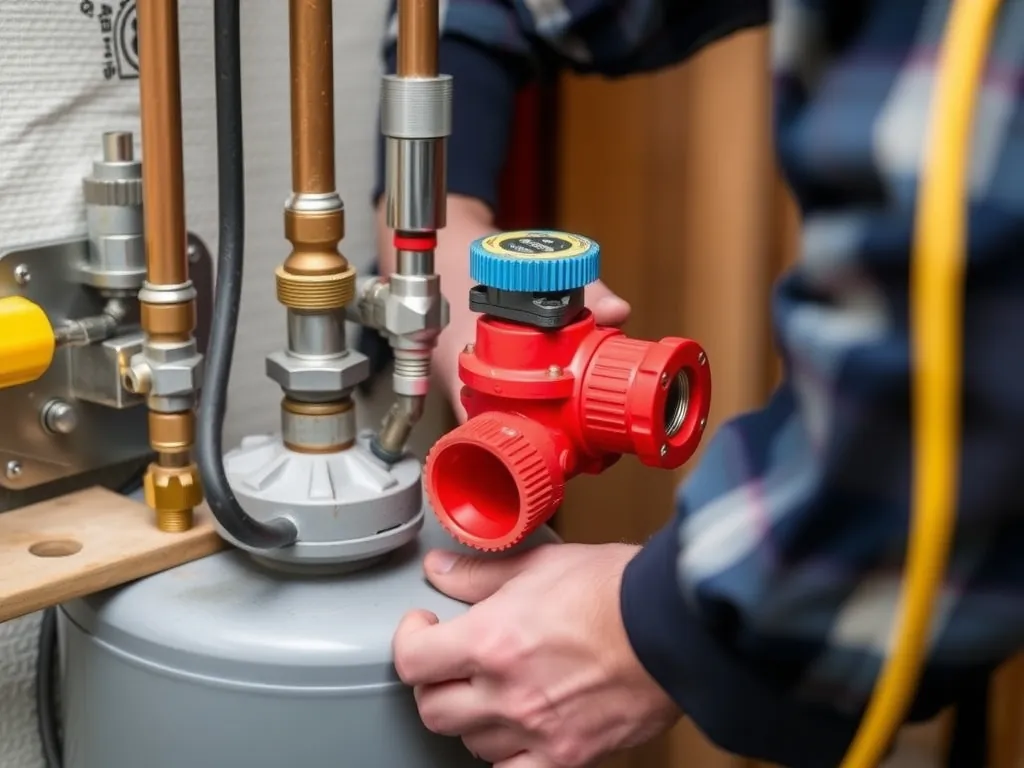
How Do You Replace a Water Heater Gas Control Valve Step-by-Step?
Step 1: Shut Off Gas and Water Supply
Turn the gas valve on the water heater to “OFF,” then shut the main gas line at the meter or shut-off valve. Confirm gas is off by listening for hissing and using a gas leak detector. Turn off the cold water inlet valve and open a hot water faucet to relieve pressure. Drain 2–3 gallons from the tank using the drain valve to reduce weight and prevent spills during removal.
Step 2: Disconnect Electrical and Gas Lines
Remove the access panel and disconnect the thermocouple and any wiring connected to the gas valve. Use a 3/8” open-end wrench to loosen the gas line fitting at the valve inlet. Wrap Teflon tape around the threads of the new valve’s gas inlet before installation. If the gas line is rigid, cut it with a tubing cutter and install a flexible appliance connector rated for gas (CSA B149.1 compliant).
Step 3: Remove Old Valve and Clean Components
Unscrew the mounting nuts securing the valve to the tank using a 7/16” wrench. Carefully lift the valve out, noting the position of the pilot tube and burner tube. Inspect the burner assembly for soot or debris; clean with a wire brush and compressed air. Replace the pilot orifice if clogged—use a #55 drill bit (0.041”) to clear carbon deposits.
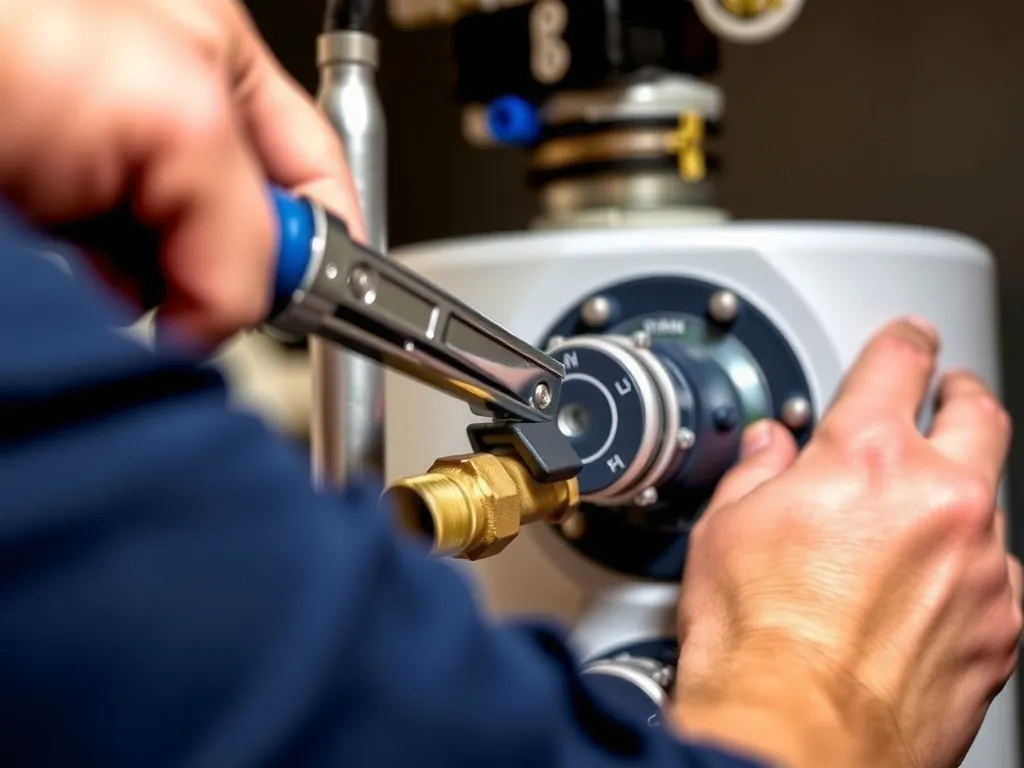
Step 4: Install New Gas Control Valve
Insert the new valve into position, aligning the pilot and burner tubes. Tighten mounting nuts evenly to avoid cracking the tank. Connect the gas line, thermocouple, and pilot tube securely. Hand-tighten all fittings first, then use a wrench for a quarter-turn final tighten—never overtighten. Reconnect any electrical wires to the correct terminals.
Step 5: Leak Test and Ignition
Open the main gas valve slowly. Apply soapy water to all gas connections and look for bubbles indicating leaks. If bubbles form, shut off gas, retighten, and retest. Once leak-free, turn the control knob to “PILOT,” press and hold the reset button for 60 seconds while lighting the pilot with a long-reach lighter. Release the button—if the pilot stays lit, turn the knob to “ON.” Set the temperature to 120°F and wait 45 minutes for water to heat.
Step 6: Final Verification and Safety Check
Use a carbon monoxide detector near the water heater to ensure no combustion byproducts are escaping. Verify burner flame is blue with minimal yellow tips—yellow indicates incomplete combustion. Monitor for 24 hours for temperature consistency. Document the replacement date and valve model for future service.
What Problems Might You Encounter with a Water Heater Gas Control Valve?
Common problems include pilot light outage, gas valve chatter, delayed ignition, overheating, and gas odor. A pilot that won’t stay lit is often due to a weak thermocouple (output <15 mV) or clogged pilot orifice. Gas valve chatter—a rapid clicking sound—signals a failing solenoid or fluctuating thermocouple voltage. Delayed ignition, where gas accumulates before igniting, creates a loud “boom,” risking damage to the combustion chamber and is caused by dirty burners or low gas pressure.
Overheating, indicated by water above 140°F or thermal shutdown, may stem from a stuck-open gas valve or thermostat malfunction. If the valve doesn’t respond to temperature changes, the internal bimetallic strip is warped or corroded. A gas odor after replacement suggests improper installation, damaged gas line, or faulty seal. Never ignore gas smells—evacuate the home and call the utility company immediately.
In coastal areas, salt corrosion causes internal valve components to seize, leading to complete failure. In high-altitude regions (>5,000 ft), gas pressure settings must be adjusted per manufacturer specs—failure to do so results in weak flames and poor efficiency. Improper venting, such as blocked flues or undersized flue pipes, causes flue gas backdrafting, which can poison the valve’s sensor and cause erratic operation.
FAQ
#### Why does my pilot light keep going out even after replacing the thermocouple?
If the pilot light still won’t stay lit after replacing the thermocouple, the issue is likely a clogged pilot orifice or low gas pressure. Clean the orifice with a #55 drill bit and check inlet pressure with a manometer—it must be 5–7” WC. A dirty burner or blocked air intake can also starve the pilot of oxygen. If gas pressure is correct and the orifice is clear, the gas control valve’s internal regulator may be faulty and require replacement.
#### Can I replace the gas control valve myself, or should I hire a professional?
You can replace the valve yourself if you have experience with gas appliances, tools, and safety protocols. However, hiring a licensed plumber is strongly advised due to gas leak risks and code compliance requirements. DIY replacements void manufacturer warranties if not performed per instructions. In states like California and New York, gas valve replacement requires a permit and inspection. If you’re unsure about gas pressure testing or leak detection, hire a professional.
#### Are gas water heater control valves subject to safety codes?
Yes, all gas control valves must comply with ANSI Z21.10.1 and the Uniform Plumbing Code (UPC) Section 608, which mandate automatic pilot safety shutoff, overheat protection, and flame rollout detection. Valves must be UL 1995 listed. Non-compliant valves may be seized by inspectors and can result in insurance denial if a fire or CO incident occurs. Always verify certification labels on the valve before installation.
#### How do Rheem and AO Smith gas control valves differ in reliability?
Rheem and AO Smith both produce high-reliability valves, but Rheem’s 22V37 series has a higher failure rate in humid environments due to less corrosion-resistant housing. AO Smith’s 200015582 valve uses a sealed solenoid design and performs better in coastal areas. Both have 10-year average lifespans, but AO Smith valves are rated for higher thermal cycling, making them preferable for high-demand households. OEM replacements are always superior to aftermarket options.
#### How often should I inspect or clean the gas control valve?
Inspect the gas control valve annually during routine water heater maintenance. Clean the pilot orifice with a wire brush and compressed air. Check thermocouple output with a multimeter every 18–24 months. If your home has hard water or high mineral content, flush the tank biannually to prevent sediment from affecting burner efficiency and valve operation. Replace the thermocouple every 5–7 years preemptively.
#### What tools do
You need a multimeter (to test thermocouple output), 3/8” and 7/16” open-end wrenches, a gas leak detector, a long-reach lighter, Teflon tape, a #55 drill bit (for pilot orifice), a flexible gas appliance connector (CSA B149.1 certified), and a bucket for draining. Optional: a manometer for gas pressure verification. Brands like Fieldpiece or Klein Tools offer reliable multimeters under $50.
#### How long does a gas control valve typically last?
Gas control valves last 8–12 years on average, with failure rates increasing sharply after 10 years. Standing pilot systems fail sooner (average 9 years) due to constant thermocouple exposure. Electronic ignition valves last longer (11–14 years) because they eliminate thermocouple dependency. Corrosion, hard water, and frequent cycling reduce lifespan. Log your installation date and replace preemptively at 10 years to avoid emergency failures.
#### Is it safe to bypass the gas control valve’s safety features?
No, bypassing safety features like the thermocouple or thermal cutoff is extremely dangerous and illegal. Doing so can lead to uncontrolled gas release, fire, explosion, or carbon monoxide poisoning. These features are mandated by federal and state codes. If the valve fails, replace it—never modify or disable it. Violations may result in fines, insurance denial, or criminal liability if harm occurs.
#### What signs indicate a gas leak from the control valve?
Signs include a strong rotten egg odor (mercaptan additive), hissing sounds near the valve, dead vegetation around the water heater, or a gas meter that continues running when all appliances are off. Use a commercial gas leak detector or soapy water to confirm. If detected, shut off the main gas valve immediately, evacuate the home, and call your gas utility. Do not operate switches, phones, or lighters.
#### Can I upgrade from a standing pilot to an electronic ignition valve?
Yes, you can upgrade to an electronic ignition valve if your tank’s mounting configuration and venting are compatible. Brands like Rheem and AO Smith offer retrofit kits. Electronic ignition reduces standby losses by 25–30%, saving $50–$120 annually on gas bills. However, installation requires rewiring, a 120V power source, and compliance with NEC Article 422.12. This upgrade is cost-effective in regions with high gas prices and qualifies for energy efficiency rebates through ENERGY STAR® programs.
—