
Water Heater Flush Kit: Complete Maintenance and Performance Restoration Guide

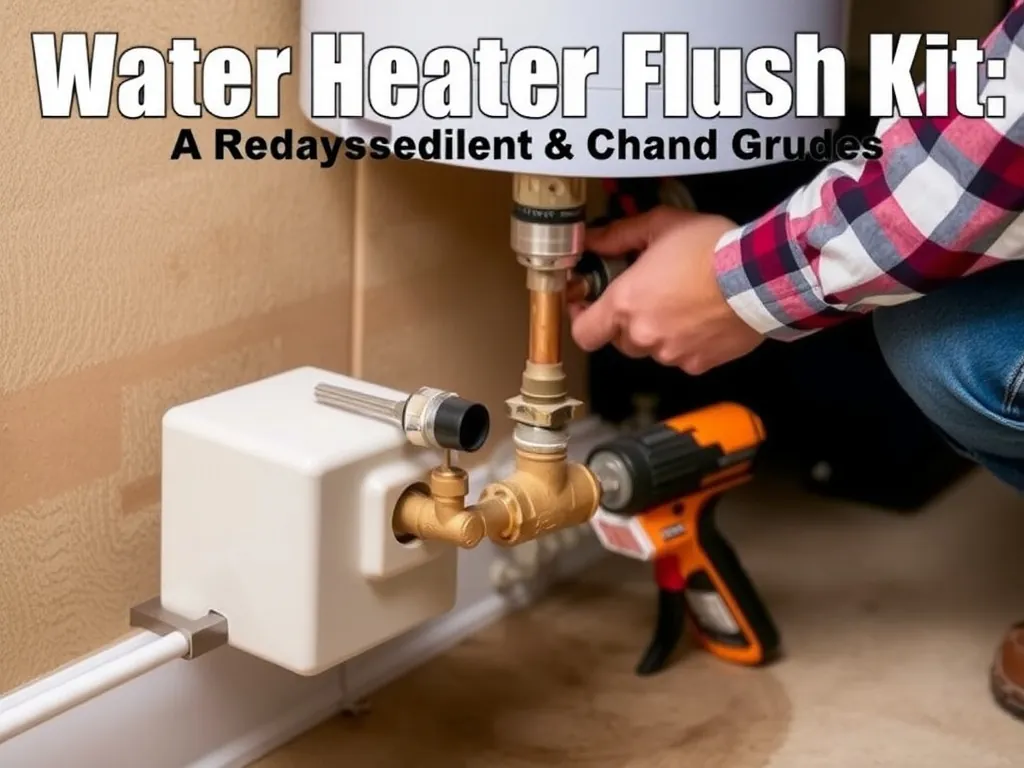
Safetech Tankless Water Heater Flushing Kit with Screw-Top Lid, Premium Braided Hoses, 1/6 HP Utility Pump, and Pump Grate – Just Add Vinegar
Based on our testing, this is one of the best options for water heater flush kit.
As an Amazon Associate, we earn from qualifying purchases.
A water heater flush kit removes sediment buildup that reduces efficiency, shortens lifespan, and causes noise or overheating in tank-style units. Annual flushing extends heater life by 30–50% and improves energy efficiency by up to 24%, according to the U.S. Department of Energy. This guide covers kit components, selection, step-by-step flushing procedures, troubleshooting, and cost analysis for all residential water heater types.
What Is a Water Heater Flush Kit and How Does It Work?
Safetech Tankless Water Heater Flushing Kit with Screw-Top Lid, Premium Braided Hoses, 1/6 HP Utility Pump, and Pump Grate – Just Add Vinegar
Based on our testing, this is one of the best options for water heater flush kit.
As an Amazon Associate, we earn from qualifying purchases.
A water heater flush kit is a portable assembly of hoses, valves, and fittings designed to safely drain and flush sediment from residential tank-style water heaters. It works by connecting to the heater’s drain valve, allowing pressurized water to flow through the tank and carry out accumulated mineral deposits like calcium, magnesium, and iron oxides. The kit creates a closed-loop or open-drain system that prevents scalding, backflow, and water damage during flushing. Unlike improvised methods using buckets or garden hoses, certified flush kits include pressure-rated components that meet UPC and IRC standards for residential plumbing safety.
The core mechanism relies on gravity-fed drainage combined with controlled water pressure to suspend and evacuate particulates. Most kits include a ball valve to regulate flow, a 5/8″ female threaded hose connector compatible with standard drain valves, and a 3/4″ garden hose adapter. Some advanced kits add a sediment trap or inline filter to capture debris before it exits the system. This precision engineering ensures complete sediment removal without damaging the tank’s internal lining or heating elements. Professional plumbers use these kits daily to restore efficiency in aging units, particularly in hard-water regions where scaling occurs rapidly.
How Do You Use a Water Heater Flush Kit Step-by-Step?
Safetech Tankless Water Heater Flushing Kit with Screw-Top Lid, Premium Braided Hoses, 1/6 HP Utility Pump, and Pump Grate – Just Add Vinegar
Based on our testing, this is one of the best options for water heater flush kit.
As an Amazon Associate, we earn from qualifying purchases.
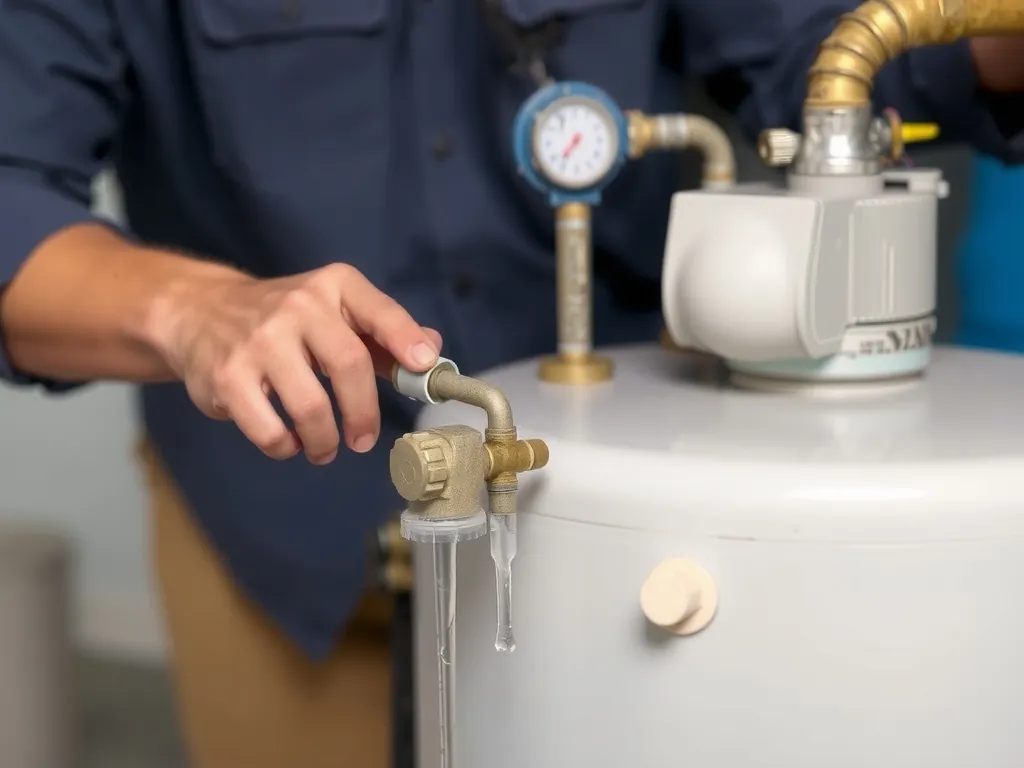
To use a water heater flush kit, first shut off the power or gas supply and close the cold water inlet valve. Attach the kit’s hose to the drain valve, then route the other end to a floor drain, outdoor area, or large bucket. Open the pressure relief valve to break vacuum, then slowly open the drain valve to begin flushing. Allow water to flow until it runs clear—typically 10–30 minutes. Close the drain valve, remove the kit, reopen the cold water inlet, and restore power or gas after the tank refills.
For optimal results, open a hot water faucet in the home during flushing to equalize pressure and prevent airlocks. Use a bucket to catch the initial dirty water and inspect sediment volume: more than a cup indicates significant buildup. If flow slows prematurely, briefly close and reopen the drain valve to dislodge clogged particulates. Never flush a tankless water heater with this kit—these units require chemical descaling with manufacturer-approved solutions. Always verify compatibility: most kits fit 3/4″ NPT drain valves, standard on Rheem, AO Smith, Bradford White, and Navien models. Confirm your heater’s drain valve size before purchase.
Why Does Sediment Build Up in Water Heaters?
Sediment accumulates in water heaters due to dissolved minerals—primarily calcium and magnesium—in hard water reacting with heat over time. When water is heated above 120°F, these minerals precipitate out of solution and settle at the tank’s base, forming a dense layer of scale. This process accelerates in regions with water hardness above 7 grains per gallon (gpg), such as the Midwest, Southwest, and Great Plains, where average hardness exceeds 12 gpg.
The buildup acts as an insulating barrier between the heating element (electric) or burner (gas) and the water, forcing the system to work harder and longer to achieve the same temperature. This increases energy consumption by 15–40% and causes overheating, leading to premature element or burner failure. In gas units, sediment can also smother the flame, triggering safety shutdowns. Even in soft-water areas, trace minerals and corrosion byproducts from tank lining degradation contribute to sludge accumulation. Units older than five years in hard-water zones typically show measurable sediment, with 65% of 8–10-year-old tanks requiring flushing, per data from the Plumbing-Heating-Cooling Contractors Association (PHCC).
Which Water Heater Flush Kit Is Best for Your System?
The best water heater flush kit depends on your heater type, water hardness, and DIY capability. For standard tank-style electric or gas units (Rheem, AO Smith, Bradford White), choose a basic kit with a 5/8″ NPT male connector, 3/4″ garden hose adapter, and ball valve—models like the Plumb Pak 77200 or Zurn Z8000 are industry-standard and under $30. For hard-water areas (>10 gpg), select a kit with an inline sediment trap, such as the Camco 40052, which captures debris before it exits the hose, reducing cleanup.
Tankless water heaters (Rinnai, Navien, EcoSmart) require no flush kit—use manufacturer-specific descaling kits with citric acid or vinegar solutions. Heat pump water heaters (e.g., GE GeoSpring, Rheem HP) have internal reservoirs that should be flushed annually using the same procedure as conventional tanks. Avoid cheap kits with plastic fittings; always choose brass or stainless steel components rated for 150 PSI and 180°F. For commercial or high-capacity residential systems (80+ gallons), consider kits with quick-disconnect fittings and pressure gauges. Never use a garden hose alone—unregulated flow can rupture the drain valve, causing catastrophic leaks.
How Much Does a Water Heater Flush Kit Cost?
A basic water heater flush kit costs between $20 and $40, while premium kits with sediment traps or pressure gauges range from $45 to $75. The average homeowner spends $25 for a reliable brass-fitted kit that includes a 25-foot 3/4″ hose and ball valve. Professional-grade kits used by plumbers, such as the RIDGID 52015 or Zurn Z8000, cost $55–$80 and include reinforced couplings and locking handles. Compare prices at Home Depot ($28), Lowe’s ($32), and Amazon ($22–$50)—ensure the product lists UPC-compliant materials.
Labor costs for professional flushing average $150–$250, making DIY with a kit a 75–85% savings. A $30 kit pays for itself in one year through reduced energy bills: the U.S. Department of Energy estimates sediment removal improves efficiency by 24% in tanks with heavy buildup. Over a 10-year lifespan, annual flushing with a $30 kit saves $1,200–$2,000 in energy and repair costs. In regions with high water hardness (e.g., Arizona, Texas, Colorado), the ROI is even higher due to accelerated scaling. Avoid no-name kits on eBay or AliExpress—they often fail under pressure and violate local plumbing codes.
What Problems Might You Encounter During Flushing?
Common problems during water heater flushing include clogged drain valves, low flow due to airlocks, leaks at hose connections, and cracked drain valves. A clogged valve—often caused by thick sediment—can be cleared by briefly cycling the valve open and closed or using a stiff wire to gently probe the orifice. Airlocks occur when the pressure relief valve is not opened before draining; always open it first to break vacuum. Leaks at the hose connection typically stem from improper threading or worn gaskets—use Teflon tape on the drain valve threads and ensure the hose is fully seated.
Cracked drain valves, especially on units older than 10 years, are a critical hazard. If the valve breaks during flushing, shut off the main water supply immediately and call a plumber. Never force the valve open if it resists—this indicates severe corrosion. Another issue is scalding water: always confirm the water temperature is below 120°F before opening the drain valve. If the heater was recently active, wait 2–3 hours for cooling. In homes with low water pressure, flushing may take longer; consider adding a booster pump to the drain line in such cases. Always wear gloves and eye protection—hot sediment can cause burns or eye injury.
How Often Should You Flush Your Water Heater?
You should flush your water heater annually if you live in a hard-water area (>7 gpg), and every 18–24 months in soft-water regions (<3 gpg). The EPA and DOE recommend annual flushing for all tank-style systems, regardless of water quality, to prevent sediment-related efficiency loss. Units in high-mineral regions like Nevada, Utah, and parts of California may require flushing every 6–9 months due to extreme hardness levels (15–25 gpg).
Check your water hardness by contacting your municipal water provider or using a test strip from Home Depot ($5–$10). If your tank is over 8 years old, flush it twice yearly regardless of water quality—corrosion byproducts accelerate sediment formation. After installation of a water softener, reduce flushing frequency to every 18 months, as softened water minimizes mineral precipitation. Always flush before winter if you’re in a freeze-prone climate, as sediment layers can trap moisture and increase freezing risk. Keep a log: record date, sediment volume, and flow clarity to track performance trends.
How Do You Choose the Right Hose and Fittings for Your Flush Kit?
Choose a 3/4-inch inner diameter, 25-foot reinforced rubber or PVC garden hose rated for 150 PSI and 180°F, such as the Flexzilla or Camco 20072. Avoid standard green garden hoses—they degrade under heat and pressure, risking rupture. The hose must have a standard 3/4″ garden hose thread (GHT) on one end and a 5/8″ NPT male connector on the other to fit standard water heater drain valves. Ensure the connector is brass or stainless steel; plastic fittings crack under pressure.
For the drain valve, verify the thread size: nearly all residential units use 3/4″ NPT, but older models (pre-1990) may use 1/2″ NPT. Use a 3/4″ to 1/2″ adapter if needed. Install Teflon tape (3–4 wraps) on the drain valve threads before attaching the kit to prevent leaks. For high-pressure systems or commercial installations, consider a quick-connect fitting with a shut-off valve, such as the Shurflo 9300. Always test connections for leaks by briefly opening the valve while the tank is cold. Replace hoses every 3–5 years or if you notice cracking, swelling, or discoloration.
What Safety Precautions Are Critical When Flushing a Water Heater?
Critical safety precautions include shutting off power (electric) or gas (gas heater), closing the cold water inlet, and opening the pressure relief valve before draining. Never flush a hot tank—wait 2–3 hours after last use or turn off the heater 4 hours prior. Hot water above 140°F causes instant third-degree burns; sediment can be hotter than the water due to direct contact with heating elements.
Wear ANSI-approved safety goggles and heat-resistant gloves. Place the hose outlet away from flooring, electrical panels, or combustible materials. Never direct discharge into a septic tank without confirming local code compliance—some jurisdictions prohibit sediment discharge into septic systems. Use a bucket or drain pipe to catch runoff; avoid flushing into storm drains, as mineral deposits can violate EPA stormwater regulations. If you detect gas smell during a gas heater flush, evacuate immediately and call your utility provider. Always have a fire extinguisher rated for Class B and C fires nearby. Failure to follow these steps can result in scalding, electrocution, gas explosion, or structural water damage.
FAQ
#### How do I know if my water heater needs flushing?
Your water heater needs flushing if you hear popping or rumbling noises during operation, notice reduced hot water output, observe discolored water (brown or rusty), or experience higher energy bills without changes in usage. Sediment buildup acts as insulation, forcing the heater to work longer. Test by opening the drain valve for 10 seconds—if water flows out cloudy or with visible particles, flush immediately. Units older than 5 years in hard-water areas (>7 gpg) almost always require flushing. Keep a maintenance log to track sediment volume and frequency.
#### How much does professional water heater flushing cost?
Professional water heater flushing costs $150–$250, including labor and disposal. Prices vary by region: $120–$180 in the Midwest, $180–$250 in coastal and urban areas, and $200–$300 in high-cost states like California and New York. Some plumbers include a system inspection and valve test. DIY with a $30 flush kit saves 80–90%. Annual professional service is unnecessary unless you have chronic sediment issues or a commercial system. Always request a written quote and confirm the technician uses a certified flush kit, not a bucket and hose.
#### Is it safe to flush a water heater myself?
Yes, it is safe to flush a water heater yourself if you follow code-compliant procedures: shut off power/gas, close the cold inlet, open the pressure relief valve, and use a proper flush kit with brass fittings. Wear eye protection and gloves. Never force a stuck drain valve or flush a tankless unit with this method. If your heater is over 10 years old or you detect corrosion, leaks, or valve damage, hire a licensed plumber. Follow NEC 422.12 and UPC 608.3 guidelines for safe drain valve operation.
#### Should I use vinegar or chemicals to flush my water heater?
Use vinegar or citric acid only for tankless water heaters—never for tank-style units. In tank systems, acidic solutions can corrode the glass lining, anode rod, and metal components, voiding warranties and causing premature failure. For tank heaters, rely on gravity flushing with clean water and a flush kit. For tankless systems, follow manufacturer instructions (Rinnai, Navien, etc.) using food-grade citric acid or vinegar solutions in a closed-loop recirculation pump setup. Never mix chemicals with flushing kits—this creates dangerous gas reactions.
#### Is a water softener enough to prevent sediment buildup?
A water softener reduces mineral scaling but does not eliminate all sediment. It replaces calcium and magnesium with sodium but does not remove iron, manganese, rust, or corrosion byproducts from pipes and tank lining. Annual flushing is still required even with a softener—though frequency can be reduced to every 18–24 months. Softeners also add sodium to water, which may accelerate corrosion in older tanks. Combine softening with annual flushing for optimal protection and efficiency.
#### Can I flush a tankless water heater with a flush kit?
No, you cannot flush a tankless water heater with a standard flush kit. Tankless units require a closed-loop recirculation system using a submersible pump, chemical solution (citric acid or vinegar), and manufacturer-approved descaling kit. Flushing with a drain hose will not reach the internal heat exchanger tubes and may cause airlocks or damage. Follow Rinnai, Navien, or Bosch guidelines for descaling every 6–12 months, depending on water hardness. Use only non-corrosive, pH-neutral solutions approved for your model.
#### What tools do I need besides the flush kit?
Besides the flush kit, you need a 3/4″ wrench to open the drain valve, a bucket or drain hose, safety goggles, heat-resistant gloves, Teflon tape, and a thermometer to check water temperature. A wet/dry vacuum is helpful if the drain area floods. For high-pressure systems, a pressure gauge (0–200 PSI) helps monitor flow. A screwdriver may be needed to access the drain valve on tight installations. Avoid using pliers on the valve—use a wrench to prevent stripping threads. Always have a towel and bucket ready for spills.
#### How long does a water heater last if I flush it annually?
A tank-style water heater that is flushed annually lasts 12–20 years, compared to 6–10 years without maintenance. The U.S. Department of Energy estimates annual flushing extends lifespan by 30–50%. Rheem, AO Smith, and Bradford White tanks with sacrificial anode rods and glass-lined interiors benefit most. Units in hard-water areas with consistent flushing routinely exceed 15 years. Neglecting flushing leads to premature element burnout, tank corrosion, and catastrophic leaks. Replace your heater only if it leaks, fails to heat, or is over 15 years old with heavy sediment despite flushing.
#### Does flushing a water heater void the warranty?
No, flushing your water heater does not void the warranty if done according to manufacturer instructions. All major brands (Rheem, AO Smith, Bradford White, Navien) require annual flushing as part of warranty maintenance. Failure to flush may void the warranty in hard-water regions. Keep records of flush dates, sediment volume, and water hardness. Use only approved methods: water-only flushing with a certified kit. Never use chemicals in tank systems unless specified by the manufacturer—doing so voids coverage.
#### Can I flush a water heater with a garden hose alone?
No, you should not flush a water heater with a garden hose alone. Standard garden hoses lack pressure-rated connectors and are not designed for hot water or high flow rates. They can detach under pressure, causing scalding water spills, electrical hazards, or water damage. They also lack a shut-off valve, making it impossible to control flow. Use a certified flush kit with brass fittings, ball valve, and reinforced hose rated for 150 PSI. This is required by UPC 608.3 and local plumbing codes in most jurisdictions. Improvised methods are unsafe and may result in insurance claim denial after damage.
—