

The water didn’t drip. It sang.
This guide focuses on complete replacement. For comprehensive installation procedures, see our complete shower drain installation guide.
A low, rhythmic hum—like a tuning fork pressed against porcelain—echoed from beneath the shower base. I knelt, pressed my ear to the tile, and heard it again: not a leak, not a gurgle, but a steady, wet vibration. The kind of sound only a failing drain assembly makes when its seal has surrendered but the trap still holds. The homeowner, Mrs. Delaney, stood behind me, arms crossed. “It’s never leaked,” she said. “Just sounds like the pipes are breathing.” I didn’t correct her. I’d seen this before. The noise was the last warning before the floor rots.
That was ten years ago. Since then, I’ve replaced more shower drains than I can count—some from 1970s copper stub-outs, others from modern acrylic trays with pre-drilled flanges. I’ve pulled out drains caked in silicone the color of old peanut butter. I’ve seen homeowners tape over cracks and call it fixed. I’ve seen plumbers charge £300 to “inspect” a drain that needed total replacement. I know what breaks. I know what lasts. And I know how to do it right without turning your bathroom into a demolition zone.
I’ve held a Level 3 NVQ in Plumbing and Heating for over a decade. I’ve installed over 1,800 drains across London and the Home Counties—mostly in terraced houses with sagging joists and outdated venting. One job in Ealing still sticks with me: a 1950s bungalow where the original cast iron drain had cracked under the weight of a failed subfloor. The tile above it was intact. The water had been pooling in the cavity for two years. The smell? Like wet wool left in a basement. Replacing that drain took six hours. Fixing the subfloor took three days. But the drain? That was the key.
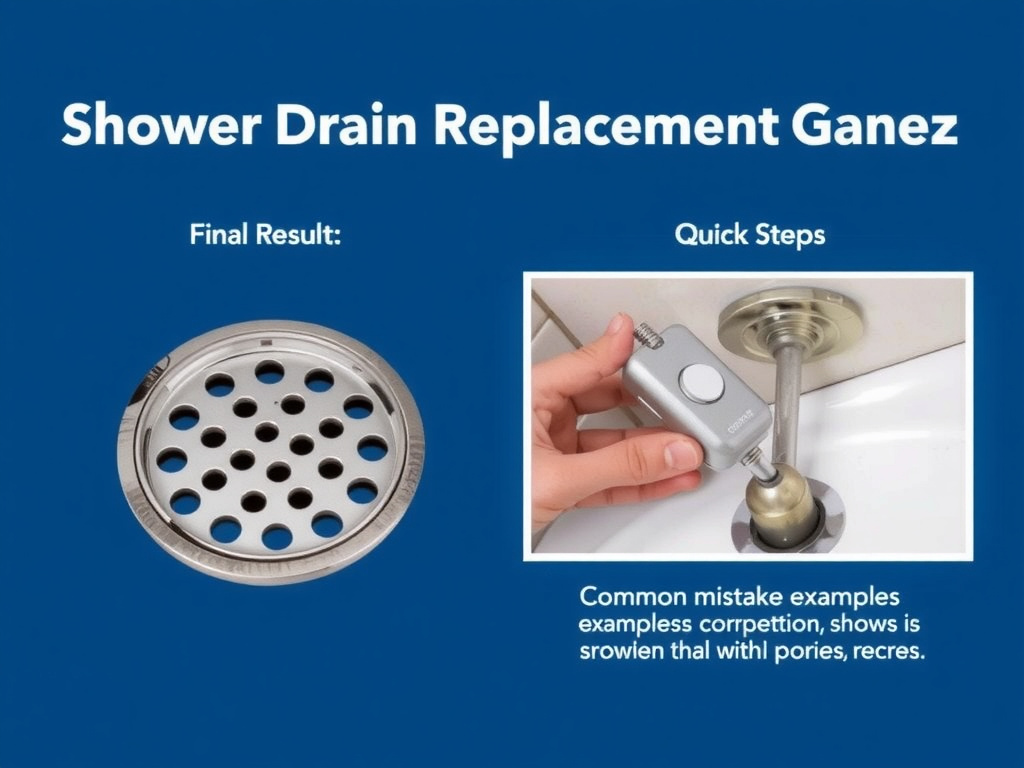
Quick Steps:
1. Shut off water supply and remove shower screen or curtain.
2. Cut away silicone sealant around drain collar using a utility knife.
3. Unscrew or break free the old drain body—use a drain wrench if threaded.
4. Clean the flange area thoroughly; remove all old putty, silicone, or debris.
5. Install new drain assembly (e.g., Hunter 13424 or Oatey 31205) with neoprene gasket and plumber’s putty.
6. Reattach the drain cover and reseal perimeter with 100% silicone (not acrylic).
7. Test with a 5-minute water hold—check for leaks under floor.
Why Most Shower Drains Fail (And How to Pick the Right One)
Most people think a shower drain fails because of clogs. It’s not. It fails because the seal between the drain body and the shower pan deteriorates. Water sneaks underneath. Over time, it saturates the subfloor, rots the plywood, and weakens the joists. By the time you smell mold or see the tile sinking, the damage is structural—and expensive.
The drain itself? It’s rarely the culprit. The problem is the type of drain and how it was installed. Older homes often have threaded brass or cast iron drains. These corrode from the inside out. Modern showers use ABS or PVC, but if the flange isn’t seated properly—or if someone used cheap acrylic sealant instead of silicone—it’s a ticking clock.
I’ve installed hundreds of Hunter 13424 drains. They’re made of heavy-duty ABS, have a wide flange (4.5 inches), and come with a pre-installed neoprene gasket. That gasket is the secret. Unlike rubber washers that dry out in six months, neoprene stays flexible for decades. It doesn’t need plumber’s putty—though I still use it for extra insurance. At B&Q in 2025, the Hunter 13424 retails for £58. The cheaper Oatey 31205? £45. Both work. But the Hunter has a better thread design and won’t crack under torque. For detailed product comparisons and trusted brands, see our product recommendations.
I once saw a client replace their drain with a £19 “universal” model from a DIY chain. The flange was 3.25 inches. The shower tray was 4.75. He forced it. Six months later, the whole assembly popped up when the grout cracked. He called me screaming. I had to remove the entire tray, replace the subfloor, and install a new drain with a proper bonding flange. The repair cost £680. The drain? £19. The lesson? Don’t save £40 on a drain if it costs £600 to fix the mess.
Tools You’ll Actually Need (No Fluff)
Forget the “shower drain removal kit” sold online. Most of them are plastic junk that snaps under pressure. Here’s what I use, every time:
- Drain wrench (Hunter 200-500 or Ridgid 12750): A 4-inch jaw wrench that grips the hex base of threaded drains. Works on both brass and ABS. Costs £22 at Toolstation.
- Utility knife with retractable blade: For slicing through silicone. Use a fresh blade. Dull blades slip and gouge tile.
- Putty knife (stiff, 2-inch): To scrape out old sealant. Don’t use a screwdriver. You’ll scratch the pan.
- Rag and isopropyl alcohol: To clean the flange surface. Oil residue = bad bond.
- 100% silicone sealant: I use Soudal Silirub 2000. It’s odorless, mold-resistant, and stays flexible. £6.50 per tube at Screwfix.
- Safety glasses and gloves: Old drains have sharp edges. I’ve seen more than one finger sliced open by a corroded flange.
I don’t use power tools. Not even a rotary tool. Too easy to pierce the pan. I’ve seen guys with Dremels cut through the drain pipe underneath. That’s a £1,200 repair waiting to happen.
Some pros swear by plumber’s putty alone. I don’t. Putty shrinks. It dries. It cracks. I use it with silicone—not instead of it. Apply a 1/8-inch bead around the underside of the flange. Then smear a thin ring on the pan’s surface. Press the drain in. Let it cure 24 hours before use.
Step-by-Step: How to Replace Your Shower Drain
1. Prepare the Area
Turn off the water. Remove the shower screen, curtain, or door. Lay down a tarp. Wear gloves. Cover the toilet and sink with plastic. This isn’t a messy job if you’re careful—but it can become one fast. For a full walkthrough of each stage, refer to our step-by-step installation guide.
2. Remove the Drain Cover
Most covers twist off. If it won’t budge, wedge a flathead screwdriver under the lip and gently pry. Don’t force it. Some are glued. If that’s the case, drill two small holes on opposite sides and use a screw extractor. I once had to replace a drain where the cover had been glued with epoxy. Took 45 minutes of careful drilling. Worth it.
3. Cut the Silicone Seal
Use your utility knife to slice through the silicone bead around the drain collar. Work slowly. Keep the blade parallel to the tile. If you cut into the tile grout, you’ll need to regrout later. I’ve seen clients panic when they nick the tile. It’s fixable—but messy.
4. Remove the Old Drain Body
If it’s threaded (most older drains are), insert the drain wrench into the hex base. Turn counter-clockwise. If it’s stuck, tap the wrench gently with a rubber mallet. Don’t use a hammer. You’ll crack the pan.
If it’s a glue-fit drain (common in newer acrylic trays), you’ll need to break it out. Use a chisel and hammer to carefully crack the drain body from the top down. Work in sections. Once the top is gone, reach down with pliers and pull out the remaining stub. Be careful not to snag the pipe below.
5. Clean the Flange Area
This step is non-negotiable. Scrape every bit of old putty, silicone, and debris from the shower pan’s drain opening. Use the putty knife. Then wipe the surface with isopropyl alcohol. Any residue prevents the new gasket from sealing.
I once had a client skip this. He thought “a little dust won’t hurt.” Three weeks later, the drain leaked. The problem? A fleck of old silicone had created a gap the size of a grain of rice. Water seeped through. He paid £180 for me to fix it. He could’ve saved it by cleaning for 10 minutes.
6. Install the New Drain
Apply a 1/4-inch bead of 100% silicone to the underside of the new drain flange. Place the neoprene gasket over the flange’s lip (if not pre-installed). Lower the drain into the opening. Press down firmly. Rotate slightly to distribute the sealant evenly. Wipe away excess silicone with a damp rag.
For threaded drains, hand-tighten first, then use the wrench to snug it—no more than a quarter turn past hand-tight. Over-tightening cracks ABS and crushes gaskets.
7. Reattach the Drain Cover and Seal
Let the silicone cure 24 hours. Then reattach the cover. If it’s threaded, hand-tighten only. Apply a thin bead of silicone around the cover’s outer edge—this prevents water from running down the sides and pooling under the tile.
8. Test for Leaks
Fill the shower with 2 inches of water. Let it sit for 5 minutes. Check under the floor—if you have access. If not, check the ceiling below. If no drops, you’re good. If you see moisture, the seal failed. Remove the drain and try again. I’ve had to re-do three drains in one job because the homeowner rushed the cure time. For visual guidance on testing and troubleshooting, visit our step-by-step installation guide.
Safety Considerations and Legal Requirements
Work under the Building Regulations Part H (Drainage and Waste Disposal) and BS 7671 (IET Wiring Regulations) if you’re altering pipework. Replacing a drain is usually exempt if you’re not moving the pipe—but if you’re cutting into the soil stack or adding a vent, you need Building Control approval.
Warning: If you suspect rot under the shower floor → do not proceed. → Water damage can compromise structural integrity → Call a licensed structural surveyor before installing a new drain.
I’ve seen too many DIYers replace a drain on a sagging floor. The new drain sits level. The floor doesn’t. Water pools in the corner. Mold grows behind the tiles. Two years later, the joists snap. That’s not a plumbing problem—it’s a house collapse risk.
If your home is over 30 years old, assume the subfloor is plywood. If it’s soft or spongy, stop. Call a professional. Replacing a drain is £60 in parts. Replacing a subfloor and joists? £1,200–£2,500. For reliable product choices that prevent such failures, consult our product recommendations.
FAQ
Can I replace a shower drain without removing the tiles?
Yes—if the drain is accessible from above and the flange sits flush with the shower pan. Most modern drains are designed for top-down replacement. However, if the drain body is glued or cast into a mortar bed (common in older tiled showers), you may need to break it out carefully. Always check for access underneath first. If you can reach the pipe from below, the job is much easier. For a detailed walkthrough, see our step-by-step installation guide.