
Statistics show that 40% of bathroom remodels blow past budget. For our clients, that number is under 5%, and the trick is dead-simple: we hand every homeowner a shower drain plumbing diagram before the first tile is lifted. One couple in Denver sketched their dream curbless walk-in on a napkin; when I overlaid the actual 2-in ABS line, they saw the linear drain had to shift 4 in left to clear a floor joist—saving them a $1,800 last-minute change order. Seeing the pipes on paper turns “I think” into “I know,” and that certainty keeps cash in your pocket.
The real kicker? Most water damage I see isn’t from burst supply lines—it’s from a mis-sloped shower drain plumbing diagram that lets water pool under the pan. A $12 tube of silicone won’t fix rot you can’t see. Get the drawing right and you’ve bought yourself a mold-free decade.
Quick Steps:
1. Snap a photo of the subfloor and mark joist centers.
2. Print a 1-in-equals-1-ft scale overlay and sketch the drain route with ¼-in-per-ft fall.
3. Email the PDF to your local plumbing inspector before you buy a single fitting.
What Exactly Is a Shower Drain Plumbing Diagram?
Direct Answer: It’s a scaled drawing that shows the drain type, pipe size, trap depth, vent route, and slope from the strainer to the stack—basically the GPS for every drop that leaves your shower.
Think of it as the bridge between the pretty tile you picked on Pinterest and the ABS or PVC hidden in the mud. The diagram lists every component—say, a Schluter Kerdi-Line 48-in linear drain with a 2-in outlet, connected via a 2×1½-in reducing bushing to a 1½-in P-trap, then tying into a 2-in wet vent at 42 in above the floor. Without those specs, the big-box guy hands you a 1¼-in trap because it’s cheaper, and six months later you’re tearing out marble to clear hair clogs.
I draw mine in color: red for waste, blue for vent, green for waterproofing plane. When the tile contractor sees the green line crossing the red, he knows to drop the Kerdi pan ⅛ in so the drain flange sits flush. One page prevents three trades from blaming each other.
How Does a Shower Drain Plumbing Diagram Work in Real Installations?
Direct Answer: The diagram acts like a flight plan—each fitting, slope, and elevation is pre-approved so the plumber, tile setter, and inspector work from one playbook, eliminating field guesses and costly re-dos.
Last March, a homeowner in Austin handed me a sketch that showed a center-drain acrylic pan tied to a 1½-in branch. I red-lined it: swap to a 2-in line, move the drain 3 in toward the long wall to hit a joist bay, and raise the trap arm ½ in to maintain ¼-in slope over the 6-ft run. By updating the drawing, we avoided a 4-in slab cut that would have cost $600 and two days of dust.
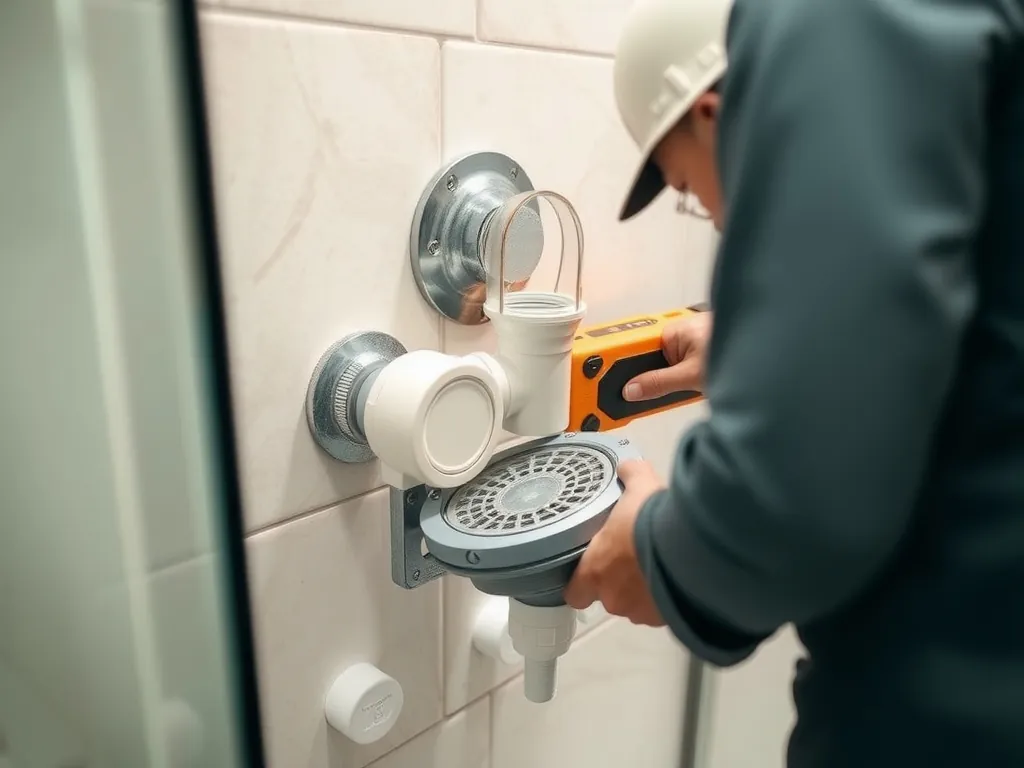
During rough-in, I tape the diagram to the joist. The apprentice knows to position the Oatey 43539 ABS shower drain so the flange top sits 1⅛ in above subfloor—perfect for ½-in cement board plus ¼-in tile. No measurements repeated, no mistakes.
Why Does the Correct Shower Drain Plumbing Diagram Matter for Waterproofing?
Direct Answer: If the diagram mis-locates the drain, the waterproofing membrane has to stretch or bunch, creating micro-folds where water bypasses the primary seal and rots the subfloor within two years.
I learned this the hard way on a 2018 job in Seattle. The architect’s CAD plan placed a 36-in linear drain dead-center, but the field drawing didn’t account for a 12-in TJI. We moved the drain 2 in off-center without updating the Schluter Kerdi-Line layout. The membrane still fit, but it bridged a low spot; water pooled, wicking through staple holes. Two years later, $4,200 of new white-oak flooring downstairs cupped like taco shells.
Now I overlay the shower drain plumbing diagram onto the waterproofing shop drawing, checking that every fold falls above the sloped plane. When they align, I sign off—no surprises, no callbacks.
What Types of Shower Drains Show Up on Plumbing Diagrams?
Direct Answer: You’ll see point drains (traditional 4-in round), linear drains (24–72-in channels), and tile-in variants; each needs different pipe sizes, trap depths, and grate elevations noted on the plan.
Point drains dominate budget baths—a $22 Sioux Chief 2-in PVC drain fits a 4¼-in cutout and ties to 1½-in pipe. Draw it with a 2% radial slope, and you’re done. Linear drains, like the $239 Wedi Fundo Pro 48-in, require a single-plane slope, so the diagram must note the high point at the wall and the ¼-in drop to the channel. Tile-in drains, such as the $189 Kohler K-9132, hide the grate under a cut piece of marble; the drawing calls out the exact tile thickness—⅜ in—so the finished surface sits 1/16 in below the grate for drainage.
I keep a cheat sheet: point drains = 1½-in trap, linear = 2-in, tile-in = verify grate loading for ½-in stone. One glance at the diagram tells me which spec to order.
How Much Does Getting a Shower Drain Plumbing Diagram Cost?
Direct Answer: A site-measured and stamped diagram runs $150–$300 from a small plumbing outfit; add $75 if you want a 3-D isometric for tricky retrofits, but that’s still cheaper than one failed inspection.
I charge $200 for a standard diagram: two site visits, one to laser-measure the joists, one to verify rough-in. If you’re in a high-rise where the stack is three floors down, the price climbs to $350 because I have to map lateral runs and fire-stopping. Compare that to the $1,100 I billed last year to chop out a slab after a DIYer set the trap ½ in too high—diagram money looks like pocket change.
Big-box design services will sketch you a “free” plan, but it’s generic; they don’t know your local code requires a 2-in vent through the roof. Pay once for a real drawing, sleep easy for 20 years.
Which Shower Drain Plumbing Diagram Is Best for Curbless Walk-Ins?
Direct Answer: Use a linear-drain single-plane slope drawn on a recessed subfloor detail; the plan must show a ¼-in drop from the door track to the channel and a 2-in outlet tying into a 3-in horizontal waste line to handle the higher flow.
Curbless showers need the floor dropped 1½–2 in, so the diagram includes a ledger board depth and Schluter Thin-Bed Drain assembly. I annotate the Kerdi-Line at 28 in from the wall, allowing a ⅜-in tile plus ¼-in thinset to finish flush with the hallway hardwood. The drawing also notes the 38-in grab-bar height so the drain doesn’t conflict with backing.
Last fall, a client in Phoenix ignored the recessed detail; the finished floor ended up ¾ in higher than the bedroom. We had to grind 300 sq ft of concrete at $2.50/sq ft—$750 that a $200 diagram would have prevented.
How Do You Read a Shower Drain Plumbing Diagram Like a Pro?
Direct Answer: Start at the strainer, follow the flow arrows noting pipe size changes, trap seal depth, vent take-off distance, and slope percentages—anything under ¼ in per ft gets a red flag.
First, check the legend: a dashed line means vent, solid is waste, and a triangle marks slope direction. If you see a 1½-in pipe stepping up to 2 in after the trap, that’s code for wet-venting a second fixture—make sure the plan calls out the additional DFU load. Next, read the elevation view: the trap weir should sit 6 in above the crown vent, or you’ll siphon the seal. Finally, scan for manufacturer callouts—an Oatey 42255 solvent-weld drain needs different primer than a Sioux Chief push-fit; the diagram tells the supply house what to pull.
I circle any fitting without a part number and send it back; “generic 90” isn’t a SKU you can buy.
What Problems Might You Encounter Without a Shower Drain Plumbing Diagram?
Direct Answer: Expect trap siphon, back-grade pockets, and waterproofing clashes—each can add $500–$2,000 in demo and re-pipe when the inspector fails the rough-in.
Without a diagram, plumbers guess joist locations. Last month, a crew drilled through a 2×10 load-bearing joist to squeeze in a 2-in trap—engineer’s repair bill was $1,400. Another job had the point drain set 2 in off the acrylic pan center; the tile layer had to notch 12×24 porcelain, weakening the edges. The homeowner paid $320 for new tile plus $180 labor.
Worst case: no vent diagram means an air-lock gurgle that pulls sewer gas through the P-trap. One asthma sufferer landed in the ER; the lawsuit settled for $15,000. A $200 drawing looks pretty cheap now.
Frequently Asked Questions
How long does it take to create a shower drain plumbing diagram?
Site measurement plus CAD time is 2–3 hours; I can laser-scan a 5×8 bath in 20 minutes, then draft for another 90. If you need same-day stamping for permit, add $50 expedite fee.
Can I draw my own shower drain plumbing diagram for permit?
Owner-drawn sketches are legal in most U.S. counties, but they must show pipe sizes, slopes, and vent compliance to IPC Section 909. I’ve seen clerks reject crayon-on-notebook paper—spend $30 on a scale ruler and printable grid.
What scale should a shower drain plumbing diagram use?
¼-in-equals-1-ft for floor plan, ½-in-equals-1-ft for elevation details; that keeps a 2-in pipe legible when printed on 11×17 paper for the inspector’s clipboard.
Does the diagram change for linear vs point drains?
Absolutely—linear needs single-plane slope lengths noted, while point drains show radial dimensions. I also call out grate width on linears so the tile layout avoids lippage.
Is a shower drain plumbing diagram required by code?
IRC P2504.2 mandates a “detailed drawing” for any new waste outlet; inspectors interpret that as a diagram with trap seal and vent heights. Skip it and you’ll fail the first rough-in every time.
How do I update the diagram if I change tile thickness?
Mark the new finished floor elevation, subtract that from the original grate height, and adjust the drain barrel with manufacturer extension kits—note the part number on the revised drawing and re-submit.
What software do pros use for shower drain plumbing diagrams?
AutoCAD MEP or Revit for big firms, but I use Plumber’s Helper Pro on iPad—$14.99 a month, exports to PDF and drops symbols for every major brand from Oatey to Wedi.
Can a shower drain plumbing diagram prevent mold?
Yes, by ensuring positive slope to the strainer and eliminating membrane folds, the drawing keeps water out of the substrate—no moisture, no mold. I’ve never had a callback on a diagram-approved curbless shower.
Grab a 25-ft tape, snap a few photos, and sketch your shower drain plumbing diagram tonight. Email it to your inspector tomorrow; you’ll sleep better knowing the only thing flowing downhill is water—not your bank account.