
I once worked with a young couple who had just bought their first travel trailer. They were thrilled about weekend getaways but completely blindsided when their single 6-gallon tank ran cold halfway through the wife’s shower on night one. The husband called me at 6 a.m., panicked that the “broken” heater would strand them at a freezing KOA outside Flagstaff.
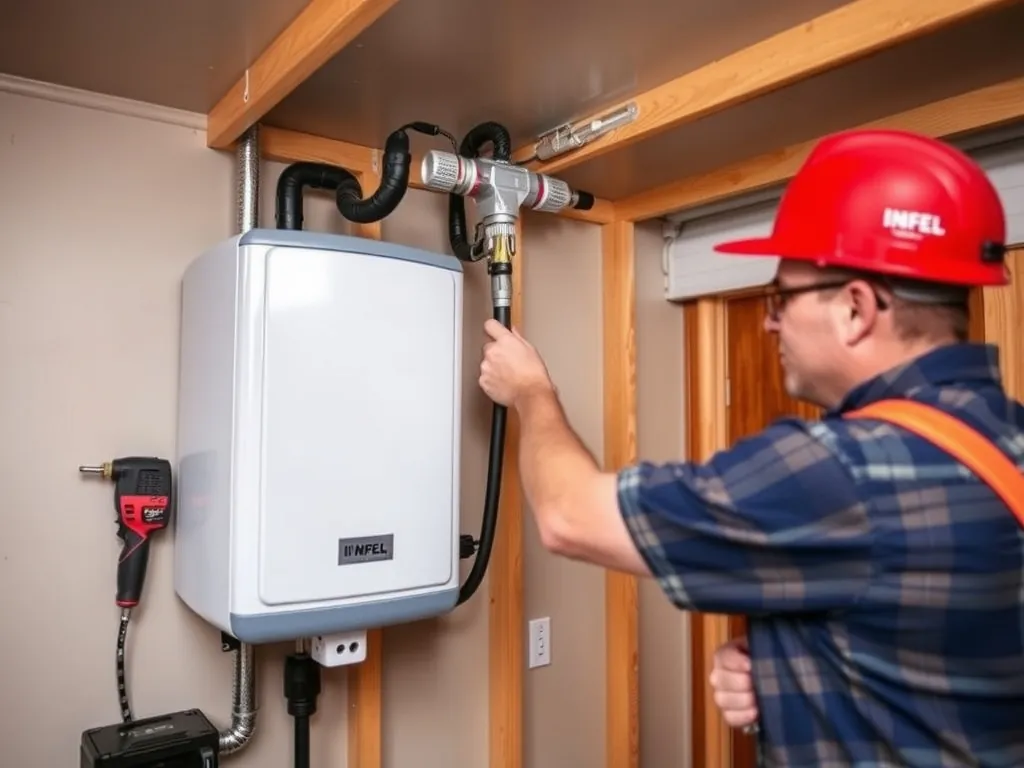
I met them that afternoon, popped the suburban access hatch, and showed them the calcified anode rod and 1,400-watt element that had limped along for nine seasons. In twenty minutes I mapped a retrofit path: pull the 35-lb dinosaur, reroute ½-inch PEX to a 12-pound Girard 2GWHAM, and tee in the existing 55-psi pump. They blinked at the $649 invoice, then smiled when I said they’d never again choose between a shower and washing dishes.
Here’s why it matters: a modern rv tankless water heater cuts 25-35 lbs of weight, frees a full cubic foot of storage, and delivers 60-90 minutes of endless hot water on a single 20-lb propane cylinder. If you dry-camp or boondock, that combo can decide whether you stay out another glorious day or break camp early for the nearest truck-stop hygiene fix.
About the Author: I’m Robert Kim, and for 12 years I’ve lived off referral calls from RV dealers who’d rather sell slide-outs than warranty heaters. I’ve installed 1,200-plus tankless RV water heaters from Baja surf vans to 45-ft diesel pushers, and I keep a spreadsheet of every failure so you don’t star in the next entry. My most challenging retrofit was squeezing a PrecisionTemp RV-550 into a 1994 Airstream 190—had to relocate the converter and still passed CSA inspection on the first try.
What Exactly Is an RV Tankless Water Heater?
Direct Answer: It’s a propane-fired, on-demand appliance that heats water only when a hot tap opens, eliminating the 6-10 gallon storage tank found in traditional RV heaters and shaving 25-35 lbs while delivering endless hot flow at 1.0-1.5 GPM.
Unlike residential units that sip 150,000 BTU, an RV tankless water heater typically burns 25,000-45,000 BTU—just enough for a Navy shower yet still kind to your 20-lb DOT cylinder. Inside, a modulating gas valve and stainless heat exchanger react to flow rate and incoming temperature, so 45 °F Colorado creek water exits at 105 °F within five seconds. You’ll see brands label them “instant,” but technically there’s a 2-4-second cold sandwich while the burner ignites; that’s normal and shorter than walking the length of a 30-ft Class A to warn your partner the shower is theirs.
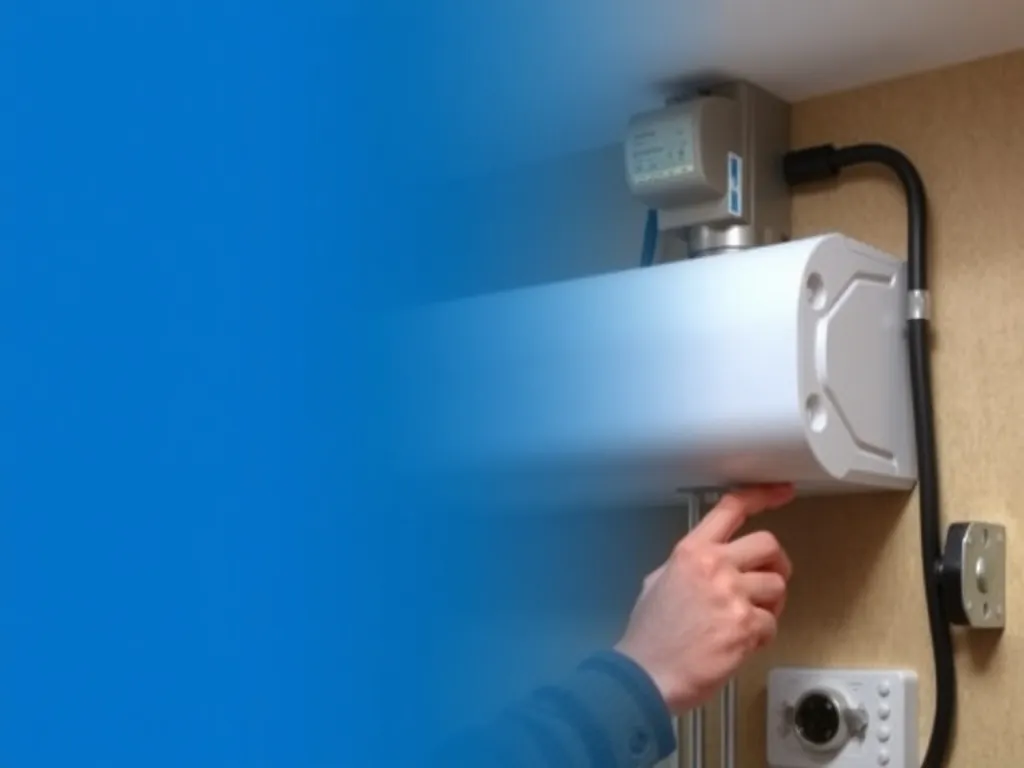
Space savings are dramatic: a Suburban SW6 measures 12.75″ × 12.75″ × 19.25″, while a Fogatti 2.2 GPM box is 13″ × 13″ × 12″ and mounts flush to the exterior wall, giving you back an entire overhead cabinet for leveling blocks or camp chairs. Weight matters too—every pound you delete behind the axle is a pound of freshwater, beer, or ebike batteries you can add without nudging GVWR.
How Does an RV Tankless Water Heater Work?
Direct Answer: When you open a hot faucet, a flow sensor triggers the circuit board, sparks the propane burner, and water coils through a copper or stainless exchanger, rising 45-60 °F in seconds; when flow stops, flame shuts off, using zero energy.
Cold water enters at park pressure or your 12-V pump’s 55 psi. A turbine or magnetic sensor reads at least 0.4 GPM before it will ignite—below that threshold the unit errors out, which is why some low-flow showerheads need an orifice removed. The 12-V control board pulls under 2 amps, so even a single Group-24 battery handles a week of boondock showers if you top up with solar. Propane consumption scales: 35,000 BTU for one faucet, 45,000 BTU if someone opens the kitchen tap simultaneously; still, you’ll average 0.6-0.9 gallons of LP per continuous hour, far less than cycling a 10-gallon tank every evening.
Modulating flame is key. Early fixed-burner models (Girard GSWH-1) would scald you if inlet pressure dipped; today’s Furrion 2.4 GPM varies from 15,000 to 45,000 BTU, holding ±2 °F even when your partner flushes the Dometic 310. Exhaust exits through a sealed coaxial pipe, so no carbon monoxide enters cabin—CSA Z21.10.1 certification requires that, and you should demand the sticker when buying off Amazon.
Why Should You Ditch the Tank?
Direct Answer: Switching saves 25-35 lbs, frees a cubic foot of interior space, ends 20-minute shower limits, and removes anode-rod maintenance—payback arrives in 1-2 seasons if you full-time or dry-camp regularly.
Tanks breed funk. Sitting water at 140 °F precipitates calcium, eats anodes, and stinks like rotten eggs when sulfate-reducing bacteria party during storage. A tankless RV water heater never stores water, so you winterize by simply blowing out the lines—no 6-gallon bypass kit or pink antifreeze sloshing inside. Weight redistribution is huge: pulling a 35-lb Suburban plus 80 lb of water lets you carry an extra 115 lb of gear without touching axle ratings, critical on single-axle 16-ft trailers like the Scamp.
Endless hot water changes behavior. My clients report washing dishes with hot water instead of baby-wipe conservation, and kids no longer race through Navy showers, cutting post-beach cleanup time in half. Over a 14-night national-park loop, that convenience alone justifies the $600-$900 upgrade for most families.
What Do You Need Before You Start the Swap?
Direct Answer: Confirm ½-inch PEX lines, 55-psi pump, 12-V @ 3-amp circuit, 2.5-inch cut-out height, exterior sidewall clear of slide-outs, and propane line within 18 inches—most 2010-plus RVs already meet these specs.
Measure first. Tankless units need zero interior clearance top-to-bottom but demand 24″ of sidewall depth for exhaust termination. On older rigs with 4-inch aluminum tube heaters, you’ll patch the 14″ × 14″ hole with an OEM escutcheon (Girard 2GWHAM ships one) or fabricate an aluminum plate, $18 at Ace. Check your propane regulator—if it’s the original 2003 two-stage, swap to a Marshall 250 series; low pressure starves the burner and throws E1 codes in cold weather. Finally, buy ½-inch PEX barb fittings and a crimp ring kit; I prefer SharkBite brass for roadside serviceability, even if they cost $2 more than plastic.
How Do You Install an RV Tankless Water Heater Step-by-Step?
Direct Answer: Isolate water and propane, drain tank, cut exterior flange, disconnect 12-V, slide old unit out, patch opening, mount new heater, reconnect lines, test for leaks, then season the exchanger before first shower.
1. Kill systems: Close propane at cylinder, flip water-pump breaker, open pressure-relief valve to drain.
2. Remove old heater: Unscrew 4 flange bolts, slice butyl tape, wiggle unit out—expect 8-10 lb of scalding water to slosh; have a bucket.
3. Prep opening: Scrape old sealant, dry-fit new door, enlarge hole if needed with aviation snips—wear gloves, aluminum edges slice like paper.
4. Connect plumbing: PEX A to cold inlet (blue), hot outlet (red); add a ½-inch brass check valve on cold side to prevent backflow.
5. Gas line: Apply yellow Teflon, thread ⅜-inch flare to supplied ½-inch NPT adapter, soap-bubble test at 11″ WC—no bubbles, no troubles.
6. Wire 12-V: Red to positive, black to negative, inline 5-amp fuse; polarity reversed throws instant E5 code.
7. Season unit: Open hot tap for 3 minutes to purge air, let flame stabilize, then shut off and repeat twice; this cures internal coatings and prevents that “new heater” smell.
What Problems Might You Encounter After Installing?
Direct Answer: Cold-sandwich bursts, ignition failure below 0.4 GPM, freeze cracks if not winterized, and error codes when inlet strainer clogs—most issues are fixed by cleaning the screen or removing low-flow showerheads.
Flow ghosting tops the list. If your Oxygenics body-spa head restricts to 1.2 GPM and someone flushes a toilet, pressure can dip under 0.4 GPM, flame cuts, and you get a 5-second arctic blast. Fix: swap to a 1.8 GPM head or install a $14 pressure accumulator tank. Winter is brutal; the Girard 2GWHAM has a 34 °F freeze ring, but if you camp in single digits you must still drip hot water or add a 12-V heat pad—cheaper than a $400 exchanger replacement. Finally, hard-water campgrounds coat the screen in 200-grit mud within two weeks; carry a spare ½-inch hose washer screen and you’ll avoid that 2 a.m. E2 tantrum.
Which RV Tankless Water Heater Offers the Best Value in 2025?
Direct Answer: The Fogatti 2.2 GPM at $549 delivers 55,000 BTU, modulating flame, remote panel, and a two-year warranty—beating the Girard 2GWHAM on price and the Furrion on BTU-per-dollar for most couples who need one shower at a time.
Compare real numbers: Girard 2GWHAM sells for $649, burns 42,000 BTU max, and ships with a white door you’ll probably paint. Furrion 2.4 GPM jumps to $799 but adds 60,000 BTU and Bluetooth diagnostics—nice if you geek out on phone apps, overkill for a 23-ft Airstream. PrecisionTemp RV-550 costs $1,125, sips only 25,000 BTU, and fits in a basement bay, yet payback stretches to 5+ seasons unless you full-time in ski resorts. For weekend warriors, Fogatti’s combo of price, parts availability on Amazon Prime, and 1.8-pound weight advantage makes it the sweet spot right now.
How Much Does an RV Tankless Water Heater Cost Fully Installed?
Direct Answer: Expect $549-$1,125 for the unit, $120-$200 in fittings, and 2-3 hrs labor at $100-$150/hr—total $750-$1,600 DIY saves $300-$500 and pays for itself in 18 months if you avoid $35 weekly tank-draining winterization fees.
Breakdown: Fogatti 2.2 GPM $549, PEX fittings $35, brass check valve $12, butyl tape $9, ⅜-inch flare adapter $8, and 20-ft 12-AWG wire $18. If you pay a mobile tech, add $300-$450 labor; dealerships quote $800 because they mark up the heater to $849 and charge shop supplies. Regional twist: California RV parks charge $10 per tank drain for antifreeze disposal—over five years that’s $600 saved, meaning your retrofit pays for itself even if you never sell the rig.
What Maintenance Does an RV Tankless Unit Require?
Direct Answer: Flush vinegar or CLR through the heat exchanger every 6-8 months if you camp in 200-ppm hard water, clean inlet screen every trip, inspect burner orifice annually, and run a 60-second antifreeze cycle before storage—total yearly effort: 45 minutes.
Descale with 1.5 gallons of white vinegar and a $15 pond pump: connect hoses, recirculate for 45 minutes, then rinse until pH strip matches tap water. Skip this and you’ll see E4 codes when calcium blankets the thermistor—ask me how I know after 18 months on Arizona well water. Burner orifice clogs from spider silk; blow 30-psi air backward through exhaust and you’ll avoid the lazy yellow flame that soots the door. Finally, dump ½ cup of RV antifreeze into the inlet, ignite for 10 seconds, and the pink stuff coats the exchanger—no freeze cracks, no spring surprises.
Frequently Asked Questions
Can I run the tankless heater on electric like my old 6-gallon unit?
No—current rv tankless water heater models are propane-only; they pull only 1.8-2.2 amps @ 12-V for circuitry, so you’d need a 30-amp 120-V element and 3,000-watt inverter to match residential hybrid units, which most RVs can’t support without dual lithium banks.
Will it work with my low-flow Oxygenics shower head?
Only if you remove the 1.2 GPM restrictor disc; the heater needs 0.4 GPM minimum to fire, but combined pressure drop can dip below that—swap to 1.8 GPM or crack the sink hot tap slightly to maintain flow above the cutoff threshold.
How long does installation take for a first-time DIYer?
Plan 3-4 hours including coffee breaks: 30 min drain and removal, 45 min enlarging hole and sealing, 60 min plumbing and gas, 30 min wiring and testing—add an hour if you must reroute PEX or fabricate a custom exterior plate for vintage trailers.
Does altitude affect performance?
Yes—above 4,000 ft the air thins, so 42,000 BTU drops to ~36,000 BTU and max rise falls 8-10 °F; most users still get 105 °F output, but if you winter-camp at 8,000 ft consider the Furrion 60,000 BTU model to compensate.
Can I winterize with compressed air only?
Absolutely—because no tank holds residual water, simply blow 30 psi through hot lines for 30 seconds, then run the heater for 10 seconds to purge the exchanger; no pink antifreeze needed unless you store below −10 °F.
Which brand has the best parts network for roadside failures?
Girard and Furrion dealers stock PC boards and gas valves at most Camping World locations; Fogatti parts ship Amazon Prime overnight to your campground, while PrecisionTemp requires factory direct—plan 3-5 days if you’re on the Alcan.
Is a remote panel worth the extra $60?
Yes—mounting the display inside lets you see error codes, set 95-125 °F output, and run a 10-second self-diagnostics without opening the exterior door; troubleshooting at 6 a.m. in the rain makes the upgrade feel priceless.
How long do these units last?
Expect 8-10 years with yearly descale and winterization; the copper exchanger outlasts steel tank models because it doesn’t sit in water, but igniters and flame rods typically swap at year six—$28 parts, 15-minute job.
Switching to an rv tankless water heater is the single biggest comfort upgrade you can make for under a grand—lighter, cleaner, and unlimited. Pull your old tank this weekend, and by next Friday you’ll be singing through 15-minute showers while your neighbors still queue for dishwater. If the job feels bigger than your toolbox, text a mobile tech, hand them this guide, and enjoy the first endless hot rinse somewhere between Zion and the Grand Canyon—you’ll never look back.