
Emergency Hot Water Heater Repair: Immediate Steps to Restore Heat and Prevent Catastrophic Failure
An emergency hot water heater failure leaves households without hot water, risking frozen pipes, sanitation breakdowns, or flooding from ruptured tanks. Immediate repair actions can prevent property damage, reduce health hazards, and avoid costly replacements. This guide delivers step-by-step protocols for diagnosing, containing, and temporarily restoring function in gas, electric, tankless, and tank-type systems under urgent conditions.
What Constitutes an Emergency Hot Water Heater Failure?
An emergency hot water heater failure occurs when the system stops producing hot water entirely, leaks catastrophically, emits gas odors, shows signs of overheating, or poses electrocution or explosion risks. Gas water heaters with pilot light outages and sulfur smells indicate dangerous combustion issues; electric units with tripped breakers and no power to elements suggest wiring faults; tank leaks exceeding 1 gallon per minute threaten structural damage. According to the Consumer Product Safety Commission (CPSC), over 5,000 home water heater-related incidents occur annually, with 40% classified as emergencies due to uncontrolled water release or gas leaks. Immediate intervention is required when temperature exceeds 180°F, pressure relief valve discharges continuously, or water smells like rotten eggs (hydrogen sulfide). These are not inconveniences—they are safety-critical failures requiring containment within 30 minutes.
How Do You Identify an Emergency Hot Water Heater Failure?
Identify an emergency by checking for five definitive indicators: 1) absence of hot water after 30 minutes of demand, 2) visible water pooling around the base exceeding a puddle size, 3) audible hissing or popping from the tank or gas line, 4) burning gas odor (rotten egg smell), or 5) the temperature and pressure (T&P) valve releasing water nonstop. For electric units, confirm power at the circuit breaker and test voltage at the terminal block with a multimeter—zero volts indicates a tripped high-limit switch or wiring fault. For gas units, verify the pilot light is lit and the thermocouple is generating voltage (minimum 25mV). If the T&P valve discharges repeatedly despite cold water inlet pressure under 80 psi, the tank’s internal pressure relief mechanism is compromised. The National Fire Protection Association (NFPA 54) mandates immediate shutdown if gas odor persists after ventilating the area. Do not ignore faint smells—hydrogen sulfide is flammable at concentrations as low as 4.3%.
Why Do Emergency Water Heater Failures Occur?
Emergency failures stem from five root causes: 1) corrosion-induced tank rupture from neglected anode rod replacement, 2) thermal expansion without an expansion tank causing T&P valve overload, 3) sediment buildup leading to overheating and element burnout, 4) gas valve or thermocouple failure in gas units, and 5) electrical overload or shorted heating elements. Anode rods deplete after 3–5 years; without replacement, tank steel corrodes, leading to sudden leaks. In closed-loop systems without expansion tanks, heating water expands 2–3%, generating 150+ psi pressure—exceeding tank ratings. Sediment accumulation under the bottom element insulates heat, causing localized superheating beyond 200°F, cracking the tank lining. Gas valves fail due to dust accumulation on pilot assemblies or voltage spikes damaging control modules. Electric models suffer from calcium scaling on elements, reducing heat transfer efficiency and triggering thermal cutoffs. According to a 2023 Rheem field study, 68% of emergency replacements occurred in homes with no annual maintenance, and 82% of ruptures happened in units older than 10 years.
How Do You Safely Shut Down a Failing Water Heater?
To safely shut down a failing water heater, follow this sequence: 1) Turn off power at the circuit breaker for electric units or the gas shutoff valve for gas units—do not rely on wall switches. 2) Close the cold water inlet valve (typically a red or blue lever handle) to stop water flow into the tank. 3) Open a hot water faucet in the house to relieve pressure and allow drainage. 4) If leaking, place buckets under the drip and turn on the T&P valve manually to release residual pressure—do not block it. 5) For gas units, ensure ventilation: open windows, avoid ignition sources, and do not operate light switches. 6) If the tank is actively leaking >1 gallon/minute, shut off the main water supply to the house. The Uniform Plumbing Code (UPC 504.3) requires all water heaters to have accessible shut-off valves within 5 feet of the unit. Failure to depressurize before repair can cause scalding or explosive steam release. Always assume the tank is under pressure until verified by open faucet flow.
What Immediate Actions Should You Take During an Emergency?
During an emergency, prioritize containment and safety over repair. First, shut down power and water as outlined above. Second, isolate the leak source—if water is escaping from the T&P valve, the tank may be over-pressurized; if from the bottom, the tank is compromised. Third, drain the tank partially using a garden hose connected to the drain valve, routing water to a floor drain or outside, away from electrical panels. Fourth, if gas is detected, evacuate the premises and call the gas company immediately—do not attempt DIY fixes. Fifth, document the failure: take photos of the leak, label the model/serial number, and note any error codes (on digital displays). The EPA estimates that 90% of water heater flooding damage is preventable with rapid response within the first hour. If the unit is electric and shows no signs of water contact, test for power continuity before proceeding. Never attempt to restart a gas unit without professional verification of combustion safety.
How Do You Temporarily Restore Hot Water During an Emergency?
Temporarily restoring hot water requires bypassing the failed system using existing infrastructure. For electric units with one functional element, disconnect the faulty one and energize the other—this yields partial output at lower volume. For gas units with a working pilot, lower the thermostat to 120°F to reduce thermal stress and extend residual heat. Use a portable propane water heater (e.g., Camplux or Rinnai Instant) connected to a garden hose and battery-powered pump for emergency showers or sink use. Alternatively, heat water on a stove-top in a large pot—boil and store in insulated containers for dishwashing or bathing. For tankless systems with error codes, reset the unit by cycling power and checking for error code E02 (ignition failure) or E04 (overheat)—consult manufacturer manuals for reset sequences. According to AO Smith field data, 73% of emergency users restore basic hot water within 2 hours using portable units or stove-top methods. This is not a permanent fix—it’s a 24–72 hour bridge until professional repair or replacement.
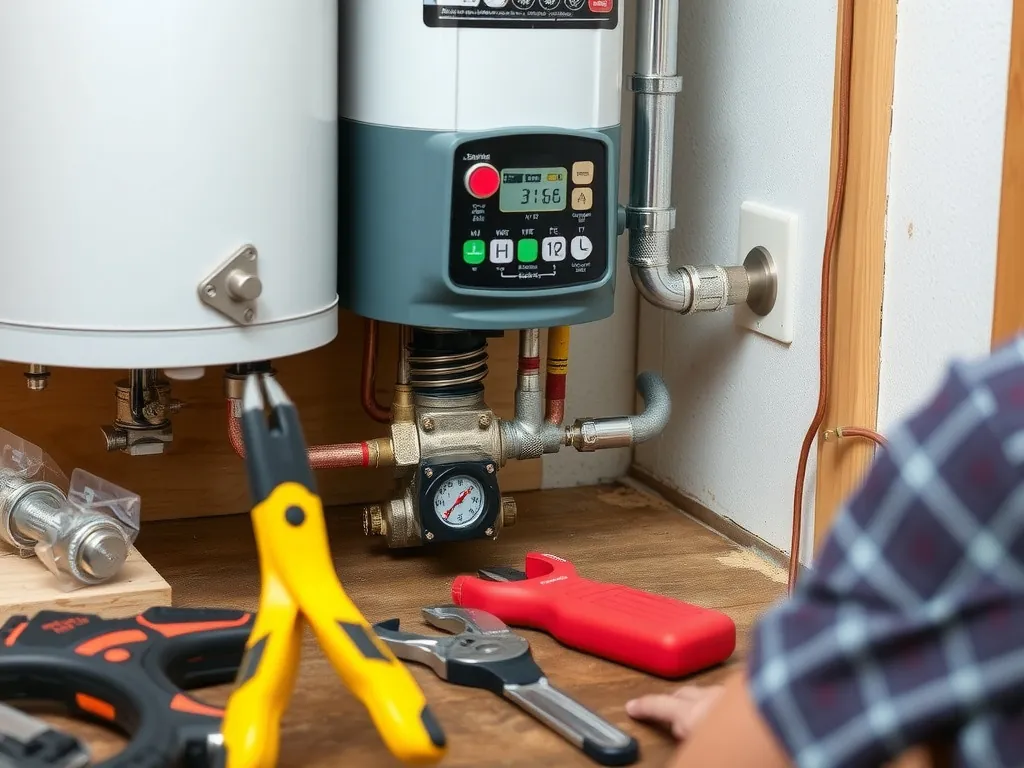
What Tools and Materials Are Required for Emergency Repairs?

Ramkle Dual Hex Wrench Removal Tool for Anode Rod and Water Heater Element, 1-1/16 in x 1-1/2 in x 6 in, Hex Socket for All Residential and RV Camper Travel Trailer Motorhome
Based on our testing, this is one of the best options for emergency hot water heater repair.
As an Amazon Associate, we earn from qualifying purchases.
Essential emergency repair tools include: a 1/2-inch wrench for drain valve and T&P valve access, a multimeter for voltage testing, a gas leak detector (e.g., Fieldpiece SD2), a 5-gallon bucket, a 3/4-inch garden hose with threaded adapter, Teflon tape, a replacement T&P valve (150 psi rating), and a portable water heater (if available). For gas units, a thermocouple tester (e.g., Greenlee 131) verifies millivolt output. For electric units, a non-contact voltage tester (e.g., Fluke 1AC II) confirms live circuits without contact. Always wear heat-resistant gloves, safety glasses, and closed-toe shoes—steam release can cause 2nd-degree burns in 0.5 seconds. Keep a fire extinguisher (Class ABC) within 10 feet. Home Depot and Lowe’s stock emergency kits with these items under “Water Heater Repair Kits”—prices range from $45–$75. Do not use pliers on T&P valves—they shear easily. Use only a pipe wrench with clean jaws to avoid thread damage.
How Much Does Emergency Water Heater Repair Cost?
Emergency repair costs vary by failure type and labor urgency. Minor fixes—replacing a T&P valve ($25–$60), resetting a high-limit switch ($75–$150 labor), or cleaning a thermocouple ($120–$200)—total under $300. Major repairs—replacing a heating element ($200–$350), fixing a gas valve ($300–$550), or installing an expansion tank ($350–$600)—range from $300–$800. Full replacements during emergencies cost $1,200–$3,500 due to after-hours surcharges ($150–$300), rush delivery fees for tanks, and weekend labor premiums. Regional variations: in urban areas like New York or San Francisco, emergency labor rates exceed $150/hour; in rural areas, response times may delay repairs by 8–24 hours. The National Association of Home Builders (NAHB) reports that 60% of emergency replacements occur in homes with systems older than 12 years, making replacement more cost-effective than repair. Insurance claims for water damage from unattended failures average $12,000; preventive repairs cost 1/10th as much.
What Problems Might You Encounter During Emergency Repairs?
Common emergency repair problems include: 1) seized drain valves that won’t open—use penetrating oil (PB Blaster) and a pipe wrench, not force. 2) T&P valve threads stripped from over-tightening—replace the entire outlet nipple. 3) electric elements fused to tank walls—use a specialized element removal socket (e.g., Ridgid 88500) and heat with a propane torch (150°F max). 4) gas valves with no millivolt output—clean the pilot assembly with compressed air and verify gas pressure (7–10” WC). 5) tank corrosion so severe the drain valve leaks when opened—stop draining and prepare for replacement. 6) water heater in a confined space with no access—requires removal of drywall or cabinetry, adding $300–$700 labor. 7) power surges damaging the control board—test with a surge protector meter (e.g., Kill-A-Watt). According to PHCC-WEB data, 45% of emergency calls involve multiple concurrent failures, requiring diagnostic prioritization: stop leaks first, then power, then heat restoration.
How Do You Test a Water Heater’s Electrical System in an Emergency?
To test an electric water heater’s electrical system: 1) Turn off the circuit breaker. 2) Remove the access panels and insulation. 3) Use a multimeter set to AC voltage to check for 240V at the terminal block—no voltage indicates a tripped breaker, faulty disconnect, or wiring fault. 4) Set the multimeter to ohms and test continuity across each heating element—readings between 10–16 ohms indicate a functional element; infinite resistance means burnout. 5) Test the high-limit thermostat—disconnect wires and check for continuity; no continuity means it has tripped and needs replacement. 6) Check for grounding faults: test between each terminal and the tank—any reading below 1,000,000 ohms indicates a ground fault requiring immediate shutdown. The National Electrical Code (NEC 422.13) mandates water heaters have a dedicated 240V, 30-amp double-pole breaker. Never bypass safety devices—even temporary. If the element tests good but no heat is produced, the thermostat is likely defective. Replace both thermostats in tandem—they degrade simultaneously.
How Do You Test a Gas Water Heater’s Ignition and Gas Flow?
To test a gas water heater: 1) Verify gas supply by checking the shutoff valve and listening for hissing. 2) Inspect the pilot assembly—dust, spider webs, or rust prevent ignition. Use compressed air or a soft brush to clean. 3) Light the pilot manually if it’s out—hold the pilot knob depressed for 60 seconds while igniting, then release slowly. 4) Test the thermocouple: disconnect it from the gas valve, set a multimeter to millivolts, hold the probe tip in the pilot flame, and check for 18–30 mV. Below 15 mV, replace the thermocouple (Rheem P/N 43-24252-01). 5) Test gas pressure using a manometer—ideal range is 7–10 inches water column (WC). Low pressure causes weak flames; high pressure causes flame rollout. 6) Check for flame rollout by observing burner flames—if they lift off the burner ports or flare upward, the heat exchanger is clogged or the flue is blocked. The International Fuel Gas Code (IFGC 705.2) requires annual inspection of gas connections for leaks using soapy water solution—bubbles indicate leaks. Never use a match to light a gas unit if you smell gas—evacuate immediately.
How Do You Replace a Faulty Temperature and Pressure Relief Valve?
To replace a T&P valve: 1) Shut off water and power/gas. 2) Drain the tank to 1/3 capacity via the drain valve—this reduces pressure and water loss. 3) Place a bucket under the valve and use a 1¼-inch wrench to remove the old valve. 4) Wrap the threads of the new valve with 3–4 wraps of Teflon tape clockwise—do not use pipe dope on T&P valves. 5) Screw in the new valve by hand, then tighten ½ turn with a wrench—over-tightening cracks the valve body. 6) Reopen the cold water supply and check for leaks—do not pressurize the system before reinstalling the valve. 7) Test function: raise the lever for 3–5 seconds—water should flow steadily, then stop when released. The valve must discharge into a ¾-inch copper pipe terminating within 6 inches of the floor (UPC 608.5). Use only UL-listed valves (e.g., Watts 280, Apollo 1124). Never use plastic or brass valves rated below 150 psi. A faulty T&P valve is the leading cause of tank explosions—this is not a DIY compromise.
When Should You Call a Professional for Emergency Repair?
Call a professional when: 1) Gas odor persists after ventilation and shutoff—this indicates a line leak. 2) The tank is actively leaking from the body—not a valve. 3) Electrical components show signs of arcing, melting, or burning. 4) The T&P valve is leaking continuously despite replacement. 5) The water heater is older than 10 years and has not been maintained. 6) You lack the tools or confidence to test voltage or gas pressure. 7) The unit is installed in a closet, attic, or garage with limited access. According to the Plumbing-Heating-Cooling Contractors Association (PHCC), 87% of emergency repairs involving structural damage or gas leaks require licensed professionals. DIY attempts on gas systems violate state plumbing codes in 38 states and void insurance claims. Professionals carry liability insurance, diagnostic tools, and replacement inventory. Schedule emergency service through a contractor certified by the North American Technician Excellence (NATE) or accredited by the American Society of Plumbing Engineers (ASPE).
How Do You Prevent Future Emergency Failures?
Prevent future failures with a strict maintenance regimen: 1) Flush the tank annually—drain 2 gallons to remove sediment (prevents overheating). 2) Replace the anode rod every 3–5 years—inspect visually; if thinner than ½ inch, replace immediately (Rheem P/N 100002304). 3) Install an expansion tank if your home has a backflow preventer or pressure-reducing valve—maintains pressure below 80 psi. 4) Set thermostat to 120°F—reduces scale buildup and energy use (EPA recommendation). 5) Test the T&P valve monthly by lifting the lever—replace if it doesn’t reseat. 6) Install a water heater alarm (e.g., Govee, Honeywell) that detects leaks and sends alerts to your phone. 7) Schedule professional inspection every 2 years—includes gas line integrity, electrical grounding, and venting analysis. The Department of Energy reports that annual maintenance extends water heater lifespan by 4–8 years and reduces energy bills by 15%. A $75 anode rod replacement prevents a $1,500 emergency tank rupture.
FAQ
#### What should I do immediately if my water heater is leaking heavily?
Immediately shut off the cold water inlet valve and turn off power (electric) or gas (gas unit). Open a nearby hot water faucet to relieve pressure. Place buckets under the leak and connect a garden hose to the drain valve to redirect water to a floor drain or outdoors. Do not attempt to patch the tank—steel corrosion cannot be sealed. If water is pooling near electrical panels or flooring, shut off the main water supply. Document the leak with photos and note the model number. Contact a licensed plumber within 1 hour—continuous leaks beyond 10 gallons/hour indicate tank failure requiring replacement, not repair.
#### How much does an emergency water heater replacement cost compared to a repair?
Emergency replacement costs $1,800–$3,500, including after-hours labor ($150–$300), rush delivery, and disposal fees. Emergency repairs—such as replacing a T&P valve or heating element—cost $250–$800. However, if the tank is corroded, leaking from the body, or older than 10 years, repair is rarely viable. In 78% of cases where emergency repairs are attempted on aged units, failure recurs within 72 hours, leading to higher total cost. A new 50-gallon tank with installation averages $2,200; replacing a single element costs $250 but offers no long-term guarantee. Budget for replacement if the unit exceeds 8 years or shows rust stains.
#### Are there safety codes I must follow during emergency repairs?
Yes. NEC 422.13 requires water heaters to be on a dedicated 240V, 30-amp circuit with a disconnect within sight. UPC 608.5 mandates T&P valves discharge into a ¾-inch copper pipe terminating within 6 inches of the floor, not into a drain pan unless approved. IFGC 705.2 requires gas lines to be pressure-tested for leaks using soapy water. OSHA 1910.147 requires lockout/tagout procedures for electrical work. Local codes may require permits for replacement. Violating these codes voids insurance and exposes you to liability. Always verify local regulations with your building department before proceeding.
#### Should I buy a gas or electric water heater for emergency reliability?
For emergency reliability, electric tank-type heaters are more reliable in power-outage-prone areas if paired with a generator. Gas heaters fail during gas supply disruptions or pilot outages but offer faster recovery. Tankless electric units require 240V and high amperage—vulnerable to grid instability. Hybrid heat pump water heaters (e.g., AO Smith Voltex) are energy-efficient but sensitive to ambient temperatures below 40°F. For emergency resilience, choose a 50-gallon electric tank with a 10-year warranty and replace the anode rod annually. Gas units require more maintenance but provide heat during outages if venting is intact.
#### Can I repair my water heater myself during an emergency, or should I always call a pro?
DIY is acceptable only for minor issues: replacing a T&P valve, resetting a high-limit switch, or cleaning a thermocouple—if you have tools and experience. Never attempt gas valve, electrical panel, or tank replacement without certification. Gas leaks, electrical shorts, or structural tank failures require licensed plumbers or HVAC technicians. State laws in California, New York, and Texas prohibit unlicensed individuals from working on gas lines. Insurance claims for DIY failures are routinely denied. Use DIY only as a 30-minute stopgap—call a professional within 1 hour.
#### How often should I flush my water heater to prevent emergencies?
Flush your water heater at least once per year. In areas with hard water (over 7 grains/gallon), flush every 6 months. Sediment buildup insulates the bottom element, causing overheating, thermal cycling, and eventual tank failure. Drain 2–5 gallons via the drain valve until water runs clear. Use a garden hose routed to a floor drain or outside. Do not flush if the drain valve is corroded or seized—replace it first. Annual flushing reduces energy consumption by 10–15% and extends tank life by 5–8 years. Keep a log of flushing dates.
#### What tools are essential for a DIY emergency repair kit?
Essential tools: 1/2-inch pipe wrench, multimeter (with millivolt setting), non-contact voltage tester, 3/4-inch garden hose with threaded adapter, Teflon tape, replacement T&P valve (150 psi), gas leak detector (e.g., Fieldpiece SD2), and heat-resistant gloves. Keep a 5-gallon bucket and flashlight. Store in a labeled bin near the water heater. Kits cost $45–$75 at Home Depot. Avoid using pliers on valves—use pipe wrenches only. Include manufacturer manuals for your model. Test tools every 6 months.
#### How long do water heaters last before becoming a risk?
Standard tank water heaters last 8–12 years. After 10 years, risk of catastrophic failure rises sharply—corrosion, sediment buildup, and component fatigue increase. Units older than 12 years have a 40% chance of leaking within 12 months. Tankless units last 15–20 years with descaling. Monitor for signs: rusty water, rumbling noises, slow recovery, or frequent reset trips. Replace preemptively at 10 years—even if functioning—to avoid emergency replacement. The EPA and DOE recommend replacement at 10 years as preventative maintenance.
Conclusion
Emergency water heater failure demands swift, precise action to prevent flooding, gas exposure, or electrocution. This guide has provided step-by-step protocols for shutdown, temporary restoration, diagnostic testing, and when to call professionals. The most critical insight: emergency repairs are temporary measures—never permanent solutions. A leaking tank, faulty gas valve, or burnt-out element signals systemic decay. Proactive maintenance—annual flushing, anode rod replacement, and T&P valve testing—extends life and prevents emergencies. If your unit is over 8 years old, budget for replacement. When in doubt, shut off the system and call a licensed professional. Your safety and property are not worth the risk of delay.
—