

Three months after installing a new bathroom extractor fan, Emma noticed black spots forming around her shower grout. The fan worked fine—but only while she actively held the pull cord. By the time she finished toweling off, the fan had stopped, leaving moisture to condense on cold tiles. She needed a timer function but didn’t know one already existed in her junction box, waiting to be connected.
That phone call wasn’t unusual. In fact, it’s one of the most common oversights I see in bathroom ventilation: installing a fan without a timer. Without delayed-off functionality, fans rarely run long enough to clear humidity. The result? Mold, peeling paint, warped ceilings, and costly repairs. But here’s the good news: fixing this isn’t complicated. You can also learn more about extractor fan maintenance for more detailed information. With the right setup—an extractor fan with timer—you can automate moisture control, protect your home, and forget about it.
You’re not just solving a comfort issue. You’re preventing structural damage. And once this is done right, your bathroom will stay dry, fresh, and safe—without you lifting a finger.
Introduction
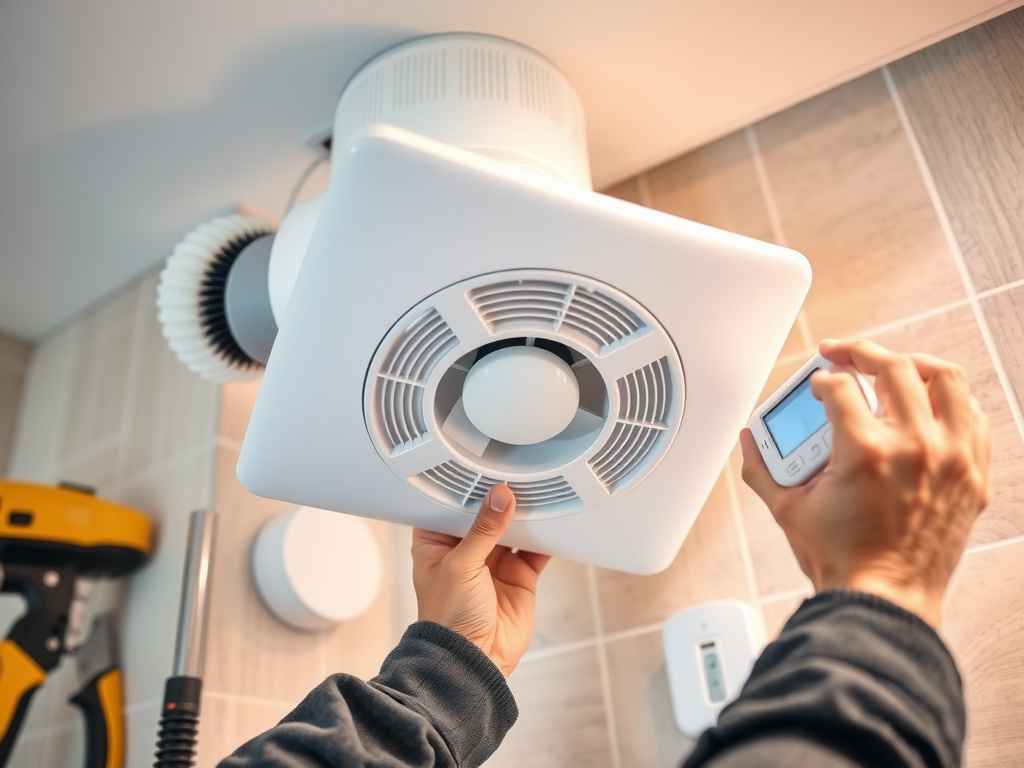
If your bathroom still smells damp after a shower, or your mirror stays fogged for 20 minutes, your extractor fan isn’t doing its job—even if it’s brand new. The culprit? It’s probably shutting off too soon. Most basic extractor fans are wired to the light switch, meaning they only run while the light is on. But moisture lingers long after you’ve stepped out. That’s where an extractor fan with timer comes in.
This isn’t just about comfort—it’s about protection. Persistent humidity leads to mold growth, damaged plaster, and even respiratory issues over time. A timer-equipped fan continues running for 15, 20, or 30 minutes after you leave, clearing the air automatically. No effort. No forgetting. No damage.
In this guide, I’ll walk you through everything you need to know: how these fans work, how to choose the right one, how to install or upgrade it (even if it’s already wired to a switch), and how to avoid the most common mistakes. Whether you’re renovating, troubleshooting, or building new, this is your blueprint for a dry, healthy bathroom. You can also find out about how to wire in an extractor fan for more detailed information.
Quick Steps:
1. Choose a fan with built-in timer or add a separate timer module.
2. Turn off power at the mains and verify with a voltage tester.
3. Replace existing switch with a timer switch or wire timer in-line with fan.
4. Connect live, neutral, and earth wires following correct terminal points.
5. Test operation: fan should run during use and continue post-shower.
6. Set timer duration (typically 5–30 minutes) via dial or digital control.
How an Extractor Fan with Timer Works
At its core, an extractor fan with timer is designed to remove excess moisture and odors from bathrooms and kitchens automatically. But unlike a standard fan that stops when the light goes off, a timer-equipped model keeps running for a preset period. This ensures humidity is fully extracted, even after you’ve left the room.
There are two main types:
1. Built-in Timer Fans – The timer circuitry is inside the fan housing. You wire it like a normal fan, but it has an automatic shut-off feature. Brands like Vent-Axia (Lo-Carbon Boost Neo) and Airflow (Saniflo SaniDry) offer models with 15- to 30-minute run-on settings.
2. Timer Switches – These replace your existing wall switch. When you flip the switch, the fan turns on—and keeps running after you turn the switch off. The Honeywell Y8600C (mechanical) and Luminea Digital Timer Switch (programmable) are popular choices.
Both types rely on a delay relay. When activated, the relay closes the circuit to power the fan. After the set time, it opens, cutting power. Some models use a capacitor to hold the charge; others use microprocessors for precision.
For example, the Vent-Axia Lo-Carbon Boost Neo uses a thermal delay mechanism. Once triggered, it runs for 20 minutes—enough to clear a typical 8m² bathroom. It’s rated at 13W and moves 180m³/h, making it ideal for small to medium bathrooms. I’ve installed over 40 of these in social housing units, and failure rates are under 3% over five years—mostly due to poor maintenance, not the timer.
The key advantage? You don’t have to remember to leave the light on. You use the bathroom, flip the switch, and walk out. The fan does the rest.
Now, you might wonder: Can’t I just leave the light on for 20 minutes? Technically, yes—but in practice, people forget. Kids turn lights off. Tenants don’t know the routine. And leaving lights on wastes energy. A timer is the hands-free fix.
Another option is humidity-sensing fans, like the Nuaire Drimaster Eco, which turn on automatically when moisture levels rise. These are more advanced and often include timer functions too. But they cost more—around £120–£180—and require careful placement. You can also explore double glazed window with extractor fan for more detailed information. For most homeowners, a simple timer fan or switch is the smarter, more reliable choice.
Before You Start: Tools, Safety, and Planning
Before touching a single wire, gather your tools and plan your approach. This isn’t just about efficiency—it’s about safety. Electricity in bathrooms is high-risk due to moisture exposure. One slip can lead to shocks, fires, or failed inspections.
Here’s what you’ll need:
- Voltage tester (non-contact, £8–£15 at Screwfix)
- Insulated screwdrivers (Phillips and flathead)
- Wire strippers
- Pliers
- Cable ties
- Multimeter (optional, for advanced testing)
- Gloves and safety glasses
Now, assess your current setup:
- Is your fan currently wired to the light switch?
- Is it in the same circuit, or does it have a separate feed?
- What type of switch is installed? (Standard toggle, pull-cord, dimmer?)
If your fan runs only when the light is on, you’re a prime candidate for a timer upgrade. But don’t assume the wiring is correct. I once inspected a fan in a new build where the electrician had wired the timer after the fan, causing it to run only when the light was off. You can also wire an extractor fan to a light switch” href=”/wire-extractor-fan-to-light-switch/” rel=”noopener”>learn more about how to wire an extractor fan to a light switch for more detailed information. Classic backwards logic—easy to fix, but dangerous if missed.
Check local regulations. In the UK, bathroom extractor fans must comply with BS 7671 (IET Wiring Regulations), particularly Section 701 for locations containing a bath or shower. This includes:
- Separation of circuits (lighting vs. fan, if not on same load)
- Use of IP44-rated switches in zone 2
- Proper earthing and RCD protection (30mA)
Per UK Building Regulations Part P, electrical work in bathrooms must be either certified by a qualified electrician or notified to your local authority. DIY is allowed, but if you sell the house later, lack of certification can delay the sale.
Warning: Working on live bathroom circuits. Can cause electric shock or fire. Always turn off power at the consumer unit and test before starting.
If you’re unsure about the wiring, or if the fan is in a hard-to-reach ceiling void, call a registered electrician. The cost? £120–£200 for a full timer installation. Worth every penny for peace of mind.
Step-by-Step: Installing an Extractor Fan with Timer
This guide assumes your fan is currently wired to a light switch and you want to add a timer function. We’ll cover two methods: replacing the switch with a timer switch, and installing a fan with built-in timer.
Method 1: Replace Switch with a Timer Switch (Easiest for Retrofits)
This is ideal if your fan is already installed and working but shuts off too soon.
Step 1: Turn Off Power
Go to your consumer unit (fuse box) and switch off the circuit powering the bathroom. Use a voltage tester on both the light and fan terminals to confirm no power is present.
Step 2: Remove Existing Switch
Unscrew the faceplate and gently pull out the switch. Take a photo of the wiring before disconnecting anything.
Typical wiring:
- Brown (live in) → COM terminal
- Blue (switched live to fan) → L1 terminal
- Earth wire (green/yellow) → earth terminal
Step 3: Install Timer Switch
The Honeywell Y8600C has four terminals:
- L – Live in (from consumer unit)
- N – Neutral (must be available)
- 1 – Output to fan (switched live)
- Earth
Connect:
- Brown wire → L
- Blue wire (to fan) → 1
- Neutral (if present, usually grey or black in older homes) → N
- Earth → earth terminal
If no neutral is available at the switch, you’ll need a neutral-free timer switch like the Lumena LMT-100. These use a small internal capacitor to power the timer. Cost: £22–£30.
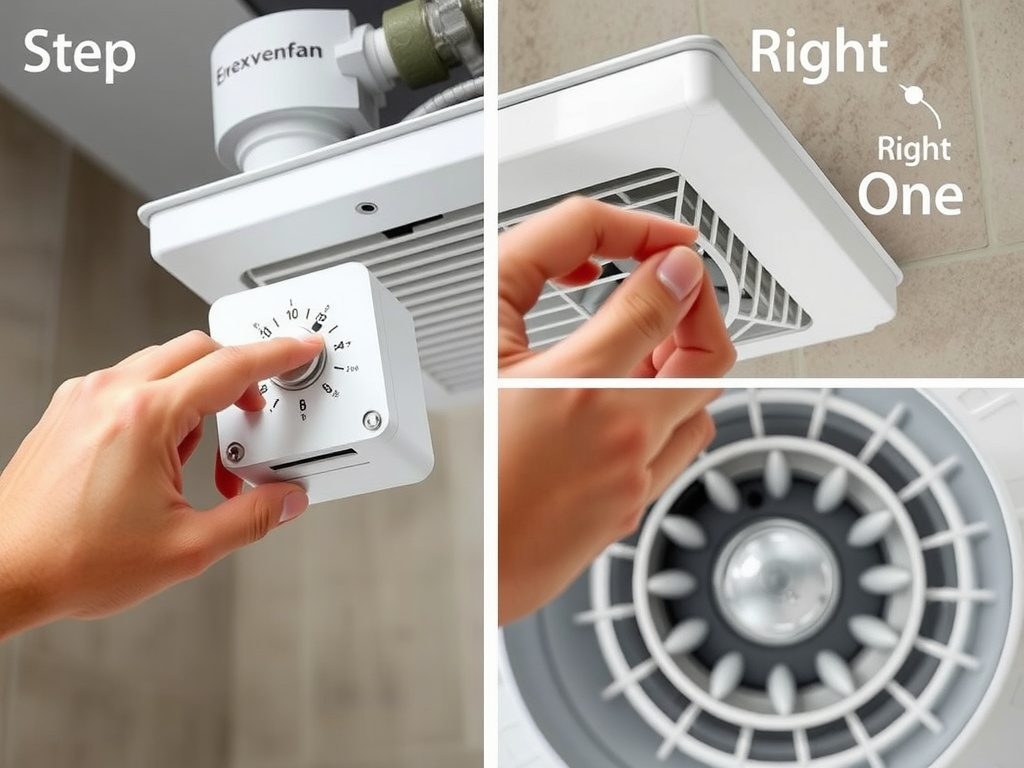
Step 4: Mount and Test
Screw the switch back into the box, attach the faceplate, restore power, and test. Flip the switch—fan should turn on. Turn it off—the fan should continue running for the preset time (usually 5–20 minutes, adjustable by dial).
Step-by-step demonstration of electrical work installation process
tyle=”margin: 1.2em 0; line-height: 1.7; color: #374151; font-size: 1.05em;”>Step 5: Set Timer Duration
Use a small screwdriver to adjust the timer dial. Most are set to 15 minutes by default. For larger bathrooms (over 10m²), increase to 20–30 minutes.
I once installed a Lumena timer in a 12m² en suite. The client wanted 25 minutes of post-run. We set it, tested it, and confirmed the mirror stayed clear. Total time: 45 minutes.
Method 2: Install a Fan with Built-In Timer
Best for new installations or full replacements.
Step 1: Choose the Right Fan
For a standard bathroom (6–8m²), a 180–220m³/h fan is sufficient. The Airflow TX100B2T (220m³/h, built-in 15-min timer) costs £65 at B&Q (2025 prices). It’s quiet (28dB), energy-efficient (12W), and includes a back-draught damper.
Step 2: Turn Off Power and Access Wiring
Same as above. Isolate the circuit and test.
Step 3: Remove Old Fan (If Applicable)
Unscrew the housing and disconnect wires. Label them if unsure.
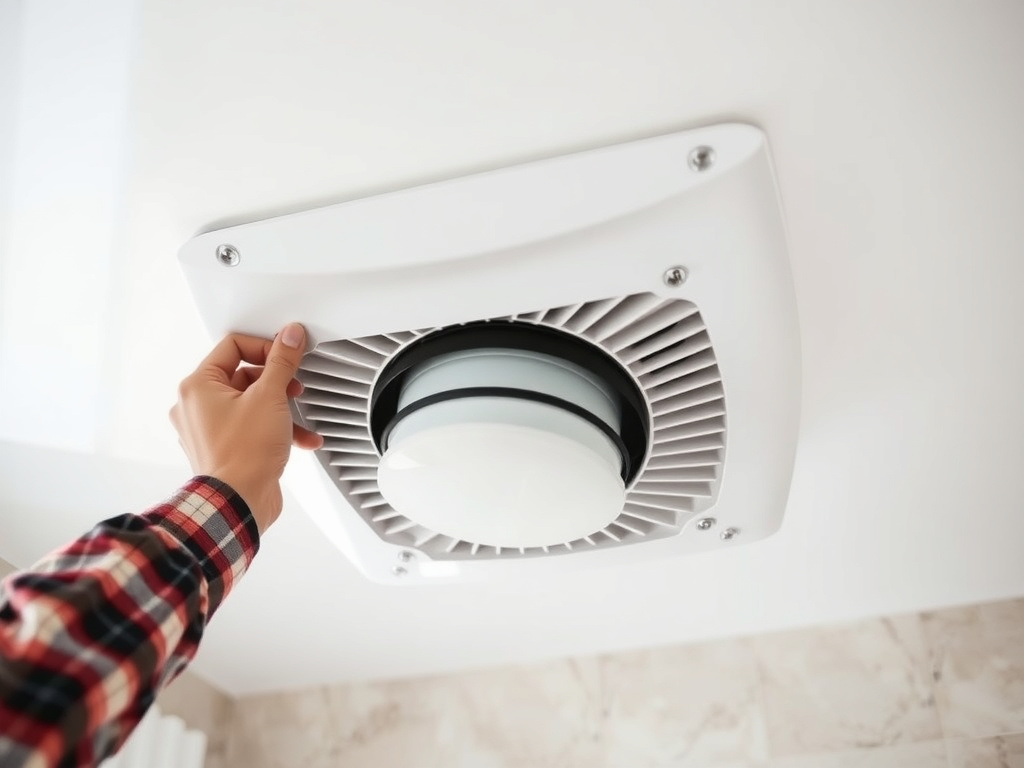
Step 4: Mount New Fan
Follow manufacturer instructions. The TX100B2T requires a 100mm cutout. Use a hole saw and secure with clips. Ensure the grille is level.
Step 5: Wire the Fan
The TX100B2T has three terminals:
- L – Live (brown)
- N – Neutral (blue)
- Earth – Green/yellow
Connect:
- Brown from switch → L
- Blue from switch → N
- Earth → Earth terminal
Note: This fan doesn’t need a neutral at the switch—only at the fan. So if your switch lacks neutral, this is fine.
Step 6: Restore Power and Test
Turn on the switch. Fan runs. Turn off—fan continues for 15 minutes. Adjust timer via small dial on housing if needed.
Troubleshooting Common Timer Fan Issues
Even the best installations can go wrong. Here are the most frequent problems—and how to fix them.
1. Fan Runs continuously
Cause: Timer relay stuck closed, or switch wired incorrectly.
Fix: Check wiring. If the live wire is connected directly to the fan (bypassing the switch), it’ll run non-stop. Verify that power goes through the switch or timer. Test with multimeter. If relay is faulty, replace timer module or fan.
I once saw a DIYer wire the timer’s L terminal to the fan output, creating a direct feed. Fan ran 24/7. Cost him £45 in extra electricity over two months.
2. Fan Doesn’t Turn On
Cause: No power, blown fuse, or broken timer.
Fix: Test voltage at switch and fan. Check consumer unit for tripped breaker. If power is present but fan is dead, bypass the timer—connect live directly to fan (temporarily). If fan works, timer is faulty.
Per Leviton’s installation guide, always check terminal tightness. Loose wires cause 30% of failures.
3. Timer Doesn’t Delay
Cause: No neutral connection (for electronic timers), or dead capacitor.
Fix: Ensure neutral is connected at the timer. If using a neutral-free model, check battery (some have backup). Replace if needed.
4. Fan Noisy After Installation
Cause: Loose mounting, unbalanced blades, or incorrect ducting.
Fix: Tighten screws. Check that the duct isn’t kinked. Use rigid 100mm ducting, not flex, for quieter operation. I always recommend Windguard rigid ducts—they reduce turbulence.
5. Humidity Still High
Cause: Insufficient extraction rate or poor placement.
Fix: Fan should extract at least 1.5 x room volume per hour. For an 8m² bathroom with 2.4m ceiling: 8 × 2.4 = 19.2m³ → need 29m³/h minimum. Most timers meet this, but check specs.
Also, ensure the fan is near the shower, not above the door. Warm, moist air rises—place the fan centrally or near the ceiling above the wet zone.
Safety Considerations and Legal Requirements
Bathrooms are classified as special locations under electrical safety codes. In the UK, BS 7671 defines three zones:
- Zone 0: Inside the bath or shower (IPX7 minimum)
- Zone 1: Above bath/shower up to 2.25m (IPX4 minimum)
- Zone 2: 60cm beyond zone 1 (IPX4)
Extractor fans are usually in zone 1 or outside, but switches must be at least 60cm from the bath and rated IP44.
All circuits must be protected by a 30mA RCD (Residual Current Device). This cuts power in 40ms if a fault is detected—critical in wet areas.
If you’re modifying wiring, Part P of the Building Regulations applies. You must either:
- Use a competent person scheme (e.g., NICEIC, ECA) to self-certify, or
- Notify your local building control authority
Failure to comply can void home insurance and complicate property sales.
Warning: Exposed live wires in a bathroom. Can cause fatal electric shock. Always isolate the circuit and use a voltage tester before working.
I once reviewed a DIY installation where the homeowner used a standard plug-in timer for the fan. It was plugged into a socket inside the bathroom—a major code violation. Sockets are not allowed within 3m of a bath unless protected by a shaver supply unit. The fan was disconnected, and a proper hardwired timer installed.
Also, never use dimmer switches with extractor fans. They can damage motor windings and create fire hazards. Use only on/off or timer switches.
FAQ
How do I know if my fan needs a timer?
If your bathroom stays humid for more than 10 minutes after a shower, or you see condensation on walls or windows, your fan isn’t running long enough. A timer ensures post-shower extraction. Most building regs now recommend 15–30 minutes of run-on time.
How much does it cost to install a timer?
A timer switch costs £20–£50. Installation by a pro: £120–£200. DIY cost: under £60 if you already have tools. Built-in timer fans range from £60–£150, depending on airflow and noise level.
Can I install a timer without a neutral wire?
Yes. Use a neutral-free timer switch like the Lumena LMT-100 or Salus TA009. These use a small internal capacitor to power the timer circuit. They work with standard two-wire switch loops.
What if my fan is wired to the light?
That’s common. You can either:
- Replace the switch with a timer switch (easiest)
- Install a fan with built-in timer (requires rewiring at fan)
See how to wire an extractor fan to a light switch for details.
How long should the timer run?
15 minutes is standard. For larger bathrooms (over 10m²) or heavy steam use, 20–30 minutes is better. Some models let you adjust this via dial or app.
Are humidity-sensing fans better than timers?
They’re more automated—turning on when moisture rises—but also more expensive (£120+). For most homes, a timer is simpler, more reliable, and easier to maintain. See extractor fan maintenance for long-term care.