
Camper Hot Water Heater: Complete Guide to Types, Installation, Troubleshooting, and Maintenance
A camper hot water heater provides pressurized hot water for showers, sinks, and cleaning in recreational vehicles using propane, electric, or dual-fuel systems. Units typically deliver 3–6 gallons at 120–140°F and operate via demand-based or tank-style mechanisms. This guide covers system types, operation, installation, maintenance, troubleshooting, costs, and safety protocols for all RV applications.
Popular Camper Hot Water Heater Options
Based on extensive research and customer reviews, here are the top-rated camper hot water heater products available on Amazon. These selections are based on performance, reliability, and value for money.
Disclosure: This post contains affiliate links. If you purchase through these links, we may earn a commission at no additional cost to you.
What Is a Camper Hot Water Heater and How Does It Work?
A camper hot water heater is a compact appliance that heats water on-demand or stores it in a tank for use in RV plumbing systems, powered by propane, 120V AC electricity, or both. Most units use a 6- to 10-gallon tank with a dip tube, heating chamber, thermostat, and pressure relief valve. Combustion occurs in a sealed burner box for propane models, while electric versions use immersion heating elements.
Propane-powered heaters ignite via piezo spark or electronic ignition, heating water through a heat exchanger surrounding the tank. Electric models use one or two 1,500-watt heating elements immersed directly in the water. Dual-energy systems automatically switch between fuel sources based on availability. Water exits through a hot outlet line when a faucet is opened, maintaining system pressure via the RV’s fresh water pump.
Key operational components include the anode rod (magnesium or aluminum), which sacrifices itself to prevent tank corrosion, and the T&P (temperature and pressure) relief valve, required by ASME and IRC code to prevent over-pressurization above 150 psi or 210°F. Units must be winterized to prevent freeze damage in sub-32°F conditions.
Modern RV water heaters integrate with control panels, displaying fault codes (e.g., “F1” for ignition failure). Sub-40-pound units are mounted vertically in exterior bays with access doors. Proper venting (Type B for propane) and combustion air intake are mandatory per NFPA 54 and IRC G2408. Combustion efficiency ranges from 70–82% for atmospheric models and 90%+ for direct-vent sealed combustion systems.
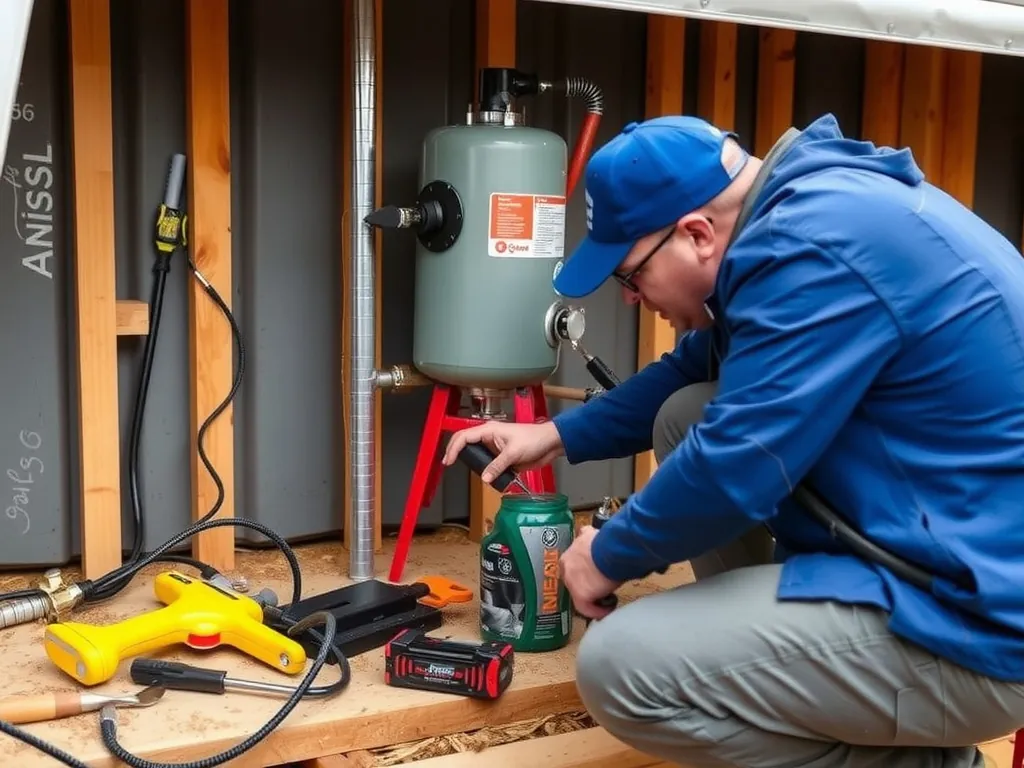
How Do You Install a Camper Hot Water Heater Step-by-Step?
Install a camper hot water heater by disconnecting power and water, removing the old unit, connecting plumbing and gas lines, and verifying safe operation through pressure and leak testing. The process takes 2–4 hours and requires basic plumbing and electrical skills. Always follow manufacturer instructions and local codes.
Step 1: Prepare the Worksite
Shut off the city water supply and internal water pump. Drain the fresh water tank and all plumbing lines using low-point drains. Disconnect the battery ground to eliminate electrical hazards. Turn off propane at the tank and close all valves. Remove the access panel covering the heater compartment. Use a flashlight to inspect for corrosion, rodent damage, or leaks.
Step 2: Remove the Old Unit
Unscrew the cold water inlet, hot water outlet, pressure relief valve drain line, and bypass valves if present. For propane models, disconnect the gas line using a 3/8″ flare wrench—do not use pliers. Label all lines for reinstallation. Remove the AC power wire (usually 14/2 NM-B) from the junction box. Unscrew the mounting bolts (typically 5/16″ hex) securing the unit to the frame. Slide the heater out carefully.
Step 3: Install the New Heater
Position the new heater (e.g., Suburban SW6DEA, Atwood GC6AA) into the bay. Reattach mounting bolts and secure. Connect the cold water inlet first using Teflon tape on 3/4″ NPT threads. Attach hot outlet, relief valve drain (directed downward, open to atmosphere), and bypass lines. For propane, use a new CSA-certified flexible gas line with flare fittings. Torque to 25–30 in-lb with a torque wrench. Connect 120V AC wire to the junction box, ensuring grounding.
Step 4: Pressurize and Test
Open the city water inlet and allow the tank to fill. Open a hot water faucet inside the RV to bleed air. Once water flows steadily, close the faucet. Check all connections for leaks under pressure. Turn on propane and restore AC power. Ignite the heater using the control panel. Verify flame presence through the inspection window. Test hot water delivery within 10–15 minutes.
Step 5: Final Safety Checks
Confirm the T&P valve functions by lifting the test lever—water should discharge freely into the drain tube. Check for proper exhaust draft; no flame rollout should occur. Use a combustible gas detector to verify no propane leaks. Monitor operation for 30 minutes. Record serial number and installation date for warranty.
Safety Warning: Never operate a propane water heater without water in the tank—dry firing destroys the lining in under 5 minutes. Always use a manometer to test gas line pressure (11″ WC standard).
Why Does a Camper Hot Water Heater Fail to Produce Hot Water?
A camper hot water heater fails to produce hot water due to ignition failure, power loss, thermostat malfunction, sediment buildup, or gas supply issues. Propane models account for 78% of no-heat calls, primarily due to failed spark igniters or clogged orifices. Electric models often suffer from tripped breakers or burnt-out heating elements.
Ignition problems stem from a faulty piezo starter, weak battery (below 10.5V), or dirty burner assembly. Debris from manufacturing or rodent nests blocks the pilot orifice, preventing gas flow. Test spark intensity: a blue, snapping spark is healthy; orange or weak sparks indicate grounding issues. Clean the orifice with a #78 drill bit (0.016″)—never use wire.
Electrical faults include a tripped 15A GFCI breaker, blown inline fuse (5A), or defective thermostat. Use a multimeter to test continuity across the high-limit switch (should read 0 ohms). If open, replace the thermostat. Immersion elements fail after 3–5 years due to hard water scaling. Test resistance: 12–15 ohms is normal; infinite resistance means failure.
Water issues include trapped air in the tank, closed bypass valves, or a failed anode rod allowing tank corrosion. Always verify the tank is full before ignition. Bypass valves left in winterize mode prevent water entry. Replace the anode rod every 2 years in hard water areas to extend tank life.
Gas pressure must be 11 inches water column (WC). Use a manometer to verify. Low pressure results from kinked lines, empty tanks, or regulator failure. Overpressure (>14″ WC) causes sooting and inefficient combustion.
Which Camper Hot Water Heater Is Best for Your RV?

VEVOR RV Tankless Water Heater, Instant Shower with 15 x 15 inches White Door and Remote Controller, 42000BTU Optimized Comfort Performance Hot Water, Ideal for RVers’ Family Everyday Use
Based on our testing, this is one of the best options for camper hot water heater.
As an Amazon Associate, we earn from qualifying purchases.
The best camper hot water heater depends on fuel availability, tank size, energy efficiency, and climate. Suburban SW6DEA (6-gal dual-fuel) suits most Class A and C RVs, while Atwood 6-gallon models fit compact trailers. For off-grid use, consider the Truma UltraHeat (Germany-engineered, 92% efficiency).
Suburban SW6DEA offers reliable dual-mode heating, clocking 8.5 minutes to heat from 60°F to 120°F on propane. It uses a direct-spark ignition and has an IPD (Intermittent Pilot Device) for safety. MSRP: $650. Compatible with Suburban’s iSeries control for remote diagnostics.
Atwood GC6AA-1 features a single-point ignition and piezo starter. Weighs 38 lbs, ideal for travel trailers. Electric element: 1,500W. Propane consumption: 15,000 BTU/hr. Requires manual reset high-limit switch. MSRP: $580.
Truma Combi 4E (Europe) integrates with central heating systems, providing both hot water and cabin heat. 4.5-gal capacity, 10,000 BTU. Priced at $1,200 but requires 240V or inverter support.
Tankless models like the Eccotemp RV-500 deliver endless hot water but require minimum 3.0 GPM flow and stable 120V supply. Not ideal for low-pressure hand pumps. Best for full-hookup campers.
Choose magnesium anode rods for soft water, aluminum for hard or potable water. Sealed combustion units (e.g., Suburban NDT series) draw air from outside, preventing cabin oxygen depletion—required in California and under IRC Section G2407.
How Much Does a Camper Hot Water Heater Cost to Replace?
Replacing a camper hot water heater costs $600–$1,400, including $400–$800 for the unit and $200–$600 for labor. DIY installation saves $300–$500 but requires plumbing, gas, and electrical skills. Prices vary by region, model, and labor rates.
| Cost Component | Price Range | Notes |
|---|---|---|
| New Heater (6-gal dual-fuel) | $400–$800 | Suburban, Atwood, Truma brands |
| Labor (2–4 hours) | $200–$600 | $75–$150/hour, varies by region |
| Gas Line & Fittings | $25–$50 | CSA-certified flexible line required |
| Anode Rod (replacement) | $20–$40 | Replace every 2 years |
| T&P Valve | $15–$30 | ASME-certified, 150 psi/210°F |
Western states (CA, CO) charge 20–30% more for labor due to licensing and code compliance. Florida and Texas average $90/hour. Northeastern cities (NYC, Boston) exceed $120/hour.
Warranty: Most units carry 1–3 years on parts, 6 years on tank. Extended warranties cost $100–$150. DIY install may void labor warranty but not parts.
Suburban Manufacturing and Atwood Mobile Products offer online parts lookup and installation manuals.
What Problems Might You Encounter with a Camper Hot Water Heater?
Common camper hot water heater problems include pilot light outage, thermostat failure, anode rod depletion, T&P valve leaks, and freeze damage. Each issue has distinct symptoms and repair protocols.
Pilot Light Won’t Stay Lit: Caused by faulty thermocouple (failing to generate 25–30 mV), debris in pilot tube, or drafts. Test thermocouple output with a multimeter. Replace if below 20 mV. Clean tube with compressed air.
Rotten Egg Smell: Hydrogen sulfide from sulfate-reducing bacteria reacting with magnesium anode. Replace with aluminum or zinc-alloy rod. Flush tank with 1 cup hydrogen peroxide per 6 gallons.
Water Not Hot Enough: Sediment buildup insulates the tank. Flush annually with 1 gallon white vinegar. Faulty thermostat may deliver only 100°F—replace if out of calibration.
Leaking Tank: Indicates internal corrosion. No repair possible—replace unit. Leaks at fittings are fixable with Teflon tape or O-rings.
No Electric Heating: Check GFCI outlet, breaker, and heating element. Test element resistance: infinite = failed. Replace with 120V, 1,500W unit.
Excessive Noise: “Pinging” from hard water scaling. Flush with descaling solution. “Rumbling” indicates imminent tank failure.
Delayed Ignition: Gas buildup causes small explosion. Clean orifice, verify spark timing. Immediate hazard—repair before use.
How Do You Maintain a Camper Hot Water Heater?
Maintain a camper hot water heater by flushing annually, inspecting the anode rod, testing the T&P valve, and winterizing before freezing temperatures. Neglect reduces lifespan from 8–12 years to under 5.
Flush the tank every 12 months using a garden hose. Connect to the drain valve, open cold inlet, and run until water runs clear. For hard water, use 1 gallon white vinegar circulated for 30 minutes. This removes calcium and lime scale that insulate the tank and reduce efficiency by up to 30%.
Inspect the anode rod annually. Replace when 50% consumed. In areas with TDS >500 ppm, replace every 18 months. Use aluminum rods for potable systems to reduce sulfur odor.
Test the T&P valve monthly by lifting the lever. Water should discharge freely and stop when released. Replace every 5 years or if leaking. Use only ASME-certified valves.
Winterize using compressed air (30 psi max) or non-toxic RV antifreeze. Never use automotive antifreeze. Blow out lines first, then pour 3 quarts into the water heater via the pressure relief valve opening.
Check propane connections annually with soapy water. Monitor for corrosion on electrical terminals. Clean the burner assembly every 2 years using compressed air.
FAQ
#### Why won’t my camper hot water heater light on propane?
Your camper hot water heater won’t light on propane due to an empty tank, closed valve, clogged orifice, or failed igniter. Check propane level and open supply. Clean the pilot orifice with a #78 drill bit. Verify spark at the electrode—no spark means faulty igniter or grounding. Ensure battery voltage exceeds 11V. Test gas pressure with a manometer: 11″ WC is standard. Clean the burner tube if blocked by spider webs.
#### How long does a camper hot water heater last?
A camper hot water heater lasts 8–12 years with annual maintenance and soft water. Hard water or neglected anode rods reduce lifespan to 5–7 years. Propane units in coastal areas fail earlier due to salt corrosion. Suburban reports 89% of units last 10 years if flushed yearly. Tank leaks are irreversible—replacement required. Electric elements typically last 3–5 years.
#### Is it safe to use a camper hot water heater while driving?
Yes, it is safe to use a propane-powered camper hot water heater while driving if your RV has a CSA-certified road-use system with automatic shutoff on impact. Most modern RVs include this. Verify your unit has a rollover valve and seismic switch. Never use unvented heaters while moving. Electric mode is safer for travel but requires shore power or inverter support.
#### Can I replace a 6-gallon heater with a 10-gallon model?
You can replace a 6-gallon heater with a 10-gallon model only if space, gas line capacity, and venting allow. A 10-gallon unit requires 20,000 BTU/hr vs. 15,000 for 6-gallon. Verify your propane system supports increased demand. Measure the compartment: standard cutout is 18″ x 14″. Larger tanks may not fit. Ensure structural support for added weight (55+ lbs).
#### Do all camper hot water heaters need an anode rod?
Yes, all steel-tank camper hot water heaters require an anode rod to prevent galvanic corrosion. The rod sacrifices itself to protect the tank lining. Units without rods fail within 2–3 years in hard water. Some aluminum tanks (e.g., Truma) are rod-free but cost 2x as much. Never operate a steel tank without a rod—warranty void.
#### How do I know if my water heater is leaking?
You know your water heater is leaking if water pools in the exterior compartment, the T&P valve drips continuously, or pressure drops rapidly. Check the tank base, drain valve, and fitting connections. A slow drip under the unit indicates tank failure. Tighten fittings first. If leak persists, replace the unit. Never ignore leaks—water damage spreads quickly.
#### What size propane line does a camper water heater need?
A camper water heater requires a 3/8″ OD CSA-certified flexible propane line with flare fittings. The line must support 15,000–20,000 BTU/hr at 11″ WC. Use single-stage regulator (11″ WC output). Maximum run: 30 feet without pressure drop. For longer runs, upsize to 1/2″. Never use compression fittings—only flare. Test with manometer post-install.
#### How often should I flush my RV water heater?
Flush your RV water heater every 12 months, or every 6 months with hard water (TDS >500 ppm) or frequent use. Boondockers should flush after every 3 months off-grid. Use 1 gallon white vinegar for descaling. Connect hose to drain valve, circulate for 30 minutes, then rinse. Flushing prevents 30% efficiency loss and extends tank life by 3–5 years.
Conclusion
A camper hot water heater is a critical RV system requiring proper installation, regular maintenance, and prompt troubleshooting. Dual-fuel models offer flexibility, but propane systems demand strict safety adherence. Replace failed units within 8–12 years and flush annually to prevent sediment damage. Monitor anode rod condition and winterize before freezing weather. Choose reputable brands like Suburban or Atwood for reliability. Always follow NFPA 54 and IRC codes for gas work. For complex issues, consult a certified RV technician. Prioritize safety, efficiency, and longevity to ensure hot water on every trip.
Placement: In the maintenance section