
Rinnai tankless water heater installation requires precise gas line sizing, proper venting, electrical hookups, and compliance with UPC and NEC codes to ensure safety and efficiency. Unlike tank systems, tankless units demand ¾-inch gas lines, dedicated 120V circuits, and condensate drainage, making DIY installs risky without certified training. This guide covers sizing, venting, gas/electrical requirements, step-by-step installation, regional code variations, and troubleshooting for Rinnai models RU, RE, and RL series.
What Is a Rinnai Tankless Water Heater and How Does It Work?
A Rinnai tankless water heater is a condensing gas-fired unit that heats water on demand using a modulating burner and copper heat exchanger, eliminating standby energy losses. It activates when a hot water tap opens, triggering a flow sensor that ignites the burner and adjusts output based on temperature rise and flow rate. Unlike storage tanks, it provides continuous hot water at 1.5–5.5 GPM, depending on model and inlet temperature. Efficiency exceeds 94% AFUE, and it condenses flue gases to recover latent heat, reducing fuel consumption by 20–40% compared to conventional tank heaters.
This design requires strict adherence to venting, gas supply, and electrical standards. Condensate must be drained to prevent corrosion, and combustion air must be unobstructed. Rinnai units are designed for indoor or outdoor use (model-dependent), but all require professional installation to meet warranty and code requirements. Understanding its operation informs proper sizing and installation sequencing.
How Do You Size a Rinnai Tankless Water Heater Correctly?
Sizing a Rinnai tankless water heater requires calculating total simultaneous hot water demand in gallons per minute (GPM) and the required temperature rise (ΔT). Multiply the flow rate of all fixtures expected to run concurrently—shower (2.5 GPM), dishwasher (1.5 GPM), kitchen sink (1.5 GPM)—to get total GPM. Subtract the incoming water temperature (e.g., 45°F in northern climates) from your desired output (120°F) to determine ΔT. For example, 120°F – 45°F = 75°F ΔT. A Rinnai RU160iN (16 GPM max) handles up to three showers and a dishwasher if ΔT is ≤70°F. In colder regions, you may need the RU199iN (19.9 GPM) to maintain output.
Incorrect sizing causes insufficient hot water or oversized units wasting capital cost. Rinnai’s online sizing tool (rinnai.com/sizing) uses zip code-based inlet temps and fixture data. For homes with 3+ bathrooms or jetted tubs, select a model rated for 18+ GPM. Oversizing increases gas line and venting complexity without benefit. Undersizing results in lukewarm water during peak use. Always verify local code allowances for maximum fixture unit loads per IRC Table P2704.1.
Why Does a Rinnai Tankless Water Heater Need a Dedicated Gas Line?
Rinnai tankless water heaters require a dedicated ¾-inch gas line because they draw 199,000–250,000 BTU/hr during peak operation, far exceeding the 40,000–60,000 BTU/hr demand of traditional tank heaters. Standard ½-inch lines cannot deliver sufficient gas volume under pressure drop, causing flame rollout, incomplete combustion, or shutdowns. The ¾-inch line ensures stable gas pressure (minimum 5″ WC inlet, max 14″ WC) regardless of other appliances running.
Rinnai models RU160iN and RU199iN require 250,000 BTU/hr input. A 50-foot run from meter to heater on ½-inch pipe may drop pressure below 5″ WC, triggering error code E1 (low gas pressure). Even if the existing line is ¾-inch, it must be dedicated—no tees to furnaces or ranges. Use black iron pipe per UPC Section 1212.3; CSST (corrugated stainless steel tubing) is permitted if installed per manufacturer specs and UL 2044 certified. Always perform a manometer test post-installation to verify pressure under load.
How Do You Install the Venting System for a Rinnai Tankless Water Heater?
Rinnai tankless water heaters use concentric venting (dual-wall) with 2″ inner flue and 3″ outer intake, either horizontally through an exterior wall or vertically through the roof. Horizontal venting requires 1/4″ per foot slope away from the unit to prevent condensate backflow. Vertical runs must terminate at least 12″ above the roofline and 4′ from windows or air intakes per IRC Section 903.3. Rinnai’s proprietary vent kits (e.g., VENT-160, VENT-199) are mandatory for warranty compliance.
Condensing units produce acidic condensate (pH 3–4), so PVC or CPVC venting is required for the exhaust leg, not metal. The intake leg draws outdoor air for combustion and must not share space with other vents. All joints must be sealed with high-temperature silicone (e.g., DAP 1200) or manufacturer-approved sealant. Never use standard HVAC duct tape. A 90-degree elbow reduces effective vent capacity by 30%; use two 45-degree elbows instead. Install a condensate trap and drain line to a floor drain or sump pump per UPC Section 709.4.
What Electrical Requirements Are Needed for Rinnai Tankless Water Heater Installation?
Rinnai tankless water heaters require a dedicated 120V, 15-amp circuit with GFCI protection per NEC Article 422.13, even though the unit is gas-fired. The control board, ignition system, and flow sensor draw 1–2 amps during operation and require stable voltage to prevent erratic shutdowns or ignition failure. A shared circuit can cause voltage dips when other appliances cycle, triggering error code E2 (ignition failure) or E6 (sensor fault).
Install a junction box within 6 feet of the unit for the power supply. Use 14/2 NM-B (Romex) cable with a 15-amp breaker. Do not use extension cords or power strips. If the unit is installed outdoors (e.g., Rinnai RL75iP), the electrical enclosure must be NEMA 3R-rated. Ground the unit to the building’s grounding electrode system using 10 AWG copper wire per NEC 250.52. Always verify local amendments—some jurisdictions require arc-fault protection or additional disconnect switches. Never bypass the built-in safety interlocks.
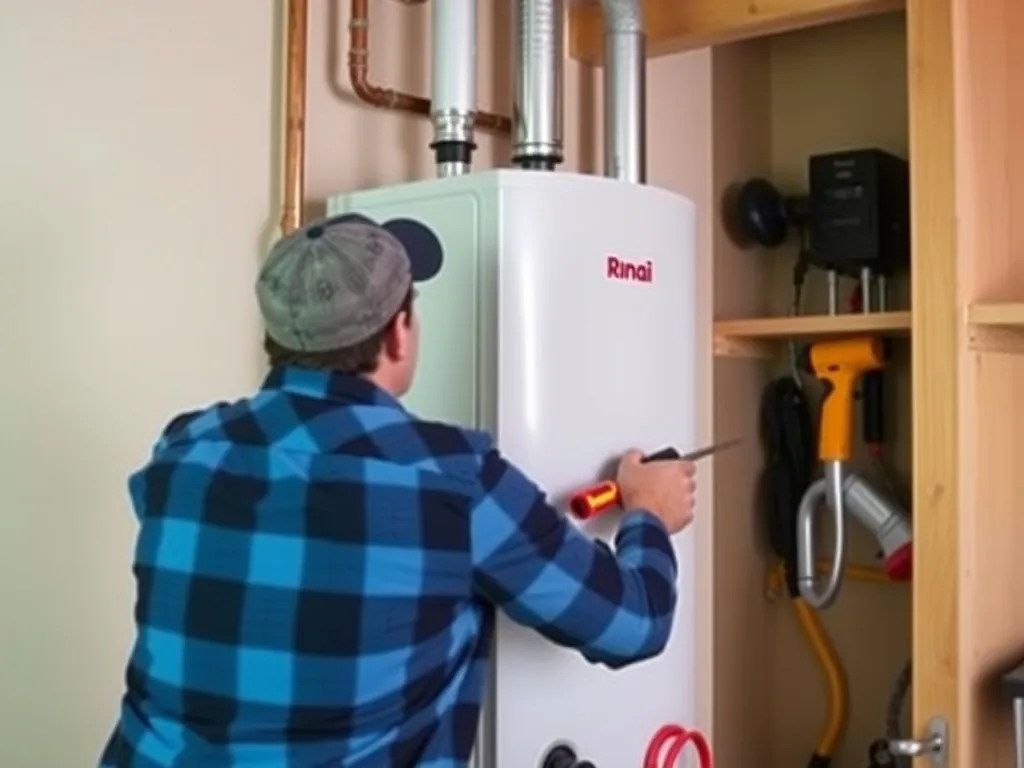
How Do You Install a Rinnai Tankless Water Heater Step-by-Step?
1. Turn off gas and water supply. Shut off the main gas valve and isolate the cold water line upstream of the unit. Depressurize the system by opening a hot water tap.
2. Mount the unit on a non-combustible wall using the provided bracket. Maintain 3″ clearance from combustibles, 12″ from floor, and 24″ overhead for venting access per Rinnai’s manual. Use a level and anchor into studs with lag bolts.
3. Install the ¾-inch gas line from the meter or regulator to the unit. Use threaded black iron or CSST. Install a shut-off valve within 6 feet of the unit. Test for leaks with soapy water or a manometer.
4. Connect the concentric vent kit. Attach the intake/exhaust pipes with hose clamps. Slope the exhaust leg downward 1/4″ per foot toward the exterior. Secure with vent straps every 4 feet.
5. Connect the cold water inlet and hot water outlet using ¾-inch copper or PEX with isolation valves. Install a pressure relief valve (PRV) on the hot line per UPC 608.4.
6. Connect the 120V power supply to the junction box. Use a GFCI breaker. Connect the white, black, and ground wires to the terminal block inside the unit.
7. Install the condensate drain line (3/4″ PVC) from the drain port to a floor drain or sump. Ensure no siphoning occurs; install an air gap if discharging into a sink.
8. Open water valves slowly. Purge air by running hot water at the farthest fixture until steady flow. Check for leaks.
9. Turn on gas. Press the power button. The unit will self-diagnose and ignite. Confirm flame status on the display.
10. Set temperature to 120°F via the remote control. Test flow at multiple fixtures. Verify no error codes. Document installation date and serial number.
How Much Does Rinnai Tankless Water Heater Installation Cost?
Rinnai tankless water heater installation costs $2,500–$5,500 for a standard indoor retrofit, including unit, materials, labor, and permits. The unit itself ranges from $1,200 (RU160iN) to $1,800 (RU199iN). Labor averages $1,000–$2,000 depending on regional rates ($75–$125/hour). Gas line upgrades (to ¾-inch) add $500–$1,500 if existing piping is undersized. Venting modifications (wall penetration, roof cap, condensate drain) cost $400–$1,000. Electrical upgrades (new GFCI circuit) are $200–$400. Permits range from $150–$400.
In cold climates (e.g., Minnesota, Maine), higher-capacity units and insulated piping increase costs by $800–$1,200. Outdoor models (RL75iP) eliminate venting costs but require weatherproof enclosures ($300–$600). DIY installations can save $1,500–$3,000 but void the 12-year warranty unless performed by a licensed plumber/gas fitter. ROI occurs in 7–12 years via energy savings (EPA estimates $100–$200/year reduction in gas bills). Compare quotes from HVAC contractors certified in Rinnai installations.
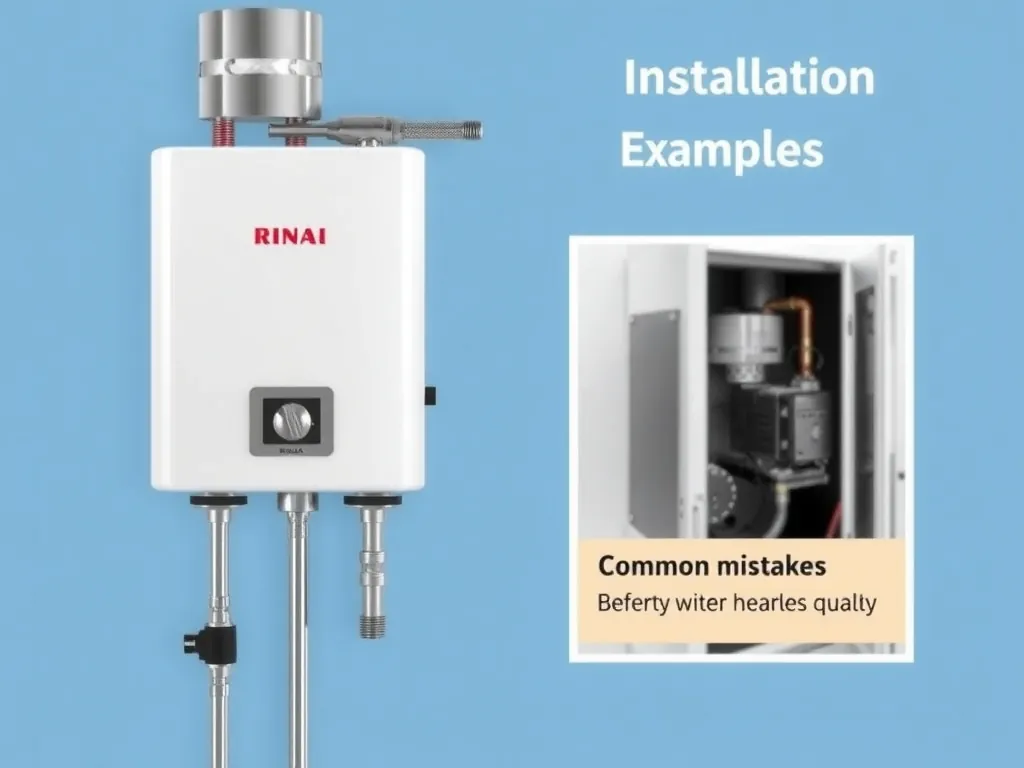
What Problems Might You Encounter During Rinnai Tankless Water Heater Installation?
Common problems include insufficient gas pressure, condensate drain blockages, improper vent slope, and electrical interference. Error code E1 (low gas pressure) often results from undersized piping or multiple appliances on one line. E2 (ignition failure) occurs if the spark electrode is misaligned or the gas valve is faulty. E6 (sensor fault) typically stems from water flow sensor contamination from debris in new plumbing lines. Condensate drainage issues cause water pooling and corrosion—always slope the PVC drain line downward and avoid long horizontal runs.
Incorrect venting can lead to carbon monoxide backdrafting. If the intake and exhaust are too close (<10 feet), exhaust gases may be re-ingested. Horizontal vent terminations must be below the eave line to prevent snow blockage. Electrical noise from variable-speed drives (e.g., HVAC compressors) can disrupt the control board—install a surge suppressor. In hard water areas, mineral buildup on the heat exchanger reduces efficiency within 1–2 years; install a scale inhibitor or water softener. Always flush the unit after installation with a 5-gallon vinegar solution per Rinnai’s maintenance protocol.
How Do You Test and Commission a Rinnai Tankless Water Heater?
After installation, perform a 3-step commissioning process. First, conduct a gas pressure test using a manometer: measure static pressure (should be 5–14″ WC) and then dynamic pressure with the unit running (must remain ≥5″ WC). Second, verify water flow: open three fixtures simultaneously (shower, sink, dishwasher) and measure output with a bucket and timer. Flow must meet the unit’s rated GPM at 120°F. Third, test for error codes: run the unit for 20 minutes, then check the display for E1–E8 codes. Clear any codes by power-cycling.
Use the remote control to confirm temperature settings (100–140°F range). Test the anti-freeze mode if installed in a garage or unheated space. Confirm condensate drain is flowing steadily into the designated drain. Inspect for leaks at all joints—especially gas fittings, water connections, and vent seams. Document all readings and settings in the service log. Provide the homeowner with the Rinnai user manual and maintenance schedule. Schedule a follow-up inspection in 30 days to check for settling or minor leaks.
What Maintenance Does a Rinnai Tankless Water Heater Require?
Rinnai tankless water heaters require annual maintenance to preserve efficiency and warranty validity. Flush the heat exchanger with 1–2 gallons of undiluted white vinegar or Rinnai’s proprietary descaling solution every 12–18 months, depending on water hardness. Use a submersible pump to circulate solution for 45 minutes through the cold and hot water lines, then flush with fresh water. Clean the inlet water filter monthly by removing the screen and rinsing under tap water.
Inspect the combustion chamber and burner for soot or corrosion every 6 months. Replace the air filter (if equipped) every 3–6 months. Check the venting system for blockages from debris or bird nests. Test the pressure relief valve annually by lifting the lever—water should discharge freely. Monitor the display for recurring error codes. In areas with water hardness >7 grains, install a whole-house water softener to prevent scale buildup. Neglecting maintenance voids the 12-year limited warranty and reduces unit life by 30–50%.
FAQ
#### Why does my Rinnai tankless water heater shut off after a few minutes of use?
This typically occurs due to insufficient gas supply or overheating from restricted airflow. Check for error codes E1 (low gas pressure) or E8 (overheat). If the gas line is undersized or has restrictions, the burner cannot maintain flame. Ensure the unit has 3″ clearance on all sides and the vent is unobstructed. Clean the air intake filter and verify the inlet water temperature isn’t below 40°F. If no codes appear, the flow sensor may be clogged—flush the system with vinegar. Replace the gas regulator if pressure drops under load.
#### Is it cheaper to install a Rinnai tankless water heater or a traditional tank?
Upfront installation costs for a Rinnai tankless unit are 2–3 times higher than a standard 50-gallon tank ($800–$1,500). However, tankless units last 20+ years versus 8–12 for tanks, and reduce annual gas bills by 20–40%. In high-use households (4+ people), the payback period is 7–9 years. In low-use homes, a tank may be more economical. Rinnai’s efficiency qualifies for federal tax credits (up to $3,200 under Inflation Reduction Act), offsetting initial cost. Choose tankless for long-term savings and continuous hot water.
#### Can I install a Rinnai tankless water heater myself to save money?
While technically possible, DIY installation voids the 12-year limited warranty unless performed by a licensed plumber or gas fitter certified by Rinnai. Gas line modifications, venting, and electrical work require permits and inspections. Improper installation risks carbon monoxide poisoning, fire, or explosion. Most insurance policies deny claims for unpermitted plumbing work. Rinnai requires proof of professional installation for warranty activation. Save money by hiring a qualified technician, not by risking safety or warranty.
#### Should I choose a Rinnai RU160iN or RU199iN for a 4-bedroom home?
For a 4-bedroom home with 2–3 bathrooms, choose the RU199iN if you live in a climate with incoming water temperatures below 50°F or if you frequently use multiple showers, a jetted tub, or a dishwasher simultaneously. The RU160iN can handle up to two showers and a sink, but may struggle during peak demand in winter. The RU199iN provides 19.9 GPM at 70°F ΔT, ensuring consistent output. Use Rinnai’s online sizing tool with your zip code to confirm. Avoid undersizing—lukewarm showers are more costly than upgrading the unit.
#### Do Rinnai tankless water heaters require a water softener?
Not required, but highly recommended in areas with water hardness above 7 grains per gallon (GPG). Hard water causes scale buildup on the copper heat exchanger, reducing efficiency by up to 30% within two years and triggering error codes E1/E6. A whole-house water softener extends unit life and reduces maintenance frequency. If a softener isn’t feasible, install a scale-inhibiting filter at the inlet and flush annually. Rinnai does not cover scale damage under warranty—prevent it proactively.
#### How long does Rinnai tankless water heater installation take?
A standard retrofit installation by a licensed professional takes 6–8 hours. Complex jobs—such as relocating the unit, upgrading gas lines, or installing new venting—can take 1–2 days. Outdoor models take less time (4–6 hours) due to no venting requirements. Permit review and inspections add 1–7 days depending on local jurisdiction. Schedule installation during off-peak seasons (spring/fall) to avoid contractor wait times. Avoid holidays or extreme weather for safety and efficiency.
#### What tools are required for Rinnai tankless water heater installation?
Essential tools include a manometer for gas pressure testing, a torque wrench for gas fittings (to prevent over-tightening), a pipe threader or die for ¾-inch black iron, a level, a stud finder, a drill with hole saws for venting, PVC cement, 14/2 NM-B wire, wire strippers, and a multimeter for electrical verification. A submersible pump is needed for descaling. Wear safety glasses and gas leak detection spray. Use Rinnai’s proprietary vent kits—do not substitute generic parts. Keep the unit’s installation manual accessible throughout.
#### How long does a Rinnai tankless water heater last?
A Rinnai tankless water heater lasts 20+ years with proper maintenance, compared to 8–12 years for conventional tanks. The stainless steel heat exchanger and modulating burner are designed for longevity. Warranty coverage includes 12 years on the heat exchanger and 5 years on parts for registered units. Lifespan is reduced by 30–50% if maintenance is neglected or water hardness exceeds 7 GPG. Annual flushing and scale prevention are critical. Units installed in garages or unconditioned spaces last longer if protected from freezing temperatures.
#### Can I use a Rinnai tankless water heater with a well system?
Yes, but ensure water pressure is between 20–120 PSI and flow rate exceeds 0.6 GPM to activate the unit. Install a pressure-reducing valve if pressure exceeds 80 PSI. Use a sediment filter at the inlet to prevent debris from clogging the flow sensor. Well water often contains iron or sulfur—install a whole-house filter to protect the heat exchanger. Test water quality annually. Rinnai units are compatible with well systems but require more frequent maintenance in high-mineral environments.
#### Does a Rinnai tankless water heater work during a power outage?
No. Unlike some battery-backup models, Rinnai tankless units require 120V electricity to power the control board, ignition system, and sensors. During a power outage, the unit will not activate, even if gas is available. Install a whole-home generator or battery backup system if continuous hot water is critical. Some contractors install a small UPS (uninterruptible power supply) to maintain control circuit operation during brief outages. Rinnai does not offer an internal battery option.
—