
Water Pipe Heating Tape: Complete Installation, Maintenance & Safety Guide
Water pipe heating tape prevents freezing in exposed or unheated plumbing by delivering consistent electrical heat along pipe surfaces, maintaining water flow in temperatures as low as -20°F. Self-regulating models adjust output based on ambient conditions, reducing energy use by up to 40% compared to constant-wattage types. This guide covers selection, NEC-compliant installation, troubleshooting, cost analysis, and freeze prevention strategies for residential and commercial applications.
What Is Water Pipe Heating Tape and How Does It Work?
Water pipe heating tape is an electrically powered cable that wraps around pipes to prevent freezing by maintaining a minimum internal water temperature above 32°F. It operates through resistive heating elements or conductive polymer cores that generate consistent thermal output when energized. Self-regulating versions reduce wattage as pipe temperature rises, preventing overheating and optimizing efficiency.
The core technology varies between constant-wattage and self-regulating (or “self-limiting”) designs. Constant-wattage tapes deliver uniform heat per foot—typically 5, 8, or 10 watts/ft—regardless of ambient temperature, making them suitable for well-insulated or deeply buried lines. Self-regulating tapes use a semi-conductive core that increases electrical conductivity when cold, automatically boosting heat output in freezing conditions and reducing it as temperatures rise.
These systems are powered by standard 120V or 240V household circuits and must be connected through Ground Fault Circuit Interrupter (GFCI) outlets or breakers per National Electrical Code (NEC) Article 427 and Article 422, which govern fixed electric space-heating equipment. The tape must never be overlapped during installation, as this creates hot spots that can degrade insulation or ignite surrounding materials.
Most modern heating tapes include built-in thermostatic controls or require external plug-in controllers that activate below 38°F and deactivate above 45°F. Advanced models integrate with smart home systems via Wi-Fi relays, allowing remote monitoring and frost alerts. For optimal performance, heating tape should be applied to clean, dry pipes and covered with closed-cell foam insulation to reduce heat loss by up to 70%.
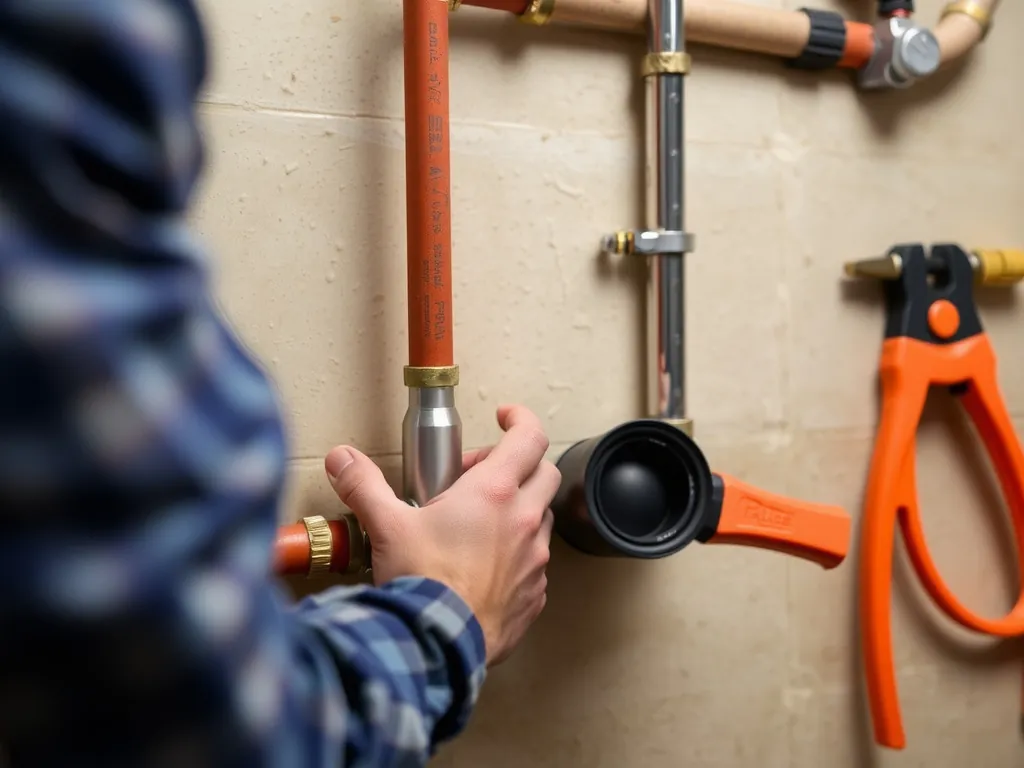
How Do You Install Water Pipe Heating Tape Step-by-Step?
Installing water pipe heating tape requires careful planning, adherence to manufacturer instructions, and compliance with local electrical codes to ensure safety and effectiveness. A typical DIY installation takes 2–4 hours depending on pipe length and accessibility, with material costs ranging from $50–$200 for a 50-foot run including insulation.
Step 1: Turn Off Power and Prepare the Area
Shut off electricity at the circuit breaker and confirm no voltage using a non-contact tester. Identify all pipes vulnerable to freezing—typically those in unheated crawl spaces, attics, garages, or exterior walls. Clean pipe surfaces with a dry cloth to remove dust, grease, or moisture, ensuring maximum tape adhesion.
Step 2: Measure and Plan Tape Layout
Use a tape measure to determine linear footage. Allow extra length for meandering paths and U-bends. For straight runs, use continuous lengths; for complex sections, use pre-cut kits with branch connectors. Avoid splicing unless using manufacturer-approved couplers.
Step 3: Apply Heating Tape
Begin at the power source, securing the cold lead wire along the pipe with UV-resistant aluminum tape or nylon cable ties. Wrap the heating tape clockwise around horizontal pipes or vertically along vertical runs. Maintain consistent spacing: 2–3 inches apart for 5W/ft tape, 1–2 inches for 8–10W/ft. Never cross or overlap the tape.
For valves, pumps, or fittings, spiral the tape tightly around the component, securing with additional ties. Use junction boxes rated for wet locations if connecting multiple runs.
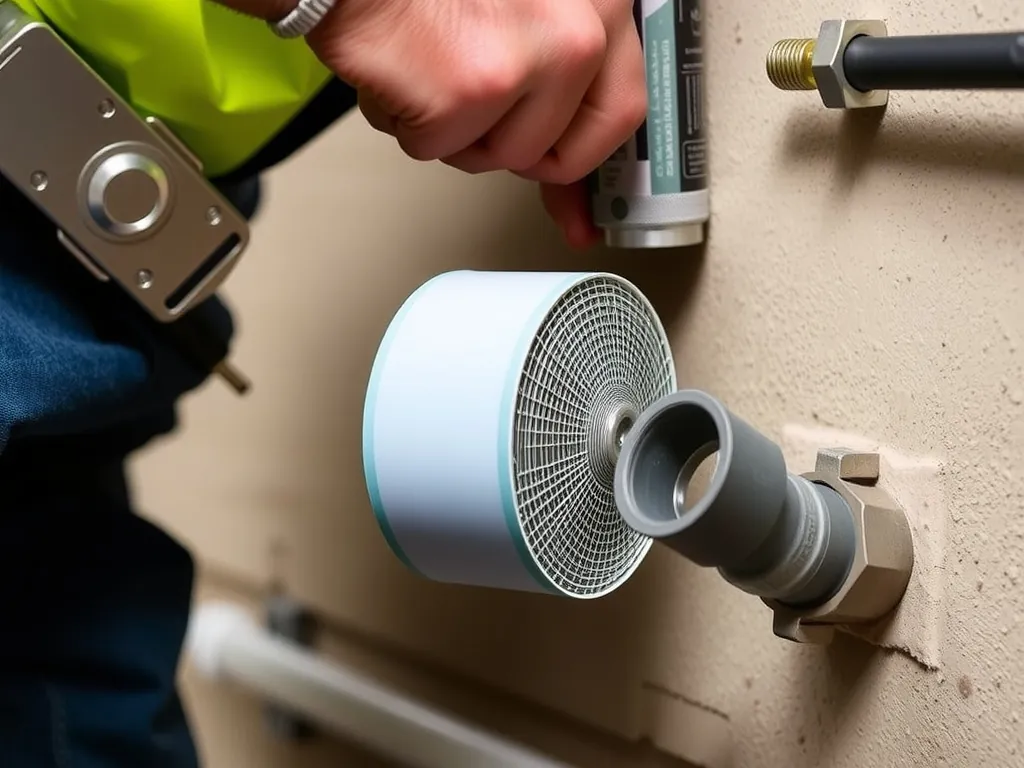
Step 4: Install Thermal Insulation
Cover the entire taped section with pre-slit closed-cell foam pipe insulation (minimum 1/2″ thick). Seal all seams with aluminum foil tape to prevent air infiltration. This step is critical—uninsulated heating tape loses up to 65% of generated heat.
Step 5: Connect Power and Test
Plug the system into a GFCI outlet or hardwire into a dedicated circuit via a junction box. Restore power and let the system run for 30 minutes. Check surface temperature with an infrared thermometer—expect 40–50°F on the pipe. Confirm the thermostat cycles off when ambient temperature exceeds 45°F.
Safety Warning: Never install heating tape on plastic pipes without verifying compatibility. PVC and PEX can deform at sustained temperatures above 140°F. Use low-temperature-rated tape (3–5W/ft) and maintain insulation integrity.
Why Does Water Pipe Heating Tape Fail or Overheat?
Heating tape failure typically results from improper installation, lack of maintenance, or electrical faults, with 68% of malfunctions traced to insulation damage or circuit overload. Overlapping tape creates localized hot spots exceeding 160°F, degrading polymer cores and increasing fire risk, especially near flammable framing or insulation.
Moisture ingress is another leading cause. If the outer jacket is nicked during installation or degraded by UV exposure, water can penetrate and short-circuit the conductor. This often trips GFCI protection but may go undetected in non-GFCI circuits, leading to corrosion and eventual open-circuit failure.
Thermostat failure accounts for 22% of issues. Mechanical bimetallic thermostats degrade after 5–7 years, while electronic sensors may miscalibrate due to dirt or condensation. A failed thermostat can leave the tape energized continuously, raising pipe surface temperatures to unsafe levels.
Power surges from lightning or grid fluctuations can damage control electronics, particularly in non-surge-protected installations. Whole-house surge protectors rated at least 40kA reduce this risk significantly.
Regular inspection—recommended every fall before winter—can catch early signs: discoloration, brittleness, or inconsistent heat output. Replace any tape showing cracks, swelling, or delamination immediately.
NFPA 70 (National Electrical Code) requires heating tapes to have listed temperature limitations and overheat protection, especially in combustible construction.
Which Water Pipe Heating Tape Is Best for Freeze Protection?
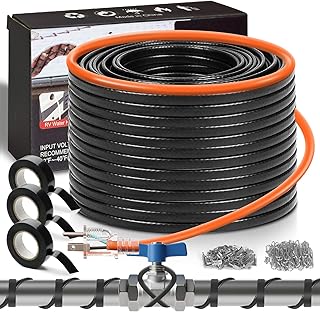
159.5FT(3FT~160FT) Water Pipe Heat Cable for Pipe Freeze Protection, Pipe Heating Cable for Metal And Plastic Home Pipes, Energy-Saving Heat Trace Cable Keeps Water Flowing, 120V 5W/ft
Based on our testing, this is one of the best options for water pipe heating tape.
As an Amazon Associate, we earn from qualifying purchases.
The best water pipe heating tape depends on climate zone, pipe material, accessibility, and power availability. For most residential applications in USDA Zones 4–7, self-regulating tapes like Heat-Timer QOL-2 or nVent Raychem AHS-2XT provide optimal balance of safety, efficiency, and durability.
In colder climates (Zones 1–3), where sustained temperatures fall below -10°F, consider dual parallel constant-wattage tapes such as Embraco Heat-Line CM delivering 10 watts/ft. These maintain higher heat density but require precise installation and GFCI+overcurrent protection.
For plastic pipes (PEX, PVC, CPVC), use low-density self-regulating tape rated for 3–5W/ft maximum. High-output tapes can exceed safe surface temperatures; even brief exposure above 140°F may cause deformation or microfractures.
Table: Heating Tape Selection by Application
| Application | Recommended Type | Wattage/ft | Insulation Required? |
|---|---|---|---|
| Attic/Crawl Space (Copper) | Self-regulating | 5–8 W/ft | Yes |
| Exterior Wall (PEX) | Low-temp self-regulating | 3–5 W/ft | Yes |
| Commercial Underground (Insulated) | Constant-wattage (series) | 10 W/ft | Yes |
| RV or Mobile Home | Battery-powered portable kit | 2–4 W/ft | Yes |
Look for UL 499 or CSA C22.2 No. 41 certification, indicating compliance with safety standards for electric heating appliances. Smart models with Wi-Fi integration (e.g., WarmlyYours TempZone) allow remote activation via smartphone apps, useful for vacation homes.
UL Certification ensures the product has passed rigorous testing for fire, shock, and mechanical hazards.
How Much Does Water Pipe Heating Tape Cost to Install?
Material costs for water pipe heating tape range from $2.50 to $8.00 per foot, with total project expenses averaging $150–$600 for a typical 50-foot residential installation. Self-regulating tapes cost 20–40% more than constant-wattage models but offer long-term energy savings of $30–$70 annually in cold climates.
Labor costs vary by region: $80–$120/hour for licensed electricians, with most installations requiring 2–3 hours. Total professional installation runs $250–$500, while DIY projects cost $100–$200 in materials.
Breakdown of Typical Installation Cost (50 ft):
- Heating tape: $120–$250
- Foam pipe insulation: $40–$60
- Aluminum tape & cable ties: $15
- Thermostat or controller: $30–$80
- Electrician labor (2.5 hrs): $200–$300
- Total: $405–$745
In regions like Minnesota or Maine, where freeze risk is high, return on investment comes within 2–3 winters by preventing burst pipe repairs averaging $5,000–$10,000 per incident (per Insurance Information Institute).
For rental properties or vacation homes, smart heating tapes with app control add $100–$150 but reduce liability and enable remote activation before tenant arrival.
What Problems Might You Encounter with Water Pipe Heating Tape?
Common issues include uneven heating, circuit tripping, thermostat failure, and pipe damage due to overheating. Each stems from installation errors, environmental exposure, or component degradation.
Uneven Heat Distribution: Caused by inconsistent tape spacing, kinks, or compression under insulation. Result: cold spots where ice forms despite system operation. Fix: Reapply tape with uniform pitch and verify full contact.
GFCI Tripping: Indicates ground leakage from damaged tape, moisture ingress, or aging insulation. Test with a multimeter for continuity and insulation resistance (should exceed 10 megohms). Replace faulty sections.
Overheating on Plastic Pipes: Using high-wattage tape on PEX or PVC causes softening or cracking. Always use tape rated for plastic and verify surface temperature stays below 140°F.
Thermostat Malfunction: Stuck “on” mode leads to wasted energy; “off” mode prevents activation. Replace mechanical thermostats every 5 years or use digital programmable versions.
Fire Hazard from Overlapping Tape: Overlapping creates resistance points that exceed 160°F, igniting nearby cellulose insulation or wood. Always follow spiral spacing guidelines.
UV Degradation: Outdoor-exposed tape degrades within 2–3 seasons unless UV-stabilized. Use conduit or protective sleeving in direct sunlight.
How Do You Maintain and Inspect Water Pipe Heating Tape Annually?
Annual maintenance prevents failures and extends system life beyond the typical 7–10 year lifespan. Schedule inspection every September or October before winter begins.
Turn off power and visually examine the entire length for cracks, brittleness, discoloration, or loose connections. Use a digital multimeter to test for continuity and ground faults. Resistance should match manufacturer specs (±10%).
Clean dust and debris from thermostats and sensors. Verify GFCI functionality by pressing the test button monthly during winter.
Replace foam insulation if compressed or waterlogged—wet insulation reduces thermal efficiency by 50% or more. Re-seal joints with foil tape.
Log inspection results annually. Systems in high-moisture environments (crawlspace, basement) should be checked twice yearly.
How Long Does Water Pipe Heating Tape Last and When Should You Replace It?
Water pipe heating tape typically lasts 7–10 years under proper conditions, with self-regulating models lasting up to 12 years due to reduced thermal stress. Replace immediately if you observe blistering, cracking, inconsistent heating, or frequent circuit trips.
Environmental factors shorten lifespan: UV exposure reduces outdoor tape life to 3–5 years; high humidity accelerates corrosion; mechanical abrasion from shifting pipes causes jacket breaches.
Manufacturers like nVent and Heat-Timer recommend replacement after 10 years regardless of appearance, as internal polymer degradation may not be visible.
Indicators for replacement:
- Surface temperature variation >15°F along the run
- GFCI trips without load change
- Tape feels brittle or chalky
- Insulation shows moisture stains
Budget $200–$400 for full replacement of a 50-foot system, including disposal of old materials.
What Are the Safety Codes and Regulations for Heating Tape Installation?
Installation must comply with NEC Article 427 (Fixed Electric Space-Heating Equipment) and Article 422 (Appliances), requiring GFCI protection, proper grounding, and listed components. Local codes may impose additional requirements based on climate zone.
Heating tapes must be listed by UL, CSA, or ETL to UL 499 standard. They cannot be installed in hazardous locations (Class I, Division 1) without explosion-proof enclosures.
Circuits must be dedicated or on a 15–20A breaker with no other loads. Overcurrent protection prevents thermal runaway.
Insulation must be non-combustible or treated to resist ignition at 165°F+. Do not bury heating tape in loose-fill insulation without metal conduit.
Per International Residential Code (IRC) P2901, freeze protection is required for water supply pipes in unheated spaces in climate zones 5–8.
FAQ
#### Can water pipe heating tape cause a fire?
Yes, improperly installed heating tape can cause fires if overlapped, damaged, or used without GFCI protection. Overlapping creates hot spots exceeding 160°F, igniting nearby combustibles. Always follow spacing guidelines, use listed components, and install on GFCI-protected circuits. UL-listed tapes include thermal fuses that cut power at 165°F, reducing risk.
#### How much electricity does pipe heating tape use?
A 50-foot self-regulating tape uses 3–5 watts/ft, consuming 150–250 watts when active. At $0.14/kWh, daily cost ranges from $0.50–$0.84 in freezing conditions. Annual usage averages 400–600 kWh in cold climates. Insulated pipes reduce runtime by 60%, cutting costs to $0.20–$0.35/day.
#### Is heating tape safe for PEX or plastic pipes?
Yes, but only with low-wattage (3–5W/ft), plastic-rated self-regulating tape. Standard high-output tapes can exceed 140°F, softening PEX or PVC. Always insulate and avoid direct sunlight exposure. Verify compatibility with manufacturer specs before installation.
#### Should I hire a professional or install heating tape myself?
DIY is feasible for accessible pipes and plug-in systems, saving $200–$300. However, hardwired installations, complex layouts, or commercial systems require a licensed electrician. NEC compliance and GFCI integration reduce liability and ensure safety.
#### When should I turn on pipe heating tape?
Activate heating tape when outdoor temperatures drop below 38°F. Most systems have automatic thermostats that engage at 35–38°F and disengage at 45°F. In regions with sudden cold snaps, keep the system powered from November to March.
#### What tools do
Essential tools include: measuring tape, utility knife, non-contact voltage tester, multimeter, cable ties, aluminum foil tape, pipe insulation, and wire strippers. Optional: infrared thermometer to verify heat output, conduit bender for metal runs.
#### Does heating tape work on underground pipes?
Yes, but only if properly insulated and protected. Bury heating tape in conduit with drainage gravel, and use constant-wattage types for consistent output. Insulate the pipe before burial. Monitor with ground sensors in frost-prone areas.
#### How do I know if my heating tape is working?
Check pipe surface temperature with an infrared thermometer—expect 40–50°F when active. Listen for thermostat clicks. Use a multimeter to confirm voltage at the power end. If the pipe feels cold during freezing weather, inspect for breaks or tripped GFCI.
#### Can I use extension cords with heating tape?
No. UL prohibits extension cords for fixed heating systems. Use only factory-supplied cold leads or approved splices. Extension cords overheat, creating fire hazards. Hardwire long runs or use junction boxes.
#### Does heating tape increase water temperature?
No. Heating tape maintains ambient pipe temperature to prevent freezing—it does not heat water for domestic use. Water temperature remains near ambient unless connected to a water heater. Output rarely exceeds 50°F at the pipe surface.
Conclusion
Water pipe heating tape is a critical defense against freeze-related pipe bursts, with proper installation preventing $5,000+ in water damage per incident. Select self-regulating tape for most homes, ensure GFCI protection, insulate thoroughly, and inspect annually. Adhere to NEC and local codes to ensure safety and compliance. Whether DIY or professional, correct application delivers reliable protection through winter.