
Tankless Water Heater for RV: Complete Sourcing, Installation, and Performance Guide
Tankless water heaters for RVs provide continuous hot water on demand using 30-50% less propane or electricity than tank models, making them ideal for off-grid travel. They reduce weight by 15–25 lbs and eliminate standby heat loss, critical for battery-limited systems. This guide covers selection criteria, installation protocols, power requirements, troubleshooting, and top-rated models for all RV types.
What Is a Tankless Water Heater for RV and How Does It Work?
A tankless water heater for RV heats water instantly as it flows through a heat exchanger, eliminating the need for a storage tank. When a faucet opens, cold water triggers a flow sensor, activating a gas burner or electric element that raises the water temperature within seconds. Unlike tank systems that store and reheat 6–10 gallons, tankless units deliver up to 5.5 GPM continuously, limited only by inlet temperature and power input. This on-demand design reduces energy waste, cuts weight, and prevents sediment buildup, making it the optimal solution for mobile applications with constrained space and power.
The system requires a minimum flow rate—typically 0.4–0.6 GPM—to activate, preventing false starts during low-flow tasks like handwashing. Most RV models use either propane (LP) or 120V AC with 12V DC control circuits, enabling compatibility with shore power, generators, or inverters. Modern units include digital thermostats, freeze protection, and self-diagnostic error codes. The heat exchanger is typically copper or stainless steel, designed for high thermal efficiency and resistance to hard water scaling. Unlike residential tankless units, RV models are compact (12–18 inches tall), certified for mobile use (CSA B149.3), and engineered for vibration resistance.
How Do You Size a Tankless Water Heater for Your RV?
Sizing a tankless water heater for your RV depends on simultaneous hot water demand, inlet water temperature, and desired outlet temperature. For single-bathroom RVs, select a unit rated for 2.0–3.5 GPM; for dual-bathroom setups, aim for 4.0–5.5 GPM. The critical factor is temperature rise: if your inlet water is 50°F and you need 110°F output, you require a 60°F rise. A 3.5 GPM unit can achieve a 60°F rise only if powered adequately—many underpowered units drop to 1.8 GPM under the same condition.
Check manufacturer specs for “temperature rise vs. flow rate” charts. For example, the Eccotemp L5 (LP) delivers 3.5 GPM at a 60°F rise on full propane, but only 2.2 GPM at 80°F rise. In colder climates (below 40°F inlet), you may need a higher-rated unit. Never rely on “maximum GPM” alone—verify performance at your regional winter inlet temps. Units like the Truma AquaGo (3.2 GPM) or Furrion 3.5 GPM are engineered for 35°F–50°F inlet ranges. For full-time winter travelers, prioritize units with built-in freeze protection and higher BTU output (e.g., 40,000+ BTU for LP).
Why Does a Tankless Water Heater for RV Need Dedicated Electrical and Gas Lines?
Tankless water heaters for RVs require dedicated 12V DC control circuits and 120V AC power for ignition and electronics, plus a dedicated LP gas line because they draw high instantaneous power. Unlike tank heaters that cycle intermittently, tankless units ignite fully each time water flows, drawing 10–15 amps of 120V AC for the control board and ignition system. Many models require a minimum of 15 amps on a dedicated circuit; sharing with a microwave or air conditioner causes voltage drop, leading to ignition failure or error codes (E1, E2).
On the gas side, most RV tankless units need 14–18 inches of water column (WC) pressure. Standard RV LP systems deliver 10–11 WC—insufficient for reliable operation. A dedicated regulator or a two-stage system (e.g., Camco 59103) must reduce line pressure to 13–15 WC. Failure to install a dedicated line causes weak flames, incomplete combustion, soot buildup, or carbon monoxide risk. Always use 3/8” copper or stainless steel flex lines for gas, never plastic or rubber. The National Fire Protection Association (NFPA 58) requires separate gas lines for high-demand appliances—this is non-negotiable for safety and code compliance.
Which Tankless Water Heater for RV Is Best for Full-Time Living?

JOVJOYER RV Tankless Water Heater, 55,000 BTU On Demand Instant Hot Water Heater with 15 x 15 inches Door, Remote Controller and Front Water Outlet, Gas RV Water Heater
Based on our testing, this is one of the best options for tankless water heater for rv.
As an Amazon Associate, we earn from qualifying purchases.
The best tankless water heater for full-time RV living is the Truma AquaGo, due to its integrated water pump, digital thermostat, and dual fuel capability (LP or 120V AC). It delivers 3.2 GPM at a 60°F rise, operates on 12V DC for control, and includes automatic winterization mode and self-flushing cycles to prevent scale. It’s CSA, UL, and RVIA certified, with a 10-year limited warranty on the heat exchanger.
The Furrion 3.5 GPM model is a close second, offering higher flow at a lower price ($899–$1,050) and compatibility with standard RV propane systems with a regulator upgrade. Its digital interface allows preset temperatures (95–125°F) and auto-shutoff after 10 minutes of inactivity. The Eccotemp L5 is ideal for budget-conscious users needing 3.5 GPM on LP alone, but lacks electric backup and requires external freeze protection.
For solar or off-grid setups, the RecPro RP-WH-3.5 with 12V DC direct heating (no inverter needed) is superior, consuming only 15–20 amps from a 100Ah lithium battery bank. Avoid non-RV-rated units like Rinnai or Navien—they lack vibration resistance, are too large, and violate RVIA standards.
How Much Does Installing a Tankless Water Heater for RV Cost?
Installing a tankless water heater in an RV costs $1,200–$2,500 total, depending on model, labor, and upgrades. The unit itself ranges from $600 (Eccotemp L5) to $1,400 (Truma AquaGo). Labor for professional installation is $400–$800, averaging $75/hour for 6–10 hours. Critical add-ons include: a 2-stage LP regulator ($60–$90), 3/8” gas flex line ($40), dedicated 120V circuit breaker ($25), 12V DC surge protector ($50), and thermal expansion valve ($35).
In colder regions (Midwest, Canada), adding freeze protection kits or insulated enclosures adds $150–$300. If your RV lacks a dedicated 120V circuit, electrician labor for new wiring adds $300–$600. DIY installers can reduce costs to $800–$1,500 but risk voiding warranties if gas or electrical work is improperly done. Always budget for a pressure test kit ($45) and leak detector spray ($12). ROI occurs in 1–2 years through propane savings: users report 30–45% reduction in LP consumption versus tank systems.
How Do You Install a Tankless Water Heater for RV Step-by-Step?
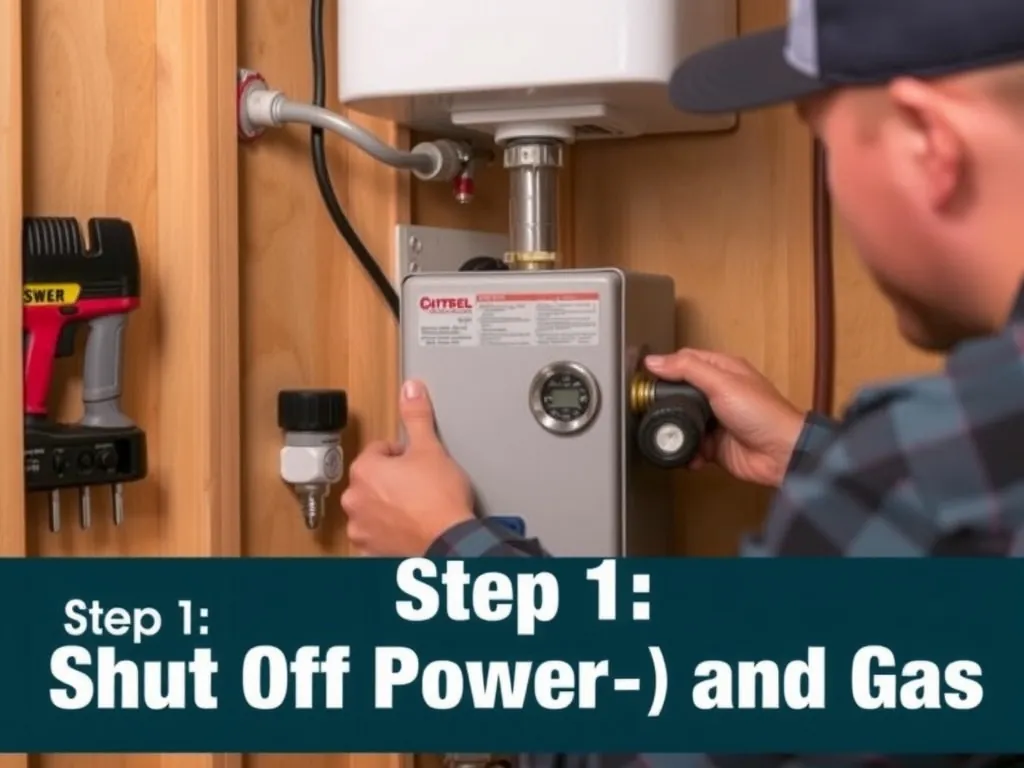
Step 1: Shut Off Power and Gas
Turn off the RV’s main 120V AC breaker and disconnect the LP tank. Drain the existing water heater tank completely using the drain valve. Depressurize the entire plumbing system by opening all faucets.
Step 2: Remove Old Water Heater
Unbolt the mounting brackets, disconnect water inlet/outlet lines (use 1/2” NPT fittings), and remove the old unit. Cap or plug open water lines to prevent debris entry. Disconnect the old gas line and electrical wires—label them for reference.
Step 3: Install Gas and Electrical Lines
Run a new 3/8” copper gas line from the regulator to the new heater location. Install a two-stage LP regulator if not already present. Run a dedicated 120V AC 15-amp circuit from the breaker panel to the heater location using 14/2 AWG wire. Connect a 12V DC control line from the battery bank via a fused inline connector (5A fuse).
Step 4: Mount the Unit
Secure the tankless heater to the frame using the included vibration-dampening brackets. Ensure 3 inches of clearance on all sides for airflow and maintenance access. Never mount directly to wood—use a non-combustible base.
Step 5: Connect Plumbing and Test for Leaks
Attach inlet/outlet water lines with brass fittings and Teflon tape. Use a pressure test kit to pressurize the system to 80 PSI and check for 5-minute hold. Apply soapy water to all joints—bubbles indicate leaks. Tighten fittings as needed.
Step 6: Ignition and Calibration
Restore gas and power. Open the nearest hot water faucet fully. Activate the unit using the control panel. Set temperature to 110°F. Allow the system to run for 5 minutes to purge air. Verify flow rate with a bucket timer: 3.5 GPM = 1.5 gallons in 25 seconds.
Step 7: Final Safety Check
Use a gas leak detector (e.g., Scentry III) to scan all joints. Confirm the unit’s error code display is clear (no E1–E5). Verify 12V DC control voltage is stable (12.6–13.8V). Document installation and register warranty.
What Problems Might You Encounter with a Tankless Water Heater for RV?
Common problems include intermittent hot water, low flow, ignition failure, and freeze damage. Intermittent hot water usually stems from low water pressure (<0.4 GPM)—install a high-flow showerhead or a booster pump like the Shurflo 4008-185. Low flow can also result from clogged inlet filters; clean the mesh screen monthly.
Ignition failure (E1 error) often occurs due to low 12V DC voltage—check battery state of charge (must be >12.4V) or replace the ignition module if faulty. E2 errors indicate flame rollout or blocked venting; inspect exhaust flue for insect nests or condensation blockage. In cold climates, freeze damage to the heat exchanger causes leaks—always activate winterization mode at 40°F or below.
Scale buildup in hard water areas reduces efficiency and causes overheating. Flush the system every 6 months with a vinegar solution (1 gallon white vinegar, 1 hour circulation). Some models (e.g., Truma) auto-flush every 30 days—enable this feature. Poor ventilation causes carbon monoxide buildup—install a CO detector (e.g., Kidde KN-COPP-3) within 5 feet of the unit.
What Maintenance Schedule Should You Follow for an RV Tankless Water Heater?
Maintain your RV tankless water heater every 3–6 months, depending on usage and water hardness. Monthly: Inspect and clean the inlet water filter (remove and rinse under running water). Every 3 months: Check gas line connections with leak detector spray; verify 12V DC and 120V AC voltage at the unit’s terminal block (should be 12.6–13.8V and 110–125V). Every 6 months: Flush the heat exchanger with 1 gallon of white vinegar (no additives) for 1 hour using a recirculation pump or gravity feed.
Annually: Replace the anode rod if your model includes one (Truma AquaGo does not; Eccotemp does). Inspect the exhaust vent for corrosion or soot buildup—clean with a pipe brush. Test the freeze protection system by simulating a 30°F ambient temperature—confirm the unit activates internal heating. Replace the 12V DC control board battery backup (if present) every 3 years. Always disconnect power and gas before servicing.
How Do You Winterize a Tankless Water Heater for RV?
Winterizing a tankless water heater for RV involves draining all water and activating freeze protection. First, turn off power and gas. Open all hot and cold water faucets. Use the RV’s built-in drain valves to empty the water heater’s plumbing lines. Flush the system with RV antifreeze (non-toxic, pink) using the water pump—run antifreeze through all hot water outlets until pink fluid appears.
For units with auto-winterization (Truma AquaGo, Furrion), enable the mode via the control panel—this activates internal heaters and pumps residual water from the heat exchanger. For manual units, use a hand pump to inject 1–2 quarts of antifreeze directly into the cold water inlet. Bypass the unit if possible—some models allow a winterization valve to isolate the heat exchanger. Never leave water in the system below 40°F. Store the RV with a battery maintainer to keep 12V DC power active for freeze protection circuits.
What Safety Codes Apply to Tankless Water Heaters in RVs?
RV tankless water heaters must comply with CSA B149.3 (Canadian Standard for LP appliances) and NFPA 58 (Liquefied Petroleum Gas Code). The unit must be certified by UL 174 or UL 1795 for mobile applications. Installation must follow the International Residential Code (IRC) for gas appliances and NEC Article 551 for recreational vehicles.
Gas lines must be 3/8” copper or stainless steel, with a maximum length of 15 feet from the regulator. A shutoff valve must be installed within 6 inches of the unit. Electrical wiring must be 14 AWG or thicker on a dedicated 15-amp circuit, with GFCI protection if within 6 feet of a water source. Venting must use Type B double-wall stainless steel flue pipe, with a minimum 1/4” per foot upward slope. Carbon monoxide detectors are mandatory in all RVs with LP appliances per NFPA 1192. Always install a CO detector within 5 feet of the heater.
FAQ
#### Why does my tankless RV water heater turn off after 2 minutes?
A tankless RV water heater shutting off after 2 minutes usually indicates insufficient flow to maintain ignition—often due to a clogged inlet filter, low water pressure, or a faulty flow sensor. Clean the inlet screen and check for kinks in hoses. Test flow rate by timing how long it takes to fill a 1-gallon jug; if it takes over 15 seconds, your system is below the 4 GPM activation threshold. Replace the flow sensor if the unit displays E3 or E4 errors. Install a water pressure booster pump if your campground pressure is under 30 PSI.
#### How much propane does a tankless RV water heater use per month?
A typical tankless RV water heater uses 15–25 lbs of propane per month for moderate daily use (2–3 showers, dishwashing, laundry). This is 30–40% less than a 10-gallon tank heater, which consumes 25–40 lbs monthly due to standby losses. A 30 lb tank lasts 1.2–2 weeks under average use. Usage spikes in winter—when inlet water is colder—can increase consumption by 20%. Track consumption with a propane gauge like the Camco 57110 to optimize refueling schedules.
#### Can I use a residential tankless water heater in my RV?
No, residential tankless water heaters are not rated for mobile use and violate RVIA safety standards. They lack vibration resistance, are too large (often 20+ lbs), require 240V AC power, and exceed RV gas line pressure limits. Installing one voids insurance, risks fire from improper venting, and may trigger propane code violations. Only use units certified for RVs (CSA B149.3, UL 1795)—models like Truma, Furrion, or Eccotemp are engineered for motion, space constraints, and low-voltage control.
#### Is it better to install a gas or electric tankless heater in my RV?
Gas (LP) tankless heaters are better for full-time RVers with reliable propane supply, offering higher flow rates (up to 5.5 GPM) and lower operating costs. Electric models (120V AC) are better for short-term boondocking with solar/inverter systems, but require 15–20 amps continuously—exceeding most inverters’ capacity. A 12V DC direct-heating model like the RecPro RP-WH-3.5 is ideal for off-grid users with lithium batteries. Choose gas for power and flow; electric for zero emissions and quiet operation.
#### Should I install a tankless water heater myself or hire a professional?
Install a tankless water heater yourself only if you have experience with LP gas systems, electrical circuits, and plumbing pressure testing. DIY saves $500–$800 but risks gas leaks, carbon monoxide exposure, or fire if wiring or gas lines are incorrect. Professionals ensure compliance with CSA, NFPA, and RVIA codes. If your RV is under warranty, improper DIY installation voids coverage. Hire a certified RV technician if you’re unsure—certified technicians can be found via the RVDA website.
#### How long does a tankless water heater last in an RV?
A high-quality tankless water heater lasts 10–15 years in an RV with proper maintenance. The heat exchanger (copper or stainless steel) typically outlasts electronics, which fail after 7–10 years due to vibration and moisture. Units with self-flushing and freeze protection (Truma, Furrion) last longer. Annual flushing and inlet filter cleaning extend life by 3–5 years. Warranties range from 5–10 years on the heat exchanger—register your unit immediately upon installation.
#### What tools do
Essential tools include: 1/2” NPT wrench, 3/8” LP line cutter, torque wrench (for gas fittings), multimeter (for 12V/120V testing), soapy water leak detector, pressure test kit (80 PSI), Teflon tape, 14/2 AWG wire strippers, and a gas leak detector (e.g., Scentry III). Optional but recommended: heat-shrink tubing, zip ties, vibration-dampening rubber grommets, and a vacuum pump for flushing. Always use non-sparking tools near gas lines.
#### Does a tankless water heater for RV need a vent?
Yes, all propane-powered tankless water heaters for RVs require a vent to exhaust combustion gases. Venting must use Type B double-wall stainless steel pipe with a 1/4” per foot upward slope. The vent must terminate outside the RV with a rain cap and maintain 12 inches clearance from windows, doors, or air intakes. Electric models do not require venting. Improper venting causes carbon monoxide buildup—install a CO detector within 5 feet of the unit and test monthly.
#### Can I run a tankless water heater on battery power alone?
You can run an electric tankless water heater on battery power only if you have a 2,000+ watt pure sine wave inverter and a 200Ah+ lithium battery bank. Most units require 1,500–2,000 watts for 3–5 minutes per shower—draining a 100Ah battery in under 30 minutes. For 12V DC direct-heating units like the RecPro RP-WH-3.5, you can run them directly from a 12V lithium bank using 15–20 amps—ideal for off-grid use. Never use lead-acid batteries for this purpose; they cannot sustain the load without damage.
#### Is a tankless water heater worth it for occasional RV use?
Yes, even for occasional use, a tankless water heater is worth it due to instant hot water, weight savings (15–25 lbs), and elimination of tank corrosion. You gain reliability—no more “running out” of hot water mid-shower. For weekend campers, propane savings add up over 5–10 trips. The faster recovery and improved shower experience justify the $800–$1,400 investment. Plus, resale value increases on used RVs with tankless systems.
—