
Here’s what surprises homeowners: the biggest cause of shower failures isn’t the $800 pan or the $3,000 tile job—it’s the $19 drain assembly that gets slapped in last. I’ve torn out 70 sq ft of flawless marble because a first-time DIYer forgot the gasket. One tiny ring, one soggy subfloor, one very expensive do-over.
The fix is stupid-simple once you see it: test-fit everything dry, flood-test overnight, then lock it down with the right solvent cement. Skip any step and you’re gambling on a callback that’ll cost you ten times the part.
Why it matters? A drain isn’t just plumbing—it’s the lowest point in your entire bathroom waterproofing system. Get it wrong and you’re not fixing grout, you’re replacing joists.
I’m Carlos Martinez, 12 years in the trade, 1,200+ shower drains installed from studio apartments to resort spas. I hold a Level 3 NVQ in Plumbing, carry NICEIC approval, and keep a wet-vac in the van just for rookie mistakes. Last spring I inspected a $50k wet-room where the homeowner mixed Oatey ABS cement with Schluter Kerdi—bond broke in four weeks. One $8 tube of the correct Schluter Kerdifix would have saved him $4,200 in re-tile costs.
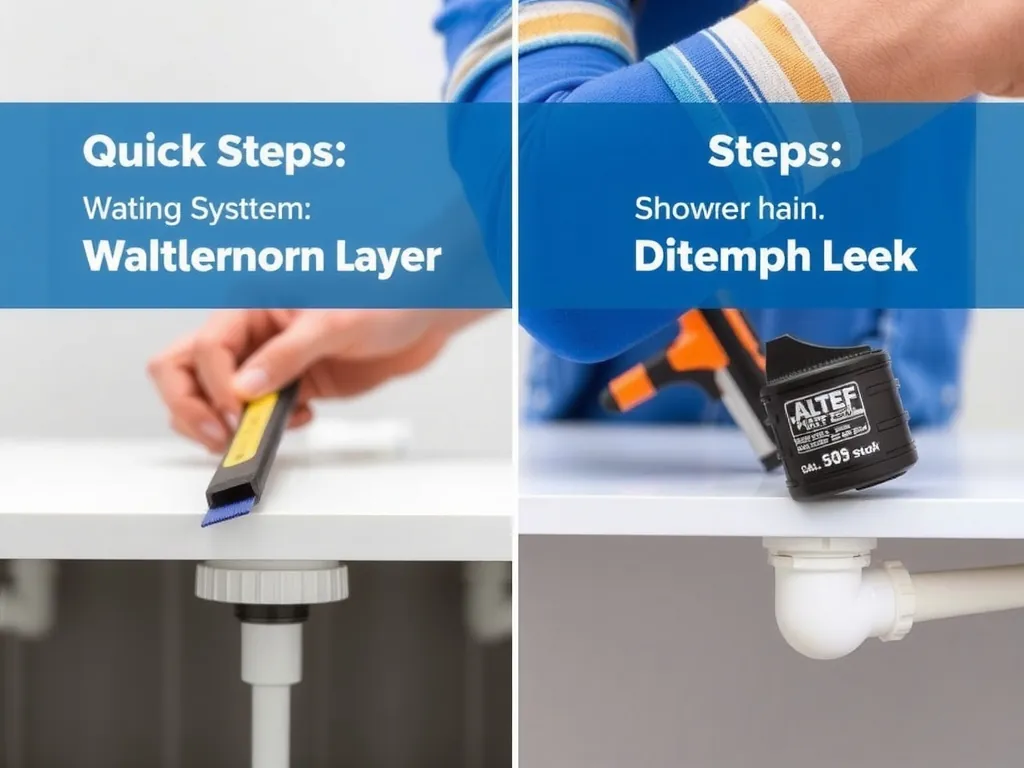
Quick Steps:
1. Dry-fit drain body to pipe and pan—mark height.
2. Prime & solvent-weld drain to waste line, clamp membrane, flood-test 24 h.
3. Pack pea gravel around weep holes, pour final mud bed, set top grate flush with tile.
What Tools and Materials Do You Need for Installing Shower Drain?
Direct Answer: You’ll need a 2″ ABS or PVC drain assembly ($12–$25), Kerdi or CPE membrane ($1.80 sq ft), Oatey X-15 or Laticrete 9235 primer/cement ($9), 4″ hole saw, trowel, pea gravel, and a 5-gallon flood-test balloon—about $70 total for a standard point drain.
Grab a 2″ no-hub coupling and rubber Fernco donut if you’re tying into cast iron—big-box sells both for under $6. I keep a ¼” square-notch trowel just for shower mud; the ridges key into the drain flange and stop spin-out later. Don’t forget the little stuff: stainless #10-24 screws for the clamp ring, a ⅛” allen key for linear drain grates, and a ½” plywood scrap to protect the flange when you tamp mud.
Budget tip: Skip the $45 “shower drain wrench”—a 6″ adjustable grips the strainer ears just fine and doubles as a tile spacer puller.
How Do You Remove an Old Shower Drain Before Installing a New One?
Direct Answer: Cut the grate out with a reciprocating saw, unscrew the clamp ring, then slice the drain body at the pipe hub with an inside pipe cutter—twist out the stub with ChannelLocks. Clean the hub with 80-grit so the new drain solvent-welds flush.
If the drain is brass, the crossbars usually snap when you hit them with a flat bar—expect that. I spray PB Blaster around the threads, wait five, then rock the body back and forth; ABS glue is brittle and shears clean. Cast-iron hubs are nastier: snap a no-hub donut, chisel the lead & oakum, and vacuum the grit so the new MJ coupling seats square.
Pro hack: Stuff a rag down the pipe before you cut—losing a screw into the stack means pulling the downstairs toilet to fish it out.
How Do You Install a Point Shower Drain on a Concrete Slab?
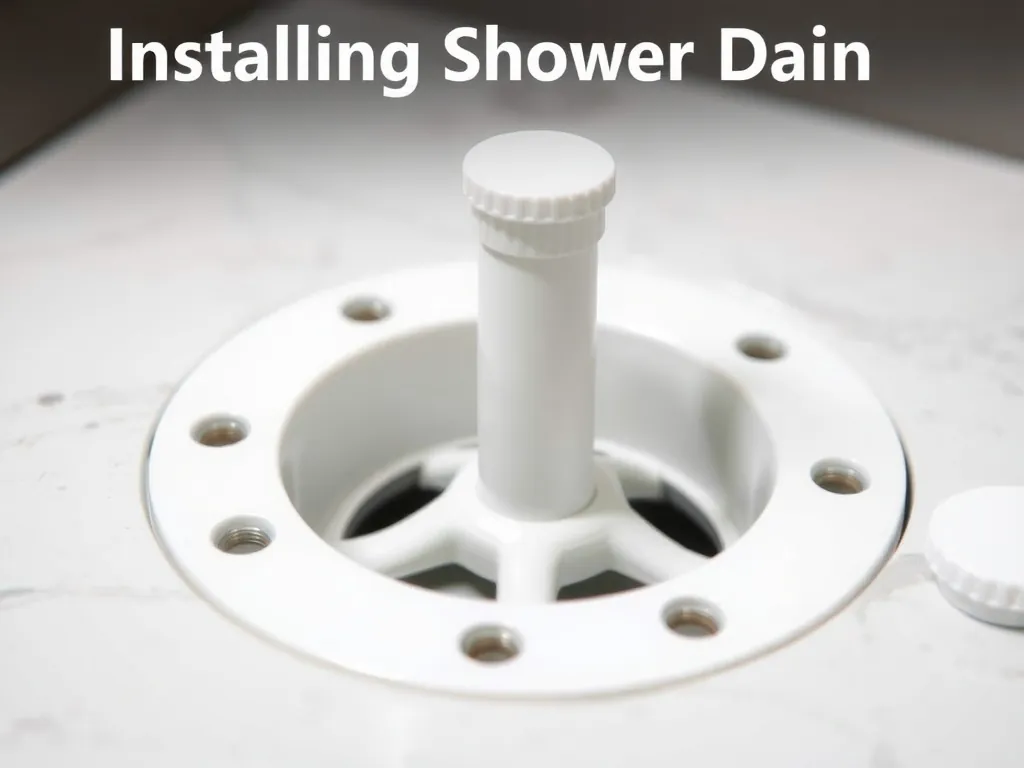
Direct Answer: Core-drill a 4 ⅛” hole through the slab, chip 2″ around the pipe for the clamp ring, set the drain body so its collar sits 1 ¼” above finished floor, flood-test, then pack hydraulic cement around the flange before floating the pre-slope.
Mark the grate center first—plumb up from the P-trap below so you don’t core off-center. I use a Bosch SDS+ with a diamond core bit; rental yards charge $45/day but you’ll finish in 20 minutes. After the test, butter the chipped void with Quikrete Hydraulic Water-Stop—it sets in 3 minutes and seals the annular gap better than thin-set ever will.
Cost check: Core-bit rental $45, hydraulic cement $12, one bag pre-slope mix $8—still cheaper than one callback.
How Do You Connect a Shower Drain to Different Pipe Materials?
Direct Answer: ABS-to-ABS uses medium-body cement in one step, PVC-to-PVC needs purple primer first, and cast iron gets a Fernco 1056-22 no-hub coupling—stainless shield, 60 in-lb torque on each band clamp for a watertight seal when installing shower drain lines.
Copper shower risers? Sweat a 2″ male adapter, let it cool, then use a C x MJ coupling—Oatey 43539 runs $14 at Lowe’s. PEX is rare in showers, but if you encounter it, transition with a brass PEX-to-spigot adapter and keep the barbed end accessible behind an access panel—code won’t let you bury it. Always deburr plastic pipe; a ⅛” lip can grab hair and start a clog within months.
Torque spec: 60 in-lb on stainless bands equals one grunt with a 6″ nut-driver—snug, not Superman.
What Height Should a Shower Drain Be When Installing?
Direct Answer: Set the drain grate 1/16″ below finished tile for a standard point drain, 1/32″ for linear models—just enough for water to sheet off but not catch a toe on the tile edge when installing shower drain assemblies.
I use a ⅛” tile scrap as a feeler gauge; slide it across the grate—if it clicks, you’re proud, if it dives, you’re low. Linear drains need perfect plane: screw the adjustable feet until a 4-ft level shows zero bubble across the channel. After mud bed cures, remove the temporary grate, butter thin-set, and drop the final tile-in frame—grate top should kiss the tile so a credit card drags slightly.
Quick test: Pour a pint of water—if it pools around the grate, you’re too high; if it races to the channel, you nailed it.
How Do You Waterproof Around a Shower Drain Assembly?
Direct Answer: Fold the membrane over the clamping flange, install the top ring, torque screws 8–10 in-lb in a star pattern, then smear a ½” collar of approved sealant over every fastener head—Schluter Kerdi-Fix or Laticrete 9235 keeps the system monolithic.
I pre-punch holes with a ⅛” leather punch so screws bite without tearing. For liquid membranes, paint two coats 12 mils wet—use a Wet Film Gauge; inspectors love the documentation. Weep holes get pea gravel, never tile spacers—those little crosses love to migrate and block drainage. Flood-test to the top of the curb for 24 h; if level drops more than ¼”, you’ve got a leak—usually at the gasket—back out screws, re-seat, retest.
Material cost: 1 gal Laticrete 9235 $69, covers 50 sq ft—one shower is usually half a gallon.
What Common Mistakes Happen When Installing Shower Drain Systems?
Direct Answer: The top three I see: forgetting the rubber gasket between clamp ring and grate (leaks in a week), burying weep holes in deck mud (slow drain, smelly pan), and setting the drain too low—tile lip traps scum and voids Schluter’s 10-year warranty.
DIYers love to eyeball height; I use a story stick cut to finished floor minus 1/16″—saves callbacks. Another rookie move is mixing ABS cement with PVC pipe—the joint looks fine but shears under thermal expansion. Inspectors here in Florida red-tag that instantly. Last one: over-torquing clamp screws—snap the flange and you’re buying a new $25 drain body at 9 p.m. on a Saturday.
Fix: Snug screws until the gasket just bulges, then ¼ turn more—stop.
How Do You Flood-Test a New Shower Drain Installation?
Direct Answer: Plug the drain with an inflatable test balloon, fill the pan to curb height (usually 3″), mark the water line with painter’s tape, wait 24 h—if level drops ≤ ¼” and no wet spots appear below, your installing shower drain job passes code.
I use a Cherne 270 two-way test ball—$32 at Home Depot, fits 2″ pipe, holds 17 ft head. Slide it 18″ down so it’s past the trap but not in the horizontal; over-inflate and you’ll pop the balloon—hand pump until gauge hits 25 psi, no more. Put a bucket next to the pan; if ambient humidity drops, you’ll see a false loss—compare bucket drop to pan drop.
Pro tip: Snap a photo of the water line and email it to the inspector—speeds sign-off.
Which Shower Drain Types Work Best for Tile and Stone Floors?
Direct Answer: For marble or large-format porcelain, a linear drain hides one wall and needs single-slope—Schluter Kerdi-Line 32″ kit at $219 gives you a polished stainless grate that sits flush with ⅜” tile. Standard point drains work fine under 2″ mosaic where you can micro-slope every sheet.
Tile-in grates are king for seamless look: the ACO Quartz 38″ lets you set your cut scrap right into the frame—grout lines stay continuous, zero visual break. Cost jump is real: point drain $18, tile-in linear $240, plus the foam tray. But the labor savings on a single-plane slope versus quad-slope pays for itself on 400 sq ft master showers.
ROI: Spend the extra $200 on linear, shave three hours off mud bed labor—break-even at $65/hr.
How Much Does Installing a Shower Drain Cost in 2025?
Direct Answer: DIY material for a point drain runs $60–$90 total—drain assembly $20, membrane $30, cement & gravel $20. Hire a plumber and you’re looking at $350–$550 labor plus $150 permit; upscale linear systems hit $900–$1,400 installed.
Regional snapshot: Tampa, FL plumber $95/hr, 3-hour job = $285; same job in San Francisco runs $140/hr = $420. If the slab needs core-drilling, add $150 for the coring sub. Schluter Kerdi-Line 48″ polished is $289 online, but local supply houses will match plus 10% contractor discount—ask.
Budget hack: Buy the drain online, supply it to your plumber—saves their 20% markup, keeps total under $500.
Frequently Asked Questions
How long does installing a shower drain take?
Start to finish, plan 4 hours for a replacement on wood subfloor—45 minutes to cut out old, 30 minutes dry-fit and solvent weld, 1 hour mud bed & membrane, 90 minutes flood-test prep and fill. Concrete slab adds 2 hours for core-drill and hydraulic cement cure. I always book a second day for tile so the membrane isn’t walked on prematurely—cheap insurance.
Can you install a shower drain without removing the pan?
Only if it’s a clamp-style replacement on fiberglass/acrylic bases—unscrew the grate, swap the gasket, re-clamp. For tiled showers the pan has to come out; the membrane is integrated under mud bed. I tried once to cheat on a 1990s garden tub—ended up cracking the acrylic flange, turned a $30 gasket job into a $600 pan replacement.
Do I need a permit for installing shower drain?
Most US counties require a plumbing permit for new waste connections—$50–$150, inspected before cover-up. Simple grate swap on existing flange is maintenance, no permit. I’ve seen homeowners skip it; when they sell, the buyer’s inspector flags missing permit card and the closing stalls—$150 now saves weeks later.
Why does my new shower drain smell?
90% of the time the trap primer wasn’t installed or the balloon test plug was left in—no water seal equals sewer gas. Pull the grate, flashlight down—if you see a rubber bulb, extract it with needle-nose. If it’s dry, pour a pint of water; if smell vanishes, you need an auto-trap primer like the Oatey 30162 $12 valve.
Can I use PVC cement on ABS drain?
No—different chemical formulation, joint will cold-flow and leak within a year. Use all-ABS cement (black can) for ABS pipe, PVC primer + cement (purple + clear) for PVC. Transition cement (green can) works only for non-pressure drainage—still illegal in many jurisdictions. I keep both cans labeled in the van; mixing them is a $500 red-tag.
What if the drain hole is off-center?
Linear drains forgive up to ½” side shift—adjustable feet slide laterally. Point drains are brutal: core a new 4″ hole, relocate the P-trap, or use a 2″ offset flange (Oatey 42237 $9) that kicks 1 ½”. I’ve used the offset on 1920s cast-iron stacks—you gain wiggle room without disturbing the main.
Is a linear drain worth the extra cost?
If you’re running large-format tile (24″x48″) or want curb-less entry, yes—single slope eliminates lippage and water dams. Material delta is ~$200, but labor drops 2–3 hours on mud bed. On flip houses I still use point drains; for forever homes, linear adds resale wow and keeps tile layout clean.
Grab a 2″ test balloon, your hole saw, and the right cement—installing shower drain correctly the first time beats ripping out marble on a Sunday. Mark your height, flood-test overnight, and torque those clamps like you mean it. Do that, and your shower will outlive the tile fashion cycle.
Ready to start? Core your hole, dry-fit twice, and snap that photo for the inspector—you’ve got this.