

The phone rang just as I was packing up my van. “Alex, it’s Margaret from the Victorian terrace on Oak Street. My clawfoot’s draining… but only when I kick the pipe.” I knew exactly what she meant—those antique brass waste lines develop personalities after a century of use. What she didn’t realise was that her casual foot-tap was actually forcing a cracked union nut back into position, buying her days before a proper flood. That temporary fix had become her morning ritual: coffee, newspaper, strategic toe-nudge. Most homeowners assume vintage tub plumbing is straightforward until they’re ankle-deep in greywater wondering why their £2,000 restoration project now involves ceiling repairs downstairs.
I’ve spent twelve years specialising in heritage bathroom restorations across Manchester and Liverpool, completing over 1,400 clawfoot installations from salvaged originals to modern reproductions. My workshop holds every thread size from 1850-1950, and I’ve documented the evolution of waste systems from early bell traps to modern click-clacks. Last winter, I converted a 1903 cast-iron tub that had been used as a flower planter for decades—its original Birmingham-made waste was still functional after removing forty years of compost. That job taught me more about galvanic corrosion than any textbook.
Quick Steps:
1. Identify your tub’s era (pre-1920s = 1.5″ BSP, post-1920s = 1.25″ or 1.5″)
2. Check for cracks in the waste tube where it meets the overflow
3. Measure the exact centre-to-centre distance between waste and overflow holes
4. Test existing pipework with dye before disturbing anything
5. Source replacement parts before dismantling (vintage threads aren’t standard)
Understanding Clawfoot Tub Drain Anatomy
Clawfoot tubs use a completely different drainage system than built-in baths. Instead of a simple waste hole at the bottom, you’ve got two connection points—the main waste at the base and the overflow halfway up the side—joined by an exposed waste tube that runs externally along the tub’s curve. This tube isn’t just decorative; it’s the critical pathway that prevents overflows while maintaining the vintage aesthetic.
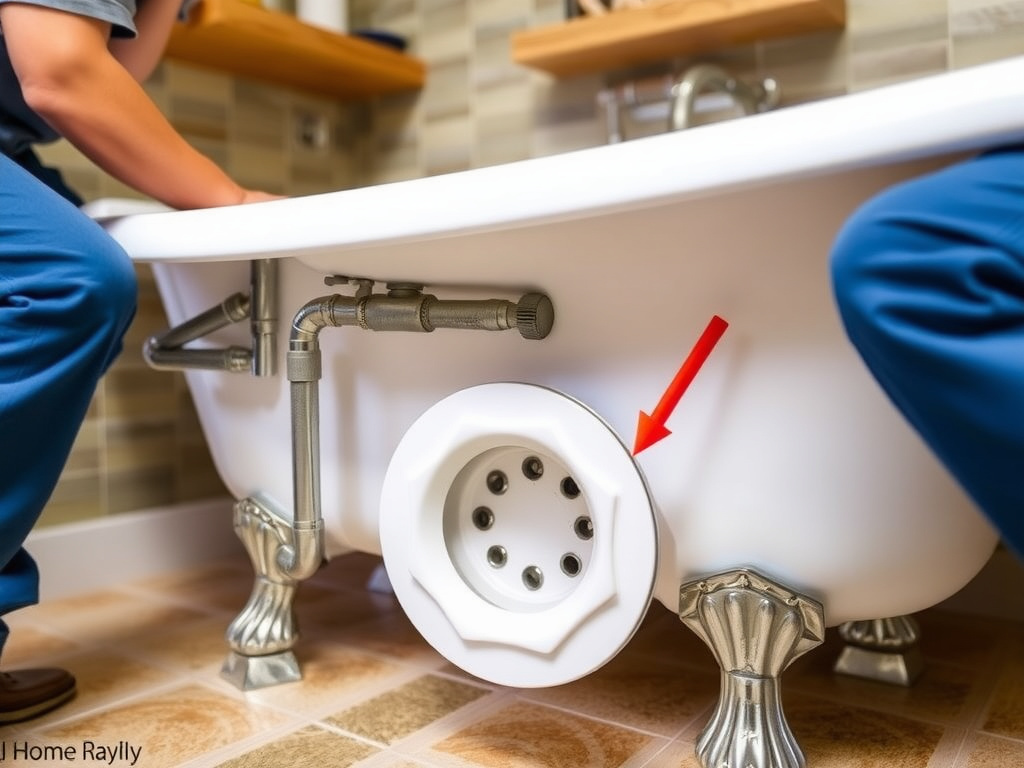
The waste assembly consists of several components that must work in perfect harmony. The waste shoe connects to the tub’s drain hole, typically using a rubber gasket and brass locknut. Above it, the waste tube rises to meet the overflow assembly, which includes the overflow plate, gasket, and connecting elbow. The entire system terminates at your floor or wall connection, usually via a P-trap that’s visible beneath the tub—part of the charm, but also the first place leaks develop.
I recently worked on a 1920s tub where the owner had replaced the original waste with modern 40mm plastic push-fit connectors. The different expansion rates between the cast-iron tub and plastic pipe meant every hot bath created micro-movements that eventually cracked the solvent weld joints. We replaced it with a proper brass waste kit (£89 from B&Q’s heritage range) and added flexible connectors to accommodate thermal movement. Six months later, still bone dry.
Pre-Installation Assessment and Planning
Before touching a single fitting, assess what you’re working with. Victorian-era tubs (pre-1900) typically used 1.5-inch BSP threads, but the actual thread form differs from modern BSP—it’s more tapered and requires specific vintage-compatible fittings. I’ve seen DIYers force modern fittings onto original threads, effectively destroying a £3,000 antique in minutes.
Check your floor structure too. Clawfoot tubs weigh 150-200kg empty, plus 200 litres of water. That’s nearly half a tonne concentrated on four small feet. I always insist on spreading plates beneath each foot, especially on suspended timber floors. Last year, I investigated mysterious ceiling cracks in a Georgian townhouse—the tub had been installed directly on floorboards that flexed slightly with each use, gradually working the waste connection loose.
Measure the exact distance between your waste and overflow centres. This varies by manufacturer: Standard Sanitary Manufacturing (common in UK) used 180mm, whereas Crane fittings were typically 190mm. Get this wrong and your waste tube won’t align, no matter how much you curse and adjust. I keep templates in my van for all major manufacturers—saves hours of trial and error.
Choosing the Right Waste Kit
The market’s flooded with reproduction waste kits, but quality varies dramatically. At the budget end, Screwfix sells a clawfoot waste kit for £34.99 that looks authentic but uses paper-thin brass that distorts when you tighten it properly. Compare this to the Heritage Bathrooms kit at £145—same visual profile but machined from solid brass bar stock with proper 3mm wall thickness.
For genuine restorations, I source from Heritage Bathrooms or salvage yards. Original Crane waste assemblies fetch £200-300 on the salvage market, but they’re bulletproof. I recently fitted a 1912 Crane waste that had been in storage since 1970—the threads were perfect, and the brass had developed that deep patina you can’t fake.
Modern alternatives exist if authenticity isn’t paramount. The Hansgrohe clawfoot waste kit (£89) uses modern click-clack mechanisms hidden behind traditional styling. It’s brilliant for rental properties where you need reliability over authenticity. The internal parts are standard 1.25-inch, meaning future repairs use readily available components.
Step-by-Step Installation Process
Start by completely removing the existing waste assembly. This often means destroying it—those brass locknuts seize solid after decades. I use a Dremel with a cutting disc to carefully split the nut without damaging the tub’s porcelain. Always support the waste shoe from below while loosening; cast iron is brittle and will crack if you apply twisting force.
Clean the mating surfaces meticulously. Old rubber gaskets leave residue that prevents proper sealing. I use a brass wire brush followed by white spirit, then inspect for pitting or hairline cracks around the drain hole. Minor pitting gets filled with Loctite 638 retaining compound—it’s designed for repairing worn bearing seats and works brilliantly on cast iron.
Install the new waste shoe with a fresh rubber gasket. Tighten the locknut hand-tight plus quarter-turn—no more. Over-tightening distorts the gasket and creates leaks. I learned this the hard way on a £4,000 bateau tub in Alderley Edge. The owner insisted I “really tighten it properly.” Two days later, the compressed gasket failed and we had to drain and start again.
The waste tube comes next. Dry-fit everything first, then add PTFE tape to all threaded connections. I use gas-grade PTFE tape—it’s thicker and copes better with the slight thread variations in reproduction fittings. The tube should follow the tub’s curve naturally; if you’re forcing it, something’s wrong. Check your centre measurements again.
Troubleshooting Common Problems
The most frequent issue I encounter is slow drainage despite clear pipes. Nine times out of ten, someone’s installed a modern P-trap with a 75mm seal depth. Victorian systems used shallow 38mm seals, and the extra depth creates a siphoning effect that slows drainage. Replace it with a reproduction shallow trap (£45 from Victorian Plumbing) and the problem disappears.
Leaks at the waste shoe usually mean the gasket’s failed, but check the tub itself first. I once chased a persistent leak that turned out to be a hairline crack in the cast iron, not the waste fitting. The crack opened slightly under hot water, allowing seepage. We fixed it with Loctite 3475 metal repair compound—still holding five years later.
Gurgling sounds indicate venting issues. Clawfoot tubs often connect to 4-inch soil stacks that provide adequate venting, but modern renovations sometimes isolate them. If your tub gurgles when other fixtures drain, you need to add an air admittance valve. The McAlpine T23-10 fits discreetly behind the tub and solves the problem for £22.
Maintenance and Long-Term Care
Brass waste assemblies develop a protective patina that actually prevents corrosion. Don’t polish them bright—they’ll just tarnish again and you’ll wear away the brass. Instead, wash with mild soap and apply a thin coat of Renaissance Wax twice yearly. This preserves the patina while preventing green verdigris from forming.
Check the waste tube’s union nuts every six months. They work loose through thermal cycling—hot baths expand the brass, cold water contracts it. I give them an eighth-turn snug, never full tightening. The rubber gaskets last about ten years with normal use, but hard water areas might see five-year replacement cycles. Signs of ageing include slight weeping around the nuts or a darker line where water tracks.
Never use chemical drain cleaners in clawfoot tubs. The aggressive chemicals attack the rubber gaskets and can etch brass. I clear blockages with a traditional drain rod and plunger. For stubborn hair clogs, remove the waste shoe completely—it’s easier than fighting with chemicals that might damage your £200 waste kit.
How much does professional clawfoot tub drain installation cost?
Expect to pay £180-250 for professional installation, assuming no complications. This includes removing the old waste, fitting the new kit, and testing. If we discover damaged threads or need to modify pipework, budget an extra £100-150. I always quote fixed prices after inspection—those “from £99” ads inevitably find “unexpected issues” that triple the bill.
Can I use modern 40mm waste fittings on my antique tub?
Sometimes, but it rarely ends well. The thread pitches differ—vintage BSP is 11 threads per inch versus modern 14. You’ll get three turns before it jams, and forcing it destroys both fitting and tub. Adapter bushes exist (£12-15) but they reduce the bore size, creating drainage issues. Better to use proper vintage-compatible fittings from the start.
Why does my tub drain slowly despite clear pipes?
Check the overflow assembly height. Modern building regulations require overflows to sit 45mm below the rim, but many clawfoots were designed with lower overflows. Raising the overflow (or lowering the waste shoe) increases the head pressure and improves flow rate. I recently modified a 1910 tub this way—drainage time dropped from four minutes to ninety seconds.
What’s the lifespan of a reproduction waste kit?
Quality brass kits last 25-30 years with proper care. The cheap zinc-alloy versions from online marketplaces might fail in 3-5 years—I replace these regularly. Look for kits specifying “DZR brass” (dezincification resistant). The Heritage Bathrooms kits I install carry a 10-year guarantee, but I’ve never replaced one due to material failure.
Should I keep the original waste if it’s functional?
Absolutely, if it’s sound. Original brass develops a surface protection that modern reproductions can’t match. I recently serviced a 1905 waste that had been in continuous use—apart from new gaskets (£8) and a thorough clean, it was perfect. The owner saved £140 and kept the tub’s authenticity intact. Just ensure the threads aren’t worn or cracked.
Safety Considerations and Legal Requirements
Working on clawfoot tub drainage falls under Building Regulations Part H (drainage and waste disposal). While you can legally install new waste fittings yourself, any connection to the main soil stack requires Building Control notification if you’re not a qualified plumber. I’ve seen DIYers create cross-connections that contaminated the mains water supply—resulting in £5,000+ fines and mandatory remedial work.
Warning: Never support your weight on the waste tube when working underneath—it’s not structural and will snap. → A falling tub can break bones and cause £1,000s of damage. → Always use proper axle stands or timber supports rated for 500kg minimum beneath the tub base.
Check your home insurance too. Many policies exclude damage from “non-standard plumbing installations.” I photograph every installation and provide compliance certificates—saves arguments when claims arise. If you’re in a listed building, any changes to visible pipework might require planning permission, even for like-for-like replacements.
Clawfoot tub plumbing isn’t complicated once you understand the principles, but rushing leads to expensive mistakes. Take time to assess what you have, source quality components, and test everything twice. That extra hour spent measuring and planning saves days of rework later. I’ve installed hundreds of these systems, and the successful ones all share one thing: patience during the planning stage. Your restored clawfoot deserves plumbing that’s as reliable as the tub itself—do it right and you’ll enjoy problem-free bathing for decades.