

The apprentice held the silicone tube like a loaded weapon, index finger white on the trigger of the skeleton gun. “Just run a bead round the chrome, yeah?” he said, pointing at the shower drain I’d asked him to seal. I let him squeeze. A grey worm the size of a garden hose splurged out, buried the grate, crawled up the waste neck and oozed into the trap. Cost of a new McAlpine ABS body plus call-out: £78. That was the day I learned most people think “sealant” means “more is better”. It doesn’t. The right product, the right gap, the right cure – that’s what keeps a shower drain sweet for twenty years instead of twenty weeks.
This guide focuses on sealant maintenance. For comprehensive installation procedures, see our complete shower drain installation guide.
Quick Answer Box
Quick Steps:
1. Remove grate, clean threads with methylated spirit, dry 15 min.
2. Mask 2 mm reveal round drain flange.
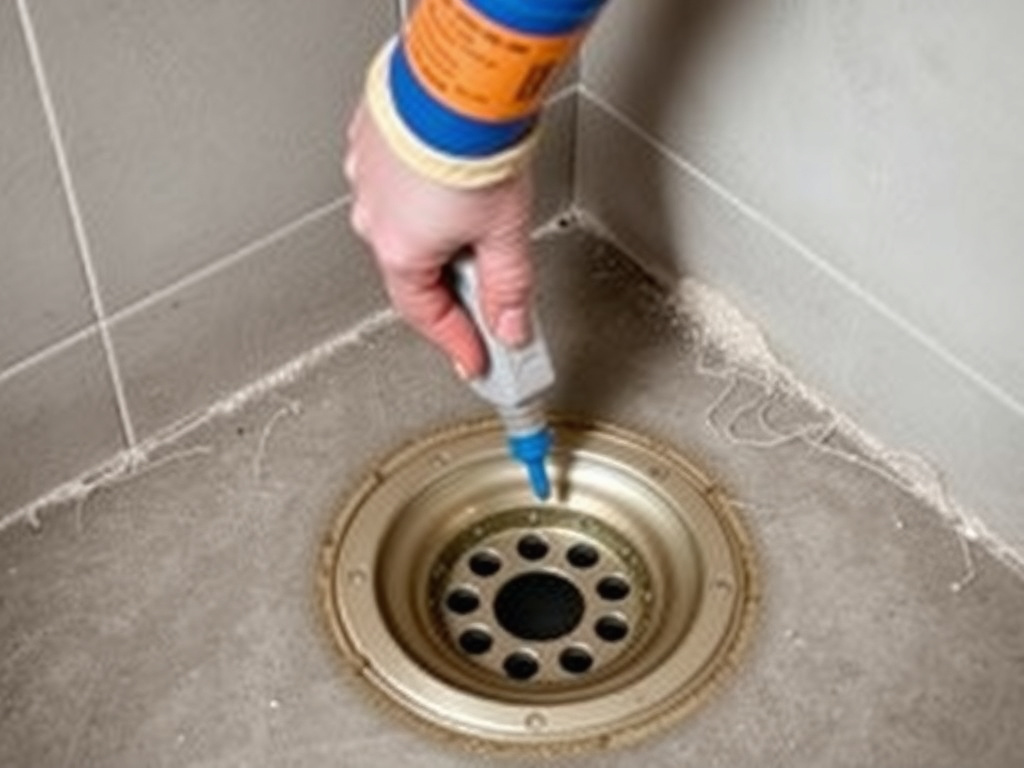
3. Cut nozzle at 45° 5 mm hole; apply continuous 3 mm bead of mould-resistant silicone UNDER flange lip.
4. Bed flange, tighten screws diagonal sequence, tool off excess in one pass.
5. Wait 24 h before first shower (7 days for full chemical cure).
Why the Drain Joint Fails First
Water doesn’t exit the tray in a polite sheet; it races for the lowest point, carrying skin oil, shampoo polymers and grit. The drain flange sits at that exact vortex. If the sealant film is pin-hole thin or the wrong chemistry, capillary action pulls residues through. Once the bead skins, micro-movement from hot-cold cycling shears it. You won’t see the gap, but you’ll smell the swamp in the joists.
I once opened a tiled enclosure in a Newcastle new-build: the silicone looked virgin on top, but the underside had turned to chalk. Developer had used a bargain “all-purpose” tube (£1.89, Toolstation) rated to +100 °C – fine for kitchen worktops, hopeless for 38 °C shower water repeated eight times a day. Re-doing the job with proper sanitary silicone added £28 in materials and saved £1,200 in ceiling replacement.
Choosing the Correct Sealant Chemistry
Forget the marketing pictures of happy couples on boxes; flip the cartridge and read the BS or ASTM digits.
- BS 5889 (Type B) Sanitary Silicone: 100% oxime cure, ±25% movement, anti-fungus. Brands: SikaSanisil (£6.40, Screwfix 2025), Dow Corning 785 (£8.99, Travis).
- Neutral-Cure STP Polymer: No acetic acid, safe on ABS or stainless. Ideal for linear wastes. Everbuild STIXALL (£7.20, B&Q) grabs in 20 min.
- Epoxy Sealant (emergency): Araldite Repair 50 ml syringe (£9.50, Halfords) sets underwater, but zero flex – use only if tray is rock-solid.
- PTFE Tape + Thread Paste: For tapered male threads on the waste tail, not the flange face. I pair Fernox LS-X (£5.80) with three wraps of PTFE; torque to 8 Nm max.
Match the sealant to the tray material: acrylic-capped stone resin expands 3 mm across a 900 mm width between 15 °C and 45 °C. Epoxy can’t take that, silicone can.
Surface Prep: The 90% Rule
“Clean and dry” sounds vague, so here’s the checklist I tape inside the cubicle:
1. Pop the grate with a small flat bar; bag the screws.
2. Scrape old silicone with a single-edge razor; finish with a white 3M scouring pad damped with isopropyl.
3. Compressed-air gun or hair-dryer on cool for two minutes – you want <20% residual moisture per manufacturers’ data sheets.
4. 120-grit pass on the plastic flange knurl; microscopic scratches triple adhesion.
5. Mask a 2 mm reveal so excess doesn’t smear into the tray texture – saves 15 min clean-up.
Skip any step and you’ll achieve 70% bond strength. That 30% shortfall equals five-year life instead of twenty.
Step-by-Step: Sealing a Compression-Type Drain
Tools: skeleton gun, nozzle cutter, IPA wipes, #2 Pozi, torque driver, plastic spoon dipped in Fairy for tooling.
1. Cut nozzle at 45°, hole 5 mm wide. Puncture inner foil.
2. Apply 3 mm bead to underside of flange lip – not on the tray. You want sealant in shear, not tension.
3. Lower body, align index mark to waste outlet. Hand-tighten screws diagonal pattern.
4. Torque 1.5 Nm (click-wrench on lowest setting). Over-torque warps the flange and extrudes all the silicone.
5. Single-pass tool with the spoon; pull mask at 10-minute skin.
6. Cure schedule: 24 h “light use”, 72 h full immersion, 7 days max strength before power-scrubbing.
Last March a client in Leith ignored the 24 h rule, showered at 6 a.m., texted me photos of a droplet hanging from the living-room pendant. One dry-fit visit later the silicone had re-bonded; we got lucky. Respect the chemistry or it bites.
STP Hybrid vs. Traditional Silicone: Pros & Cons
Silicone veterans swear the 1990s formula is immortal; young lads like me push STP because it skins faster and doesn’t stink of vinegar.
Silicone plus: 25-year movement capability, colours (clear, white, almond).
Silicone minus: 48 h shower exile, acetic acid can pit chrome, dirt sticks to surface oils.
STP plus: Paintable, zero shrink, grab in 20 min, low-VOC for occupied flats.
STP minus: £1–2 extra per tube, limited colour choice, requires primer on some ABS blends.
For rental turnover where downtime = lost Airbnb revenue, I use STIXALL and let tenants shower the same evening. In my own house I still use Dow 785 – I trust the decades-long track record more than my patience.
Hidden Gotchas: Linear & Tiled-Up Drains
Linear wastes look sleek, but the flange is only 8 mm wide and sits under 30 kg of screed. Manufacturers ship a feather-weight foam seal – rubbish. I replace it with SikaSwell P-2010 10×20 mm joint tape (£2.40 per metre, 2025), then over-bed with low-modulus silicone. Without the tape, thermal screed movement slices the bead in two seasons.
Tiled-up drains (where the grate screws into the tile itself) need a secondary silicone veil across the top edge. Use a translucent tube so grout colour still matches; wipe with a Lurgan cloth before it skins or you’ll smear polymer across the mosaic.
Price & Time Snapshot (2025, UK Midlands)
- Labour: £45–65 per hour, minimum 1 h.
- Materials:
– Cartridge silicone £6–9, STP £7–10, epoxy £9–12.
– Consumables (IPA, masking, nozzle): £1.80.
- Typical 90 mm high-flow drain re-seal: 35 min, total invoice £68–90.
- Full linear drain rebuild (remove tile, re-screed, seal): 4–5 h, £280–350.
DIY saves labour but add £25 for a skeleton gun you’ll use twice, plus £40 for a torque driver you’ll swear at later. Economically, it pays to hire unless you own three bathrooms.
When NOT to Seal – Replace Instead
If the flange plastic is chalky (UV attack), the rubber gasket is ballooned, or the trap body has hairline cracks, no sealant will help. McAlpine WM19 90 mm high-flow unit costs £22 at Plumbase and drops straight in. I keep two in the van; they’ve rescued more weekends than I can count.
Warning: Applying fresh silicone over a perished gasket traps water → hidden rot → joist replacement → £1,000s. Test the flange with a 0.5 kg pull; if it flexes, rip it out.
Maintenance to Double Life
Once a year pour a kettle of 60 °C water mixed with two tablespoons of washing soda; it strips bio-film without attacking silicone oils. Follow with cold rinse. Never use bleach gels that sit in the trap – sodium hypochlorite dries the polymer and causes edge peeling.
FAQ
Can I use plumbers’ putty instead of silicone?
Only on stainless-steel flanges with a rubber friction washer. Putty cannot handle movement and will crack acrylic trays. Modern UK traps specify silicone in the install sheet; deviate and you void the warranty.
How soon can the shower be used?
Skin time is 20 min for STP, 60 min for neutral silicone, but full cure takes 24 h (STP) to 72 h (silicone). One shower won’t kill it, but repeated thermal cycling before cross-link completion shortens life by ~40%. I tape the mixer handle and leave a note.
Why does my new silicone go black within months?
You cleaned with bleach first, didn’t you? Residual chlorine creates microscopic pits where mould spores lock in. Always final-wipe with isopropyl, never household cleaner. Choose a cartridge labelled “Bathroom 10-year mould shield” – it contains 0.3% zinc pyrithione.
Is clear or white silicone stronger?
Same tensile (1.5 MPa). Clear shows dirt less on chrome, white hides gaps on acrylic. Strength is identical; choice is cosmetic. I stock both and let the customer pick after a five-second visual test.
Can I apply silicone underwater?
Only epoxy putty sticks to wet substrates. Standard tubes need <20% surface moisture. If you must seal live, dry with compressed air and use Everbuild Aqua Mate (£9.99) – formulated for boat hulls, cures in damp conditions.
Do I need a step-by-step installation guide?
Yes—especially if this is your first time. Following a detailed step-by-step process reduces errors and ensures proper adhesion. For visual learners, our guide includes diagrams that clarify tricky steps like flange alignment and torque sequencing.
Product Recommendations
Based on thousands of installations, here are my go-to picks: top-rated sealants, trusted tools, and where to buy them at 2025 prices. Always match the product to your tray material and usage pattern—don’t skimp on chemistry.
Conclusion
The difference between a shower drain that smells fresh at year fifteen and one that drips into the light fitting is a 3 mm bead applied with intention, not hope. Buy the correct chemistry, prep like you’re about to paint a Rolls, and give the cure clock the respect you’d give concrete. Do that, and the only thing heading down your waste pipe will be water – not your weekend.